Little side note: Patent and the Pantry now has a page on Facebook. Come say hello and join in the discussion. Find it here.)
And now, on with the baking!
No one would ever call me trendy.
I’m not on top of the latest fashions, my music tastes are more eclectic than current and I’d label my style retro rather than cutting edge.
So, when food trends begin taking over the Internet, appearing on blogs and in newspaper articles alike, I don’t exactly jump on board. Macarons? Those look a bit tricky, I say. Whoopie Pies? Not sure what the allure is there. No-knead bread? Looks complicated.
No-knead bread was everywhere about four years ago, shortly after the New York Times’ Mark Bittman wrote a piece about Jim Lahey and his revolutionary recipe for a crusty loaf of bread that required very little effort, only advance planning. Soon bloggers were extolling the virtues of this bread and posts abounded with photos of the round boule with its dark gold crust and large-holed interior.
My parents jumped on the bandwagon and in the intervening years have abandoned their bread maker in favour of no-knead bread, making a loaf seemingly every other day.
So, on a recent visit with them, I was finally able to taste what all the fuss was about.
It’s no surprise everyone’s been raving.
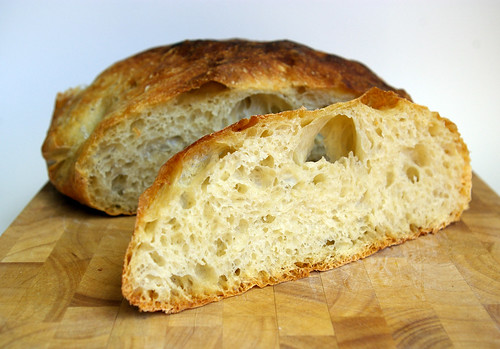
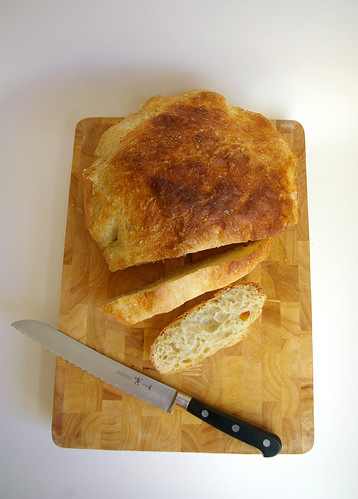
This bread has a crisp crust, but the interior — riddled with the large air bubbles that come from the long fermentation — is all soft chew. It tastes like bread should.
And it makes amazing toast.
But even with all those points, I still resisted for another year before finally deciding it was time to see if I could do it, too.
(I will readily admit here that part of that hesitation stemmed from the inevitable danger that comes from a carboholic realizing she can have access to fresh, homemade bread at will.)
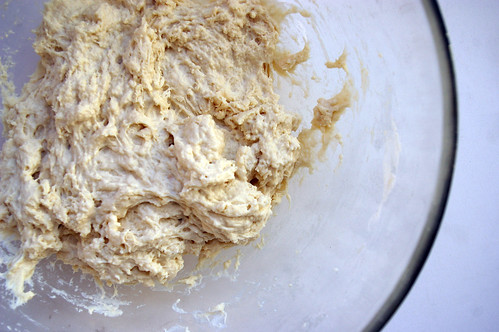
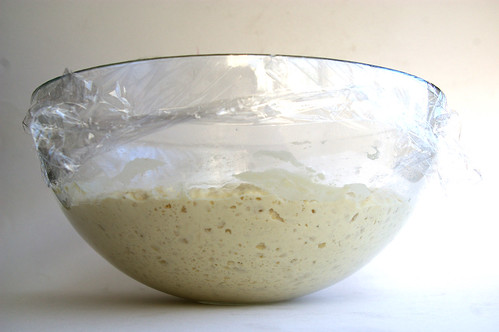
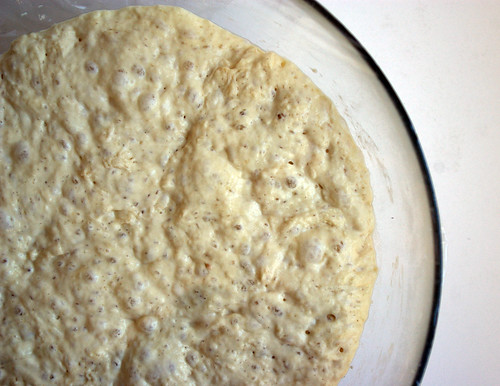
In my glass bowl, I mixed the flour, salt, instant yeast and cool water. I stirred it into a sticky, shaggy mess, covered it with plastic wrap and left it alone for 18 hours. The next day (the most reasonable way to make this bread, I figure, is to let it rise overnight), the dough had tripled in size and was dotted with hundreds of tiny bubbles.
It smelled of yeast and good things to come.
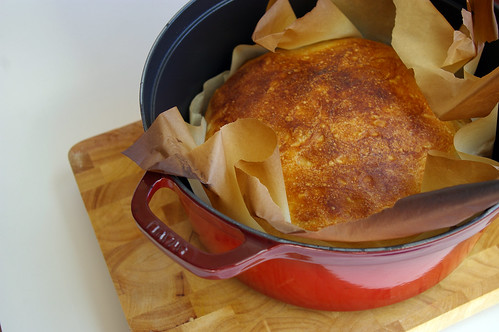
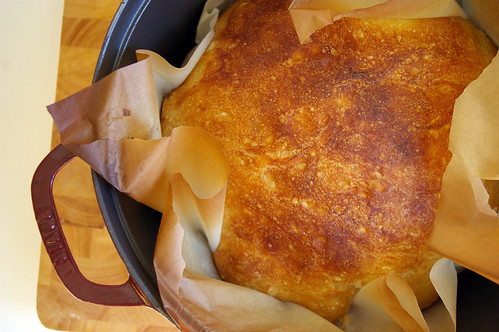
The only time I deviated from the recipe was when Lahey called for a second rise on a clean kitchen towel using wheat bran or additional flour to keep it from sticking, which is then used to dump the dough into a preheated cast iron or enamel pot. Instead, I let it rise again on a piece of parchment. When it came time to get the dough into the cooking vessel, it was just a matter of picking up the four corners of the paper and plopping it in the pot, greatly lessening any chances of getting burned.
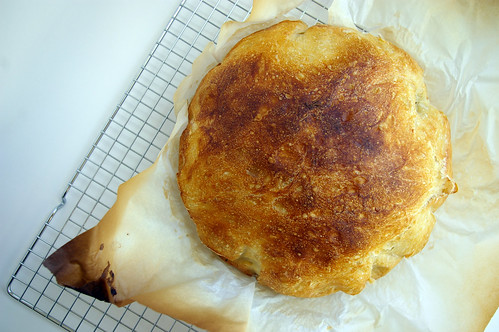
When it came out of the oven, and I lifted it out of the pot using two wooden spoons, I was excited. It looked and smelled like a perfect round loaf.
And that first slice was perfection, topped only with a thin smear of real butter.
Besides the undeniable beauty of eating a slice of bread still slightly warm from the oven (although Lahey calls for it to rest for at least an hour before cutting into it, it is often hard to resist waiting the entire 60 minutes), there is something so satisfying about baking a loaf of bread on your own.
So — I may be behind the times in finally trying it, but this bread is no passing fad.
(This is a Danish Dough Whisk — a tool that is great for mixing dough.)

The recipe is Lahey’s own, but I have adapted it to use parchment paper for the second rise. I also found the cooking time too long, so when I bake this bread I cut it down by about 10 minutes.
(The cooking times here are as Lahey suggests.)
Basic No-Knead Bread
Adapted slightly from Jim Lahey’s My Bread (W. W. Norton & Company, 2009, $37.50)
- 3 cups (750 mL) bread flour
- 1¼ tsp (6 mL) table salt
- ¼ tsp (1 mL) instant yeast
- 1 ¹/³ cups (325 mL) cool water, at 55°F to 65°F (12°C to 18°C)
In a medium bowl, stir together the flour, salt and yeast. Add the water and, using a wooden spoon or your hand, mix until you have a wet, sticky dough, about 30 seconds. Make sure it’s really sticky to the touch; if it’s not, mix in another tablespoon or two of water.
(Note: I’ve had to use more water almost every time. I suspect it’s because Calgary is so dry.)
Cover the bowl with a plate, tea towel or plastic wrap and let sit at room temperature (about 72°F/22°C), out of direct sunlight, until the surface is dotted with bubbles and the dough is more than double in size.
This will take a minimum of 12 hours and (Lahey’s preference) up to 18 hours. This slow rise -fermentation -is the key to flavour.
When the first fermentation is complete, generously dust a work surface (a wooden or plastic cutting board is fine) with flour. Use a bowl scraper or rubber spatula to scrape the dough on the board in one piece.
When you begin to pull the dough away from the bowl it will cling in long, thin strands (this is the developed gluten), and it will be quite loose and sticky, but do not add more flour.
Use lightly floured hands, a bowl scraper or spatula to lift the edges of the dough toward the centre. Nudge and tuck in the edges of the dough to make it round.
Place on a piece of parchment paper, seam side down. Cover with a clean towel and place in a warm, draft-free spot to rise for 1 to 2 hours. The dough is ready when it is almost doubled in size.
Half an hour before the end of the second rise, preheat the oven to 475°F (240°C), with a rack in the lower-third position and place a covered 4½ to 5½ quart (4¼ to 5 L) heavy pot in the centre of the rack.
Using pot holders, carefully remove the preheated pot from the oven and uncover it. Gather up the dough by holding the four corners of the parchment paper and place the entire thing, paper and all, into the pot.
Cover the pot and bake for 30 minutes.
Remove the lid and continue baking until the bread is a deep chestnut colour, but not burned, 15 to 30 minutes more.
Use a heatproof spatula or pot holders to carefully lift the bread out of the pot and place it on a rack to cool thoroughly. Don’t slice or tear into it until it has cooled, which usually takes at least an hour.
Makes one large loaf.
This article first appeared in the Calgary Herald’s Real Life section. For more delicious recipes, visit CalgaryHerald.com/life.


9 Comments
How much, if any, of the bread flour do you think could be replaced with whole wheat flour?
I’ve seen some people say they swap it out entirely, while others have emailed to say they make it using half bread flour and half whole wheat. I haven’t tried yet, so can’t say with complete confidence which will work. If I was going to try it, I’d start by swapping out one cup of the flour for whole wheat and going from there.
can you just use a regular old pot to bake it in? or should it really be a dutch oven type of fancy french thing?
I think (but am not 100 per cent sure) it needs to be a dutch oven because it retains the heat better and creates a little oven in and of itself. I’d be worried about using a regular pot at that high a heat for that length of time. But any cast iron pot/dutch oven will do.
well now i know what to put on my christmas list!
can you comment on the kind of yeast? is it ” active dry ” yeast , but not “rapid rize”?
did you use the kind in packets , like fleichmans, or did you buy in bulk?
Hi Summer, I used instant or “rapid rise” yeast in this recipe. Because I do a lot of baking, I buy it in a little jar (I use Fleischmann’s), but it’s the same stuff as in the packets. As long as you make sure it’s labelled “instant” or “rapid rise,” you should be OK.
Just FYI, you won’t need a whole packet, though, as they contain about 2 1/2 teaspoons and you only need 1/4 teaspoon.
where can one find danish dough whisks. I too watched the video of this method, was lucky enough to get dutch oven from my daughter in law