Peanut Butter, Sambal, Lime, Cilantro Toast

For the better part of a year, I’ve been nattering on about how I’ve become addicted to a Bon Appetit recipe for toast.

Yes, toast. Though, also yes, Bon Appetit.

I’ve tweeted about it, told friends they have to try it and posted it (more than once) on Instagram.

Peanut Butter-Cilantro-Sambel Olek Toast I

I think Bon Appetit just posted a photo and description to their Twitter account and at the time I sort of thought, huh, and then carried on. I guess it stuck with me? Because at some point after that, I realized I had all the ingredients to make it: good bread, peanut butter, cilantro, lime and sriracha. (Actually, I now make it with sambal oelek, which I prefer to sriracha as it has a more well-rounded spicy kick than sriracha. The only real downside to this is you can’t squiggle sambal the way you can with sriracha. A minor disappointment.) So, I made it. I toasted a thick slice of Sidewalk Citizen sourdough, slathered on peanut butter (not even a fancy one), squeezed over some lime and then spread out a blob of sambal oelek and sprinkled roughly chopped cilantro on top.

Oh. My. God.

Peanut Butter-Cilantro-Sambel Olek Toast II

This is definitely one of those things that is far greater than the sum of its parts. And yet, it’s really good because each ingredient shines through, that tangy lime, rich peanut butter, hit of chile heat and brightness from cilantro – which also adds requisite colour.

After a year of making it, I’ve learned a few things.

This is not the place for wimpy white bread. You need something with heft, with significant crisp, crunch and chew to stand up to the flavours. I’ve tried it with all sorts of bread and find that a good loaf of sourdough, or its equivalent, is best. Trust me. A basic loaf of white bread just leads to sadness in this case.

Don’t underestimate the amount of lime to make it right. A quarter wedge is about right.

Also, it’s just not the same without cilantro. (I used to hate the stuff. I am completely baffled as to how I’ve come around on this herb. I understand I’m an anomaly on this front. For those who find it tastes like soap, I’m sorry, I haven’t yet experimented with other herbs. Maybe Thai basil would work?)

Peanut Butter-Cilantro-Sambel Olek Toast III

I’ve tried with both crunchy and smooth peanut butter and admittedly prefer smooth. But it’s worth experimenting.

So, this has been added to my toast rotation, along with tomatoes (few things are finer than a really good toasted tomato sandwich, I would suggest) and avocado (trend be damned).

That’s saying a lot because, frankly, I’ve been eating a lot of toast lately.

Toast is delicious, so that’s not necessarily a bad thing. Except it’s not really a sustainable way of eating.

The truth is, I’ve lost some of my passion for cooking. I know it’ll come back eventually, but for now it’s a lot of salads and toast and charcuterie plates. (I know, it’s sometimes really awesome to live alone so you can have any of those, or cereal, for dinner.)

So, forgive me for talking about toast for a minute?

Summer is the best time for toasted tomato sandwiches as tomatoes actually have flavour and come in some many lovely shapes and colours and sizes. I sometimes like to slice up a variety to put on my buttered toast as it looks so beautiful and because each of the varieties does have a variation in flavour.

Orange tomatoes

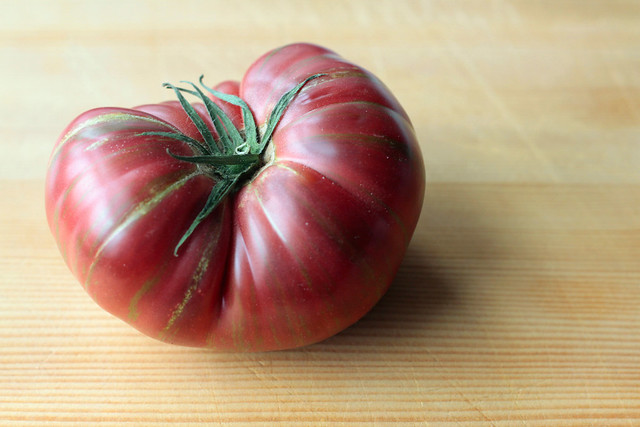
Heirloom tomato

For a full sandwich, I like a nice homestyle white bread, toasted – even though my family would argue I actually like “warm bread” – to a deep gold. But for open-face sandwiches, it’s sourdough all the way. Sidewalk Citizen bread is an excellent vehicle for open-faced tomato sandwiches. Sturdy enough to not let a little tomato juice wilt it and with lots of nooks and crannies for melted butter to seep. That is, of course, if you have enough of a loaf left after getting it home from the bakery. I am surprised at how often I manage to resist just tearing into the loaf with bare hands and slathering on some nicely salted butter. Ahem.

Tomato Toast I

Tomato Toast II

As for avocado toast, I don’t think the Internet needs any more words spent on it, so I’ll only add a few.

No, I don’t make it into roses. Yes, sometimes I kind of mash it into the toast. But most of the time I like it just in slices overtop.

Avocado Toast II

I’ve experimented with squeezing over a bit of lime and a dusting of cilantro, if I have it. That’s quite nice, though not entirely necessary. Salt and pepper, though, are required. I found some lemon-infused salt once and that’s absolutely fantastic on avocado – though I would never suggest buying a salt just for this. (I have a weirdly large salt collection; most of them I bought on travels – I do love a food souvenir.)

Speaking of salt, if you ever come across a bottle of Jane’s Krazy Mixed-up Salt (known in my family simply as Crazy Jane’s), snap it up. It is the best on tomatoes and avocados.

Krazy Jane's

Tomatoes and avocados have been my toast go-tos for some time. And now I’ve added this peanut butter one.

Just on Saturday, I woke up and realized that I had some cilantro hanging out in my fridge.

(Aside: Did you know the best way to keep it? Put it in a glass filled with water, like a bouquet, with the fringed leaves poking out the top, and then cover loosely with a plastic bag. Boom. That cilantro has lasted without browning or wilting for more than a week.)

I cannot quite explain how delighted I was when I made that realization and knew some peanut butter-lime-sambal-cilantro toast was in my future.

Continue Reading

Coronation Grape Focaccia with Rosemary

A friend of mine has diagnosed me with a case of the ‘overwhelms’ and that’s a pretty accurate summary of where things are at right now. I’ll have book news (OMG!) in a blog post later this week, work is hectic and the last few months have been filled with lots of amazing and lots of truly heartbreaking things. For each of those there are drafts of blog posts that I haven’t been able to bring myself to finish writing and post.

But one bright spot has been that my Writer Girls — a collection of my closest friends from my early days at the University of Victoria — were in town a couple of weeks ago for a visit and we spent three glorious days eating, drinking, laughing and catching up. There is no better way to recharge than to spend time with people who know you almost better than you know yourself. And, better than that, have far better memory-retention skills and can recall, at a moment’s notice, all the hilariously dumb things you’ve done or said in the last 20 years. And trust me, there are a lot of them.

On the final day, between ferrying the girls back to the airport to catch their flights back home, we decided an afternoon snack was in order and my friend Julie wandered off to the local grocery store in search of cheese and crackers. She returned with those, along with a huge box of dusky dark purple Coronation grapes. Beyond their stunning colour, they have this beautiful slightly sweet, slightly pungent taste. They were perfect with cheese.

And then all of my girls were gone and I was left with the remainder of the grapes.

And for some unknown reason, I remembered seeing a recipe for a focaccia topped with Concord grapes and sprigs of rosemary and that’s all I could think about. Salty-sweet, with the grapes roasted and warm and all that lovely woodsy rosemary strewn over the whole thing.

In Italian, it’s known as Schiacciata con L’uva and it’s a truly autumnal bit of baking linked to the grape harvest in Tuscany. So, Concord or Coronation grapes are perfect for this focaccia since this is exactly when they are in season. Mostly you read about this being made with Concords. (The Coronation was developed here in Canada and seems more popular on this side of the border.) The benefit of using Coronations, though, is that they are seedless (yay!) and, judging from some of the recipes I found online, not having to de-seed grapes saves a lot of time and mess. Since I’m generally prone to getting food all over what I’m wearing, having an option to at least reduce the chance of staining myself purple is a good thing.

These grapes are delicious on their own — especially cold from the fridge and most definitely when served with some nice crackers and cheese. But roasting them into a focaccia that has been sprinkled with raw sugar, flaked salt and rosemary tranforms them to something so much more. They get a bit jammy, their skins wrinkle and their dark purple juice stains the bread around them. Their complex flavour plays well with the herbal hit of rosemary and, well, it’s all on focaccia, so what more could one ask for? Other than having my Writer Girls here for one more weekend to eat some with me.

Since we’re planning on next meeting up in Italy next fall, though, there’s a very good chance I’ll be able to make it for them then.

Coronation Grape and Rosemary Focaccia

I adapted this from a few different sources, mostly amping up the amount of grapes and rosemary — you know, the good parts.

  • 1 cup warm water (between 105 and 110F)
  • 2 tablespoons milk
  • 1 1/2 teaspoons sugar
  • 1 1/2 teaspoons active dry yeast
  • 2 3/4 cups all-purpose flour
  • 1 teaspoon salt
  • 5 to 6 tablespoons olive oil, divided
  • 1 1/2 cups Coronation grapes
  • 1 tablespoon rosemary leaves
  • 1 tablespoon raw sugar
  • 2 big pinches flaked sea salt

In the bowl of a stand mixer fitted with a dough hook, combine the water, milk, sugar and yeast and let sit until the yeast has bloomed and is creamy looking. Add the flour, salt and 2 tablespoons of the olive oil and mix on low speed until combined and then turn the speed up to medium and knead the dough until it forms a smooth ball, about 8 minutes.

Add 1 tablespoon of oil to a large bowl and use your fingers to spread the oil around the bowl. Transfer the ball of dough to the oiled bowl and turn to coat the dough all over. Cover and let rise in a warm place until doubled in size, about 1 to 1 1/2 hours.

Line a baking sheet with a piece of parchment paper that hangs over the edges. (I’ve found this is the best way to make sure the focaccia doesn’t stick to the pan or the parchment.) Pour on 1 tablespoon of olive oil and spread all over the parchment that covers the pan. (There’s no need to oil the overhang.) Tip the risen dough onto the prepared baking sheet and, using the tips of your fingers, stretch the dough to fill it, dimpling the surface as you go. If the dough resists, wait a few minutes and then continue. It will fill the baking sheet with a little patience. Drizzle another tablespoon or two of olive oil over the dough, letting it fill the dimples. Cover loosely with plastic wrap and let it rise again for about 30 minutes.

As it rises, preheat the oven to 450F.

Just before baking, scatter over the grapes, rosemary, raw sugar and flaked salt, pressing them in to the dough slightly. Bake until golden and cooked through, about 15 minutes.

Serve warm or at room temperature (if it lasts long enough to cool to room temperature).


Continue Reading

Blueberry Cornmeal Muffins

I was thinking about this recipe all day today now that blueberries are back at the markets and couldn’t figure out why I couldn’t find it on my own blog. Turns out I failed to post it after writing it last year (or even further ago). Making some of these tonight.

Blueberry Cornmeal Muffins I

My cupboards are stuffed with ingredients I’ve used for one recipe and then promptly forgotten about. Half empty packages of rice noodles, more Israeli cous cous than I know what to do with, cans of coconut milk and assorted pastas.

And amongst all those bags and packages are several of finely ground cornmeal, which I’ve bought to use in corn bread or polenta, then forgotten about and bought more. (I might be a candidate for some sort of kitchen-related hoarding intervention.)

I like polenta; I like corn bread. I even liked the bit of cornmeal added to the crust of a Rhubarb Crostata I made a couple of weeks ago. But none of these things has me getting through those bags of cornmeal quickly.

So, when I was looking for baking inspiration on Monday and stumbled across a Nigella Lawson recipe for Blueberry Cornmeal Muffins, I knew exactly what my next project would be. (To add to my eagerness, I had a large basket of blueberries in my fridge slowly wrinkling that needed to be dealt with immediately; clearly, it was a sign.)

Blueberry Cornmeal Muffins III

Like all muffins, this recipe is easy and comes together quickly.

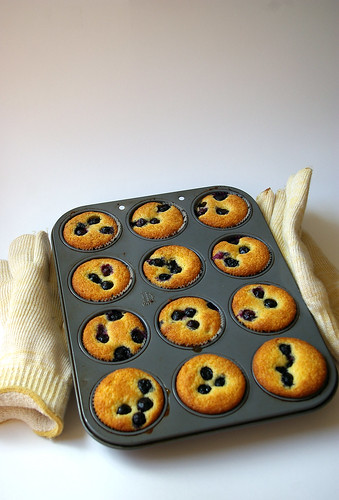
But the addition of just a bit of cornmeal makes them more than just your average blueberry muffin. The top – which stays flattened – becomes a tasty golden crust, revealing beneath a tender and light muffin dotted with blueberries.

It’s neither overly sweet nor cakey, which seem to be more cupcake-like traits than muffin ones. And, while very soft, the cornmeal gives it a heartiness.

Having one more recipe in my arsenal that uses up my abundance of cornmeal – and such a tasty one to boot – pleases me.

And the fact that I got to use up some festive, polka dotted cupcake liners at the same time made this an even better way to clean out the cupboards.

Blueberry Cornmeal Muffins IV

Blueberry Cornmeal Muffins

This recipe comes from Nigella Lawson’s book Kitchen. I added a few more blueberries than called for and added a pinch of salt, which you can feel free to leave out, but I think rounds out the flavours in baked goods. The muffins were fully baked at the 15-minute mark, so consider checking a minute or two early.

Lawson suggests they are best eaten on the day they’re made, but can be stored in an airtight container, layered with parchment paper, then reheated in a warm oven for 5 to 8 minutes.

  • 1 cup (250 mL) flour
  • ½ cup + 1 tbsp (140 mL) cornmeal
  • 2 tsp (10 mL) baking powder
  • ½ tsp (2 mL) baking soda
  • 2/3 cup (150 mL) sugar
  • pinch salt
  • ½ cup (125 mL) vegetable oil
  • ½ cup (125 mL) buttermilk
  • 1 egg
  • ¾ cup (175 mL) blueberries

Preheat the oven to 400 F (200 C) and line a muffin tin with papers.

In a large bowl, mix the flour, cornmeal, baking powder, baking soda and sugar and salt. In a measuring jug or bowl, pour the oil and buttermilk and whisk or fork in the egg.

Stir the oil mixture into the bowl of dry ingredients – remembering that lumpiness is a good thing when making muffins – and fold half the blueberries into your thick golden batter.

Divide this batter between each muffin case (they will be about two-thirds full) and drop the remaining blueberries on top; you should have about 3 for the top of each muffin.

Cook in the oven for 15 to 20 minutes, till a cake tester comes out cleanish (obviously it will be stained if it hits a berry). Leave the muffins in the tin on a wire rack for 5 minutes, then remove the muffins, in their cases, to the wire rack to cool a little (not too much) before you serve or eat them.


Continue Reading

Welsh Scones

Growing up, I had a thing for the Royal family.

I had coffee table books all about Princess Diana, her wedding to Charles, her boys, William and Harry, along with a video of Andrew and Sarah Ferguson’s wedding.

I was one of those girly-girls with a penchant for dressing up, wanting to wear twirly skirts (that whirled out when I spun in circles; I called them turn-y skirts), put on lipstick. I always wanted a tiara.

So, although the inundation of countdowns and articles and television specials and photo galleries leading up to the wedding between Prince William of Wales and Kate (I’m sorry, Catherine) Middleton has been a bit much, my inner eight-year-old girl is kind of loving it. What will the dress look like? What diamond-encrusted tiara will adorn her lovely dark locks? What will the bridesmaids wear? Will they have turn-y skirts?

Outside of the fantasy world, I don’t envy Kate. I’m happy for her and William because they do some genuinely in love, something so clearly missing in the relationship between his parents (though I couldn’t see that as a child). But I wonder too at what she’s giving up for that love. Yes, there are jewels and gorgeous clothes, first-class trips, brushes with celebrity. And there is the paparazzi, the pomp, the expectations, the constantly public life.

No matter, I will be indulging that inner child and tuning in to the wedding.

In honour of that, I’ll be eating scones (and drinking some champagne, of course — though not at 3 a.m. I’m not so devoted that I will wake up that early. That’s why I have a PVR.) as Kate walks down the aisle.

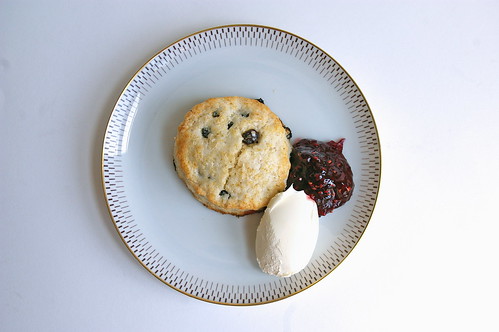
"Welsh Cake" scone

I could eat any version of scones, but I decided to create a recipe that would combine a basic scone with a Welsh cake (which share some similarities with scones, though they are fried instead of baked). My stepfather, who is of Welsh descent, often made these as a Sunday treat when we were kids. (A tradition, thankfully, that continues when I visit my parents.) They have a distinctive flavour that comes from nutmeg and currants. Basically, I wanted to use those flavours. Not just because I love them, but it’s just so fitting.

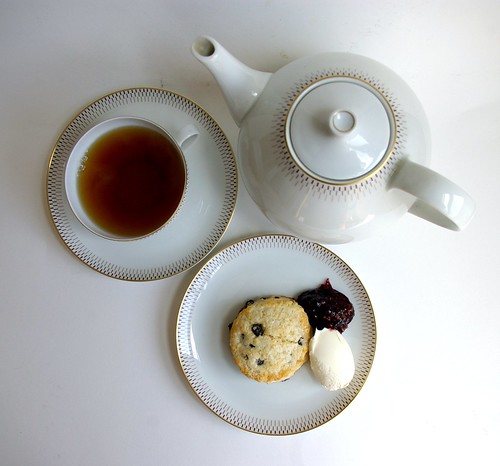
Afternoon Tea

He is Prince William of Wales, of course. And the couple will start their life as newlyweds in Anglesey, an island off the northwest coast of Wales.

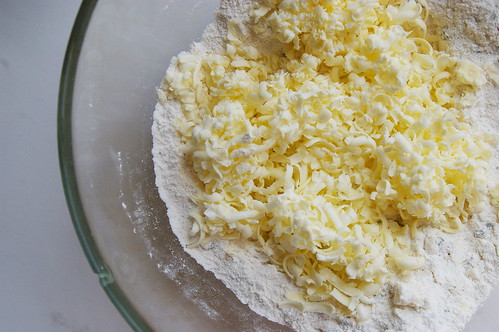
I have to give credit where it’s due, so I will say that Nigella Lawson has changed the way I make scones. Her trick of grating frozen butter is just . . . perfection. I cannot recommend it enough. No matter what scone recipe I use these days, I always, always, always use this technique. Please, try it, I implore you.

This is based on her strawberry shortcake recipe, but has been adjusted.

Butter curls

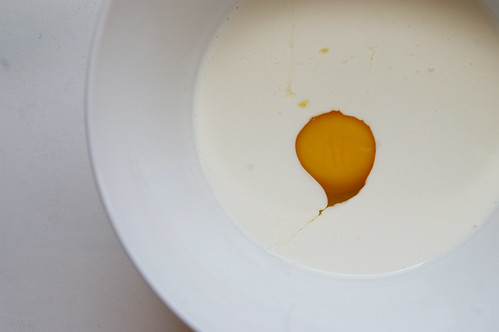
Egg in Cream

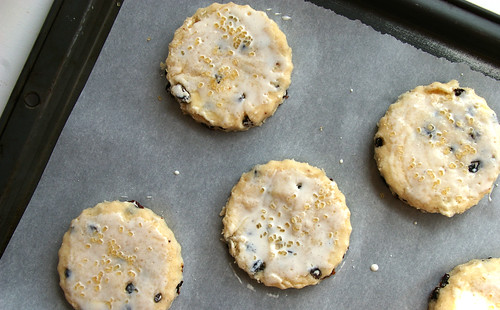
Rolled and Cut

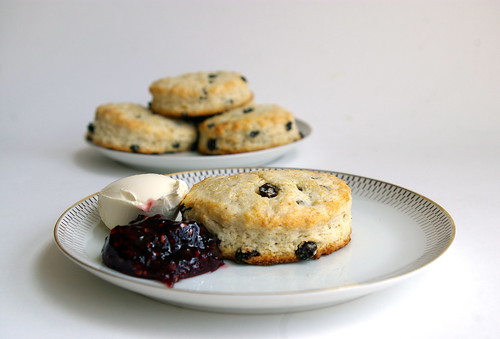
"Welsh Cake" Scones

Welsh Scones

  • 1½ cups flour
  • ½ teaspoon salt
  • 1 tablespoon baking powder
  • 1/4 cup sugar
  • 1/2 cup currants
  • 1/2 teaspoon nutmeg (I may go with a tad more next time)
  • 1/2 cup unsalted butter, frozen
  • 1 large egg
  • ½ cup half-and-half or whipping cream (you may need slightly more)
  • 2 tablespoons whipping cream
  • 2 tablespoons sugar (regular or natural cane sugar), optional

Preheat the oven to 425°F.

Mix together the flour, salt, baking powder, sugar, currants and nutmeg in a bowl. Grate the frozen butter into the dry ingredients and use your fingertips to lightly toss all together. Whisk the egg into the half-and-half cream and pour into the flour mixture a little at a time, using a fork to mix. (I often need another tablespoon or two; I chalk it up to that dry Calgary weather.)

Turn the dough out onto a lightly floured surface, then roll gently to about ¾-inch thick. Dip a cutter in flour and cut out as many scones as possible. (Small ones are cute, but sometimes you just want a large scone with lots of room for Devonshire cream and jam.) Work the scraps back together, re-roll and cut more. (Nigella suggests using a 3-inch/6½-cm round cutter to make 8; I used a smaller one and got about 14.) Place on a baking sheet, brush the tops with the 2 tablespoons whipping cream and sprinkle with the remaining sugar, if desired. I used natural cane sugar, which has larger grains.

Bake until golden. Between 10 and 15 minutes for larger scones. Cutting them smaller? Check earlier. Mine took about 9 minutes. Remove to wire rack to cool.

Eat with copious amounts of jam and Devonshire cream. Or butter and jam. Or just jam.

Continue Reading

Goat Cheese with Herbed Olive Oil

We have few Christmas traditions in my family. With all us kids grown up and no new generation to take our place, there are only a few activities we cling to during the holiday season. Gone are the days when we wrote letters to Santa and put out a plate of cookies. And we were never the type that gathered around the fire to listen to a parent read The Night Before Christmas.

But over the years we have created a few rituals that we still hold dear when the season finally arrives. The first is listening to Amahl and the Night Visitors – an opera about a poor widow and her lame son who are visited by the Three Kings en route to Bethlehem – while doing some Christmas baking.

A second, more recent, is watching the YouTube video of a house whose Christmas lights are coordinated to the operatically rock-and-roll Trans Siberian Orchestra’s Wizards in Winter – a song my mum and I both acquired permanently last year. This video, with its perfectly timed display of lighted Christmas trees and wreaths, never fails to bring on the giggles.

And third, and perhaps most important, we sit down on Christmas Eve and eat goat cheese doused in herb-and-garlic infused olive oil. With a lot of bread. And a glass or two of wine.

Goat Cheese in Herbed Olive Oil

This custom is so tied to our Christmas, in fact, that when I made it once for friends at some point outside of the holiday season, my little sister got mad at me. The word ‘sacrilegious’ may have even been used.

Like all good traditions, it is unclear when exactly it started or why.

What I do know is that the only reason we even discovered the recipe in the You Asked For It section of Gourmet Magazine was because we wanted the cookie recipe on the same page. At some point later, my mum thought to try out the goat cheese one as well.

It is almost too much to call it a recipe since the most taxing part appears to be gathering the spices and slicing the bread that goes with it. Heating olive oil with some rosemary, garlic and a few other goodies for five minutes is hardly cooking. And yet the combination of slightly grassy oil, softened garlic and the sharp heat of peppercorns mixed with rich goat cheese is so perfect. Add a slice of chewy baguette – making sure to scoop up a bit of each component – and it’s almost heaven.

Garlic, herbs and spices

Having read the recipe over before writing this, I see that it says to slice the goat cheese into eight rounds and then pour the herbed oil over top. I have no idea why we have never done this, but decided to stick to tradition – as we have so few – and leave the cheese in log form.

After all, what are the holidays without some traditions?

Flavouring the oil

Goat Cheese in Herbed Olive Oil II

Goat Cheese with Herbed Olive Oil
Adapted from Gourmet Magazine, January 1994

1 small bay leaf
4 garlic cloves, cut into thin slivers
1 tbsp. (15 mL) fresh rosemary leaves
¼ tsp. (1 mL) coriander seeds, crushed lightly
¼ tsp. (1 mL) fennel seeds, crushed lightly
10 whole black peppercorns
¼ cup (50 mL) extra-virgin olive oil
½ pound (250g) log of soft mild goat cheese
Sliced bread as an accompaniment

In a small saucepan simmer bay leaf, garlic, rosemary, coriander seeds, fennel seeds and peppercorns in oil for 5 minutes. Arrange goat cheese on a platter and spoon oil mixture over. Serve goat cheese with bread.

This story first appeared in the Real Life section in the Calgary Herald. For more delicious recipes, visit CalgaryHerald.com/life.

Continue Reading

White Bean Tartlets with Oven Roasted Tomatoes

This post is dedicated to my friend Elsbeth who is going to kick my butt for waiting two weeks to post. I could possibly be the most procrastinating-est blogger ever. It’s a curse.

So, Elsbeth, this one is for you.

Solo Tartlet

I had a little party on Friday two weeks ago to celebrate a blog milestone. The original plan was to have a few friends over for appies and wine to celebrate crossing the 100,000-views mark, but that didn’t work out because I ended up getting to that point faster than originally thought and the timing was off. (No, it was not procrastination related, for once.) Then I thought it would be cute to instead have people over for passing by 123,456 views.

So, that’s what it ended up being.

I sometimes get a bit of party anxiety, though. Will people have fun? Will there be enough food?

And, as usual, my fretting was all for naught. Besides having cheese, crackers, some salami and prosciutto, I also made two appetizers: prawns sauteed with chili, garlic and ginger served in wonton crisp cups and these White Bean Tartlets with Oven Roasted Tomatoes. And thankfully (with the addition of sending one care package home for a friend who couldn’t make it), all of the food was eaten! Frankly, that was the best part. Made me feel like everyone enjoyed the goodies. Plus, you know, less clean up.

(So, I’m making up for the lack of text here with bonus photos. Couldn’t narrow them down….)

Trio of tartlets III

I got the inspiration from one of my 8 million cookbooks, but adjusted the recipe quite a bit and figure that, at that point, it’s safe to call it my own. It was pleasantly garlicky and rich-tasting even though there was almost no fat involved. And, c’mon, they’re just so damn cute.

Thyme

Tomatoes and Thyme

Roasted Tomatoes with Thyme

White Beans pre-puree

Trio of Tartlets

Trio of tartlets II

White Bean Tartlets with Oven Roasted Tomatoes

  • 30 grape tomatoes
  • 30 tart shells or pastry to make 30 tarts
  • 3 tablespoons olive oil, divided
  • 4-5 sprigs of thyme
  • 1 teaspoon thyme leaves, minced
  • 3 cloves garlic, minced
  • 19 oz (540 mL) can white kidney beans
  • 1/2 cup white wine (can substitute stock or even water)
  • Salt and pepper to taste

Bake tart shells as indicated or blind bake homemade pastry until shells are completely cooked.

Preheat oven to 350. Put tomatoes in oven safe dish and toss with 2 tablespoons of olive oil. Sprinkle with a pinch or two of salt and add the sprigs of thyme. Roast in the oven for about 30 minutes until their skins have started to split. Set aside.

In a pot over medium heat, heat 1 tablespoon olive oil and minced garlic. Once the oil is hot and the garlic has started to soften, add the drained and rinsed beans and continue cooking until warmed through and the beans are starting to fall apart, stirring often. Add wine (or stock or water) and thyme leaves and cook until most of the liquid is gone. Remove from the heat. Dump the beans, garlic and thyme into a food processor and whiz until it forms a nice paste. If it appears to be a bit too dry, add some more wine/stock/water. Spoon into cooked pastry shells and top each one with a roasted tomato. At this point I also spooned any drippings from the roasted tomato pan onto the tartlets.

Continue Reading

Guacamole

When the cravings for Guacamole come, they must be answered.

I love avocados. The pale green flesh, the rich buttery taste, the thwack sound the pit makes when I hit it with my knife. I like it sliced in salads or spread between two pieces of buttered toast with a little salt and pepper. But I really love it in guacamole with a handful of salty chips on the side.

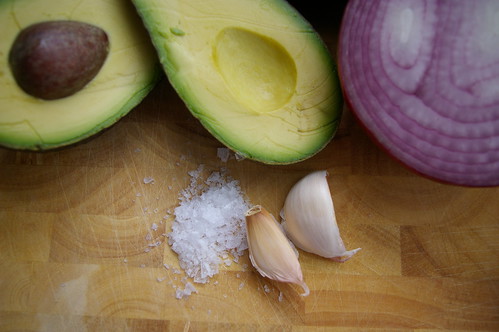
The Ingredients

Sure, it’s high in fat, but I’m slightly mollified by the fact it’s a good fat and there are lots of vitamins and potassium in avocados. I also need that information to justify my decision to eat guacamole for dinner. (It’s flimsy justification, but justification nonetheless.)

The Ingredients

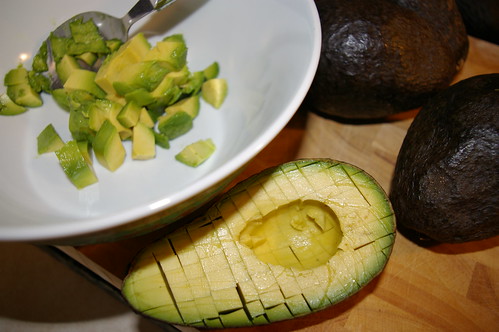
I like to make mine by cubing the avocados while still in their skins and then scooping the chunks out with a spoon before gently stirring with the other ingredients, so the meaty fruit retains some of its bite instead of becoming a paste. (You’ll see below that the instructions are slightly different. Obviously, do as you feel is best.)

Dicing the avocado

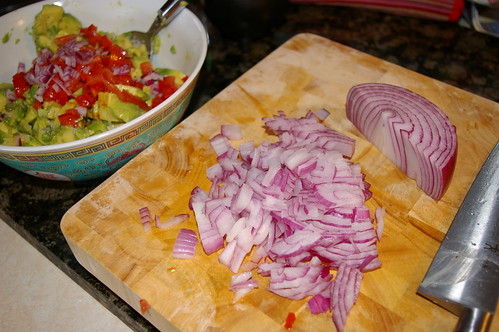
Red Onion

Ready to serve

It should come as no surprise that this recipe comes from my mentor, the Barefoot Contessa.

Guacamole

  • Four ripe Haas avocados (I just buy whatever is in the store)
  • 3 tbsp. freshly squeezed lemon juice — one lemon
  • 8 dashes Tabasco sauce
  • 1/2 cup small-diced red onion
  • 1 large clove garlic, minced (I use a rasp — best kitchen gadget ever — so there are no large chunks of garlic)
  • 1 tsp. kosher salt
  • 1 tsp. freshly ground black pepper
  • 1 medium tomato, seeded and small-diced

Cut the avocados in half, remove the pits, and scoop the flesh out of their shells into a large bowl. (I use my hands.) Immediately add the lemon juice, Tabasco, onion, garlic, salt and pepper and toss well. Using a sharp knife, slice through the avocados in the bowl until they are finely diced. Add the tomatoes. Mix well and taste for salt and pepper.

Continue Reading

Asparagus and Goat Cheese Tart

Puff pastry is my new nemesis.

This was supposed to be a ridiculously easy recipe — based on the “fake instead of really bake” principle of entertaining. I don’t believe in cheating, but I do believe that sometimes simplifying is a good way to go … especially when hosting a party. And this had all the things I like assembled together: puff pastry, goat cheese, roasted asparagus.

And yet, not a triumph.

Tart corner

I had my suspicions this wasn’t going to go right from the point of attempting to roll out the thawed pastry. Instead of a nice oblong rectangle, I got a wiggly-edged square that was about half the size of the crust in the photo ripped out of the magazine. No problem, I thought, I’ll make two tarts. It will be daintier, I figured.

After my wiggly-edged oblong was rolled out, I placed it on the parchment-paper-lined pan and docked the hell out of it with a fork. Theoretically, that should have made the centre of the tart not puff quite so much. Emphasis on theoretically.

After 10 minutes of baking, I took a peek into the oven only to be horrified by the mound of pastry puffing up into a golden pillow. NO! I docked you! I prickled your pastry skin with my four-tined fork! Get down! Actually, in reality, I’m pretty sure I just swore, then pulled the damn thing out of the oven and de-puffed it with the aforementioned fork, shattering the pastry.

Then came the attempt to smear on the layer of softened goat cheese. A bit more complicated now that the outer crust was in shards. On the upside, once I managed to successfully get the cheese on, no one could sense the puff pastry disaster that lay underneath. I added the lovely green spears of asparagus, some lemon zest and put it back on the oven, at the same time retrieving the second wobbly oblong that had also grown into a big puffed pillow. And repeat.

Mid-tart

As I assembled the second tart, I felt the urge to check the progress on the first only to discover the edges were starting to move beyond golden and into burnt territory. Gah! The asparagus still hadn’t fully roasted, but the pastry was cooking much too fast. I turned the temperature down and adjusted the rack higher and hoped for the best.

However, for all the fuss puff pastry involves, there is one undeniable benefit. Because it’s all thin layers, a solution for the slightly-burnt-bottom-problem was immediately apparent. With a little careful knife work, I pried off the blackened bottom layer. And, lo, all was right.

I don’t think I’ll be attempting this one again. At least not until I get better practiced with the puff pastry. But I would suggest more lemon zest. Also, I squeezed over some lemon juice when the tarts had just come out of the oven, which I think helped add some zing and slightly cut the richness of the goat cheese.

Asparagus and Goat Cheese Tart

The recipe comes courtesy from Real Simple magazine.


Asparagus Tart

  • 1 sheet frozen puff-pastry, thawed (apparently overnight in the fridge is best)
  • 1 10-ounce log goat cheese
  • 1 1/2 pounds asparagus, ends trimmed
  • 1 tbsp. olive oil
  • zest of 1/2 lemon
  • salt
  • freshly ground pepper

Preheat the oven to 400. Roll out the pastry into a 10″x18″ rectangle. Leaving a one-inch border, prick the surface of the pastry all over with a fork. (If this works for anyone else out there, please let me know.) Bake about 15 minutes or until golden, then remove from oven. Spread the cheese over the pastry. Lay the asparagus on top of the cheese. Brush with the oil and sprinkle with the zest salt and pepper. Bake an additional 20 to 25 minutes. Let cool before serving.

Continue Reading

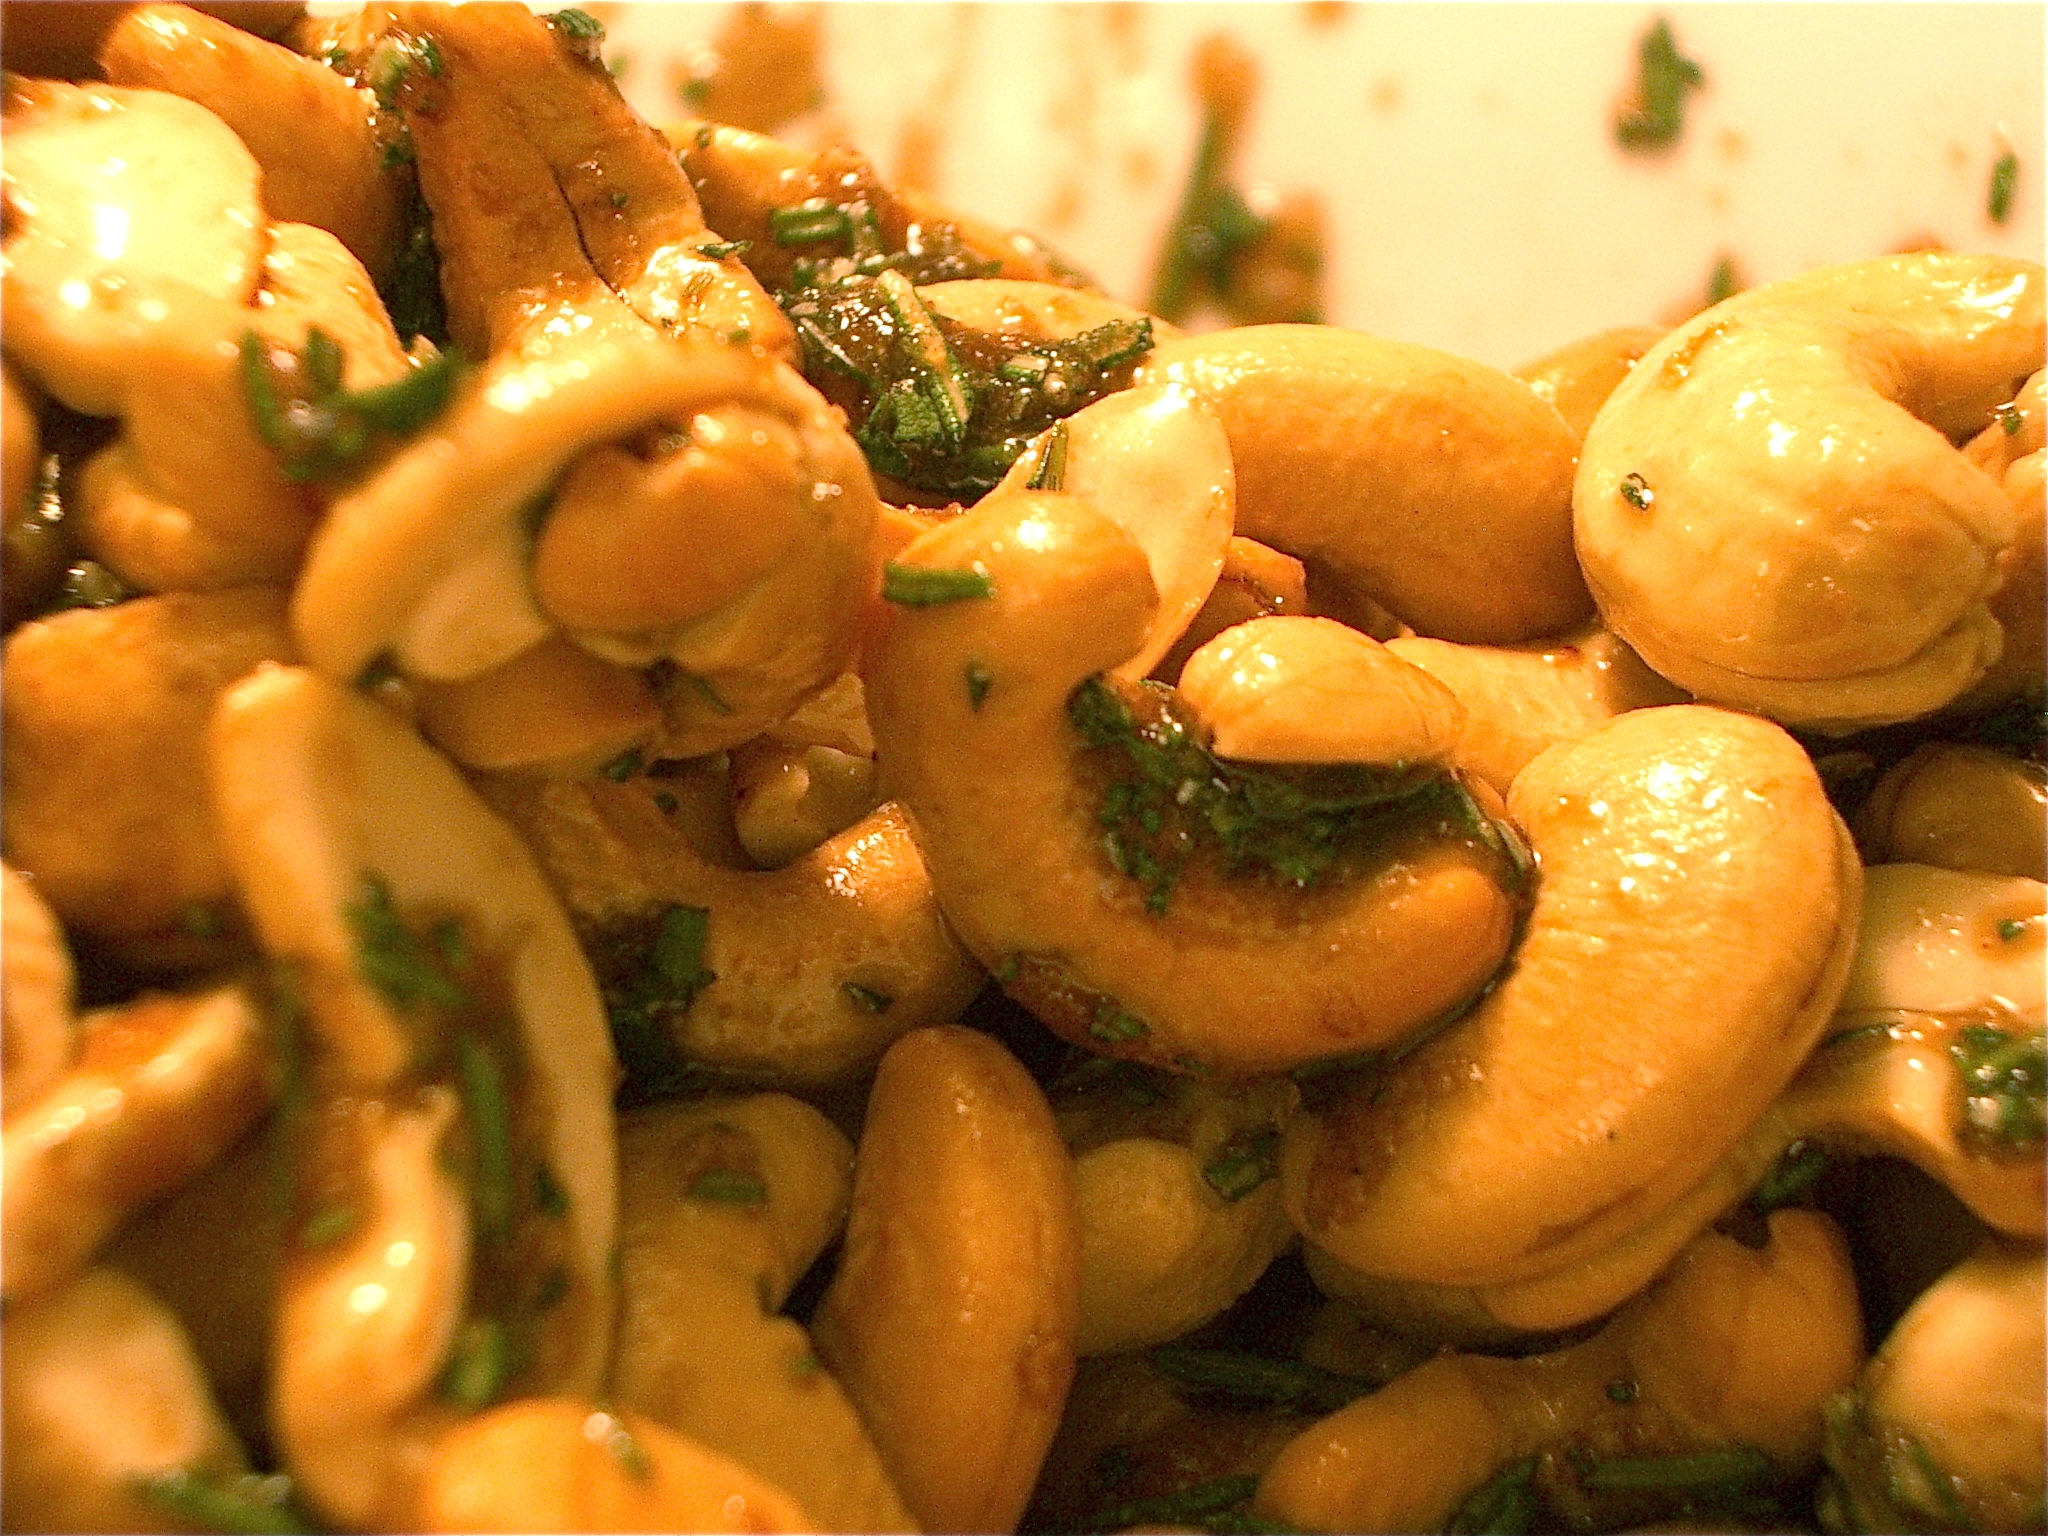
Rosemary Cashews

I was doing my taxes tonight — one day before the deadline, which must be a record for me — which is apropos of nothing other than my mind was wandering away from my CPP contributions and more towards what else I could be doing if I wasn’t being forced to do paperwork … even if that paperwork would lead to an extra couple of hundred dollars in my bank account.

Last week I bought a package of rosemary and some bulk cashews thinking I might find some time to put together one of my favourite snack recipes. Somehow over the course of the past several days things got pretty busy, but I couldn’t keep putting it off for fear the lovely green needles of rosemary would blacken and wither in my crisper. So, as I signed off on my tax return, I decided it was time to whip up a little bonus.

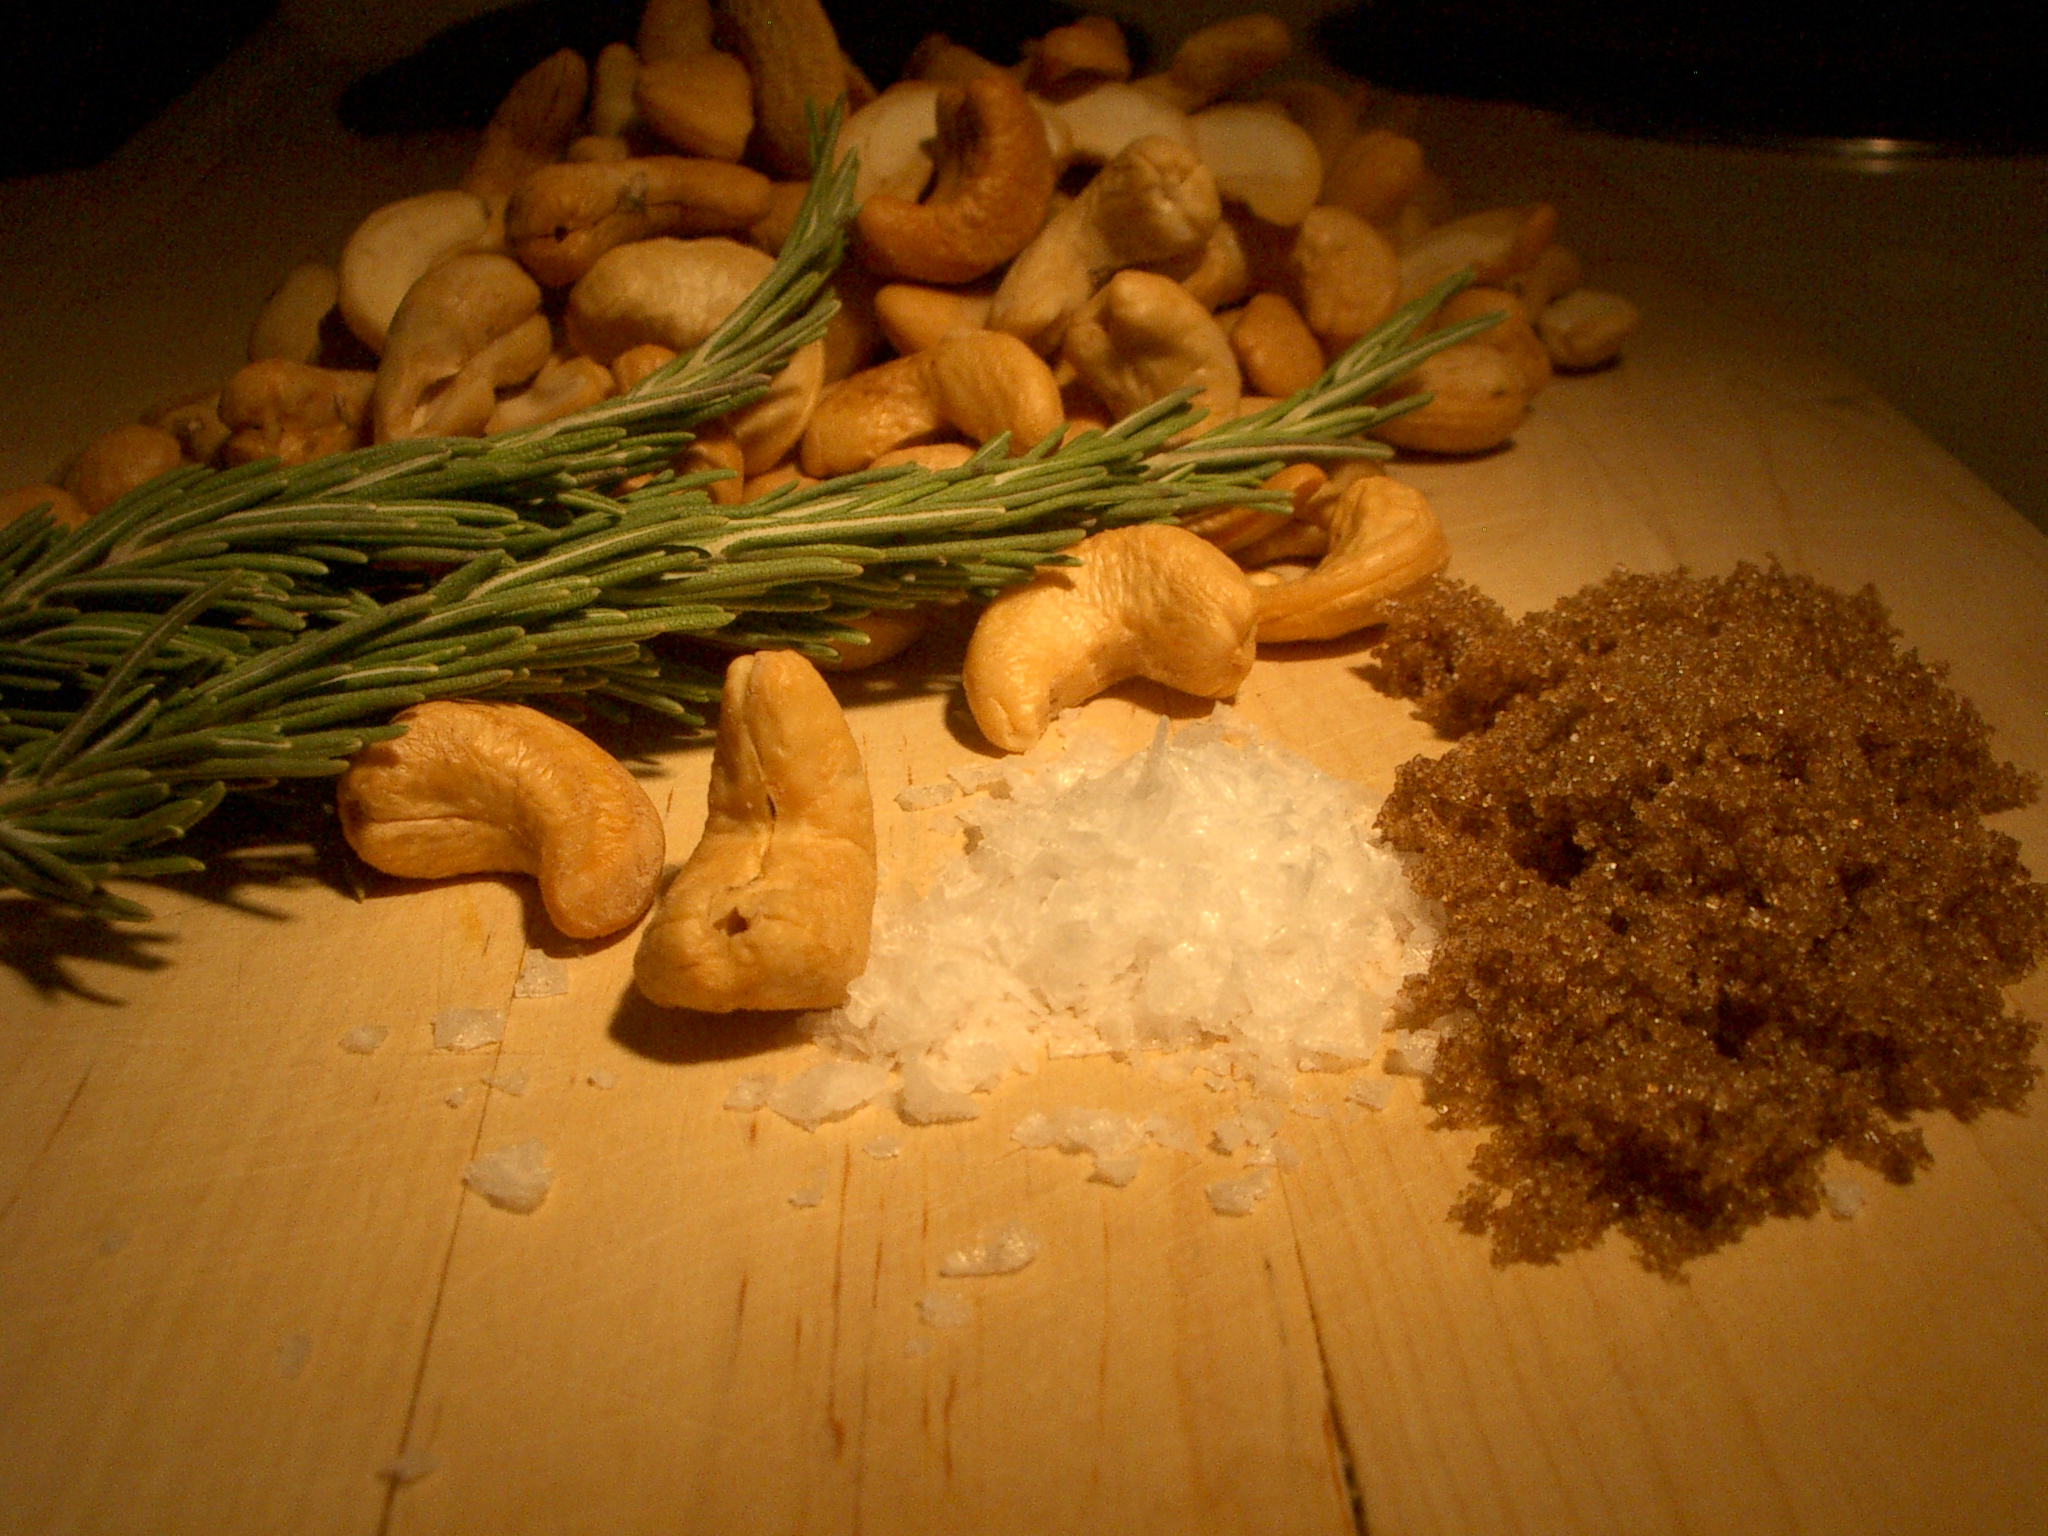
The Ingredients

Rosemary Cashews have rapidly become my go-to hostess gift since I began making them a few years ago. They have been to book club and video nights, served as work snacks and traveled all the way to Malta as a small, homemade gift for friends hosting me there. (They were such a hit, we made a bastardized version for Canadian Thanksgiving, in which my friends invited 10 for turkey dinner by the pool.)

I love the play of salty and sweet and the hit of heat, combined with the herby woodiness of the rosemary. Plus they’re ridiculously easy to make.

With all due respect to Ina Garten — my cooking guru, the Barefoot Contessa — I generally not-quite-double the coating to ensure the cashews are thoroughly covered. (Hey, the nuts are just the carriers of the rosemary and sugar, in this girl’s eyes. And yes, this may make them a little bit more slippery, but isn’t that why cocktail napkins were invented?)

I also generally use salted butter because that’s what I have sitting around and can’t be bothered to invest in unsalted just for one or two recipes. As a result I cut back on the salt. Oh, and I’m kind of a wimp when it comes to heat, so I don’t add all the cayenne she calls for.

Rosemary Cashews

Here is the recipe is as it stands in her cookbook, Barefoot Contessa in Paris.

Rosemary Cashews

  • 1 pound roasted, unsalted cashews
  • 2 tbsp. minced fresh rosemary leaves
  • 1/2 tsp. cayenne pepper
  • 2 tsp. light brown sugar
  • 1 tbsp. kosher salt
  • 1 tbsp. unsalted butter, melted.

Preheat the oven to 350 degrees. Spread the cashews out on a sheet pan. Toast in the oven until warm, about five minutes. (Full disclosure here: I cheat at this part and just use a dry frying pan on low heat to heat up the nuts.)

In a large bowl, combine the rosemary, cayenne, sugar, salt and butter. Thoroughly toss the warm cashews with the spiced butter and serve warm. (Though, let’s be honest here, they are just fine at room temperature too.)

Continue Reading