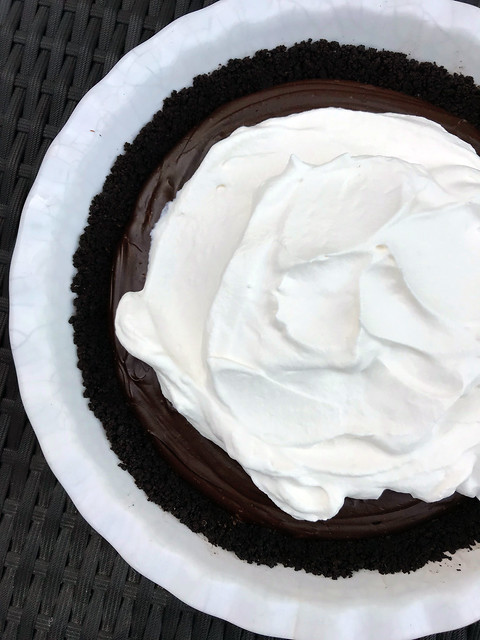
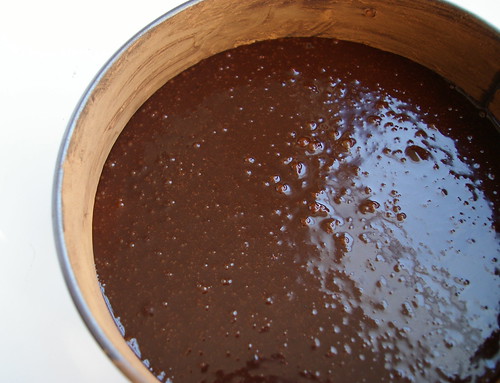
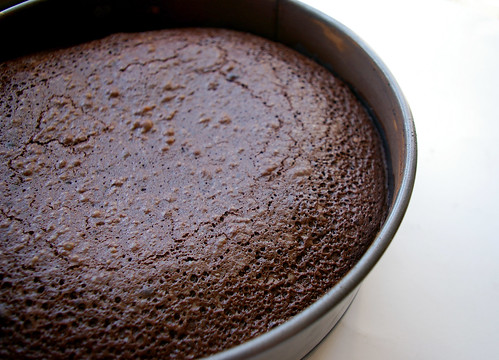
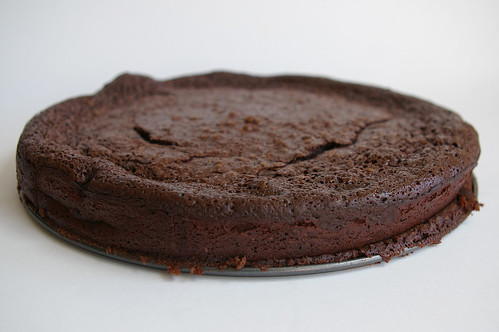
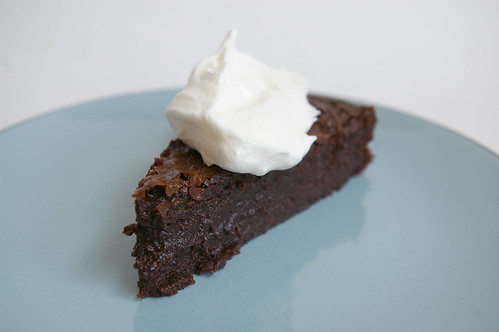
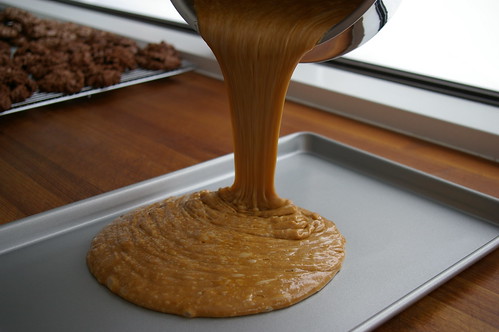
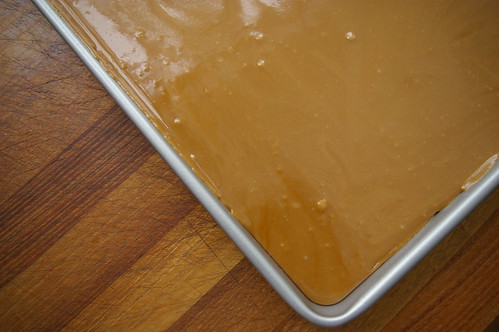
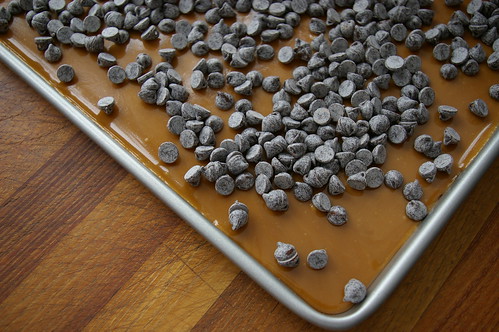
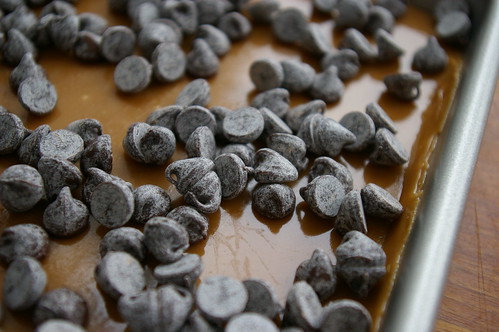
No-Bake Chocolate Cream Pie

This post is dedicated to the lovely woman I met (and whose name I, naturally, embarrassingly forgot) at the Half Your Plate fundraiser dinner at Winsport. I don’t know if you’re even going to check my blog again after such a long absence, but please know I have not forgotten your kind words and encouragement.)

My thoughts are bubbling over as I try to figure out how to start talking about this pie.

I mean, part of me isn’t really sure any words are needed.
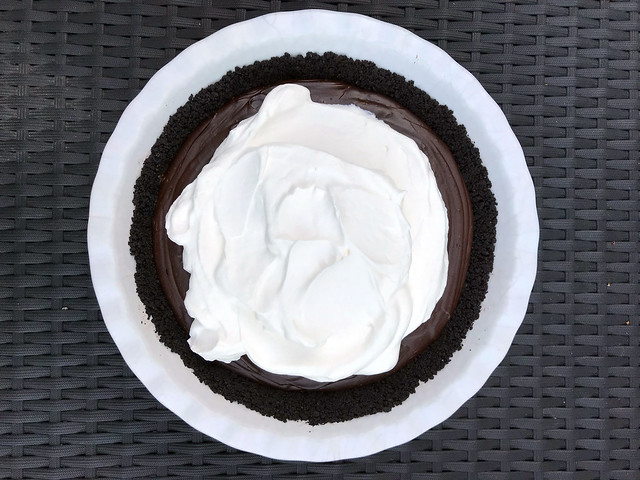
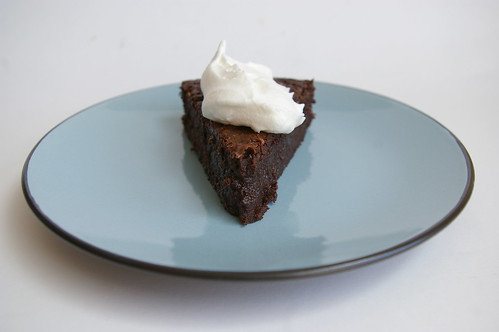
No-Bake Chocolate Cream Pie
Right? (TL:DR version, if you’re skipping to the bottom: this tastes like the chocolate cream pie of your dreams.)

I guess I could start with how the tweet from Bon Appetit stopped me in my tracks when I was scrolling through Twitter the other day and I immediately favourited it, so I could return to it later.

Now, truthfully, I probably have a few hundred recipes bookmarked this way and have never actually got around to making any of them. But this pie? I don’t know. It felt… doable. More importantly, it requires no oven to be turned on. And, frankly, I’m already no good in a heat wave. Heat my apartment by turning on the oven and I’d be passed out in front of a fan while whatever I was baking burned.

Or I could start with the fact that it was perfect timing to have found this recipe just as friends invited me over for a barbecue feast dinner party, complete with ribs, brisket, cornbread and deep-fried balls of macaroni and cheese. Would I consider bringing dessert? Yes, I absolutely would. After all, it’s more motivating to make a massive chocolate cream pie when you get to enjoy it with good friends. (And also because you’ve had these ribs before, they are ridiculously good and I feel that making an awesome pie is only a drop in the bucket when it comes to returning the favour.)

Or maybe I’ll just point out that while in high school I never once ate in the cafeteria (opting to play cards in the hallway in front of my locker), but on the rare occasion I would head there for a snack — either this doughy, saucy pizza bread or a slice of McCain’s chocolate cream pie. You know the one. With the star-tipped “cream” frosting over a pudding-like piece of pie.

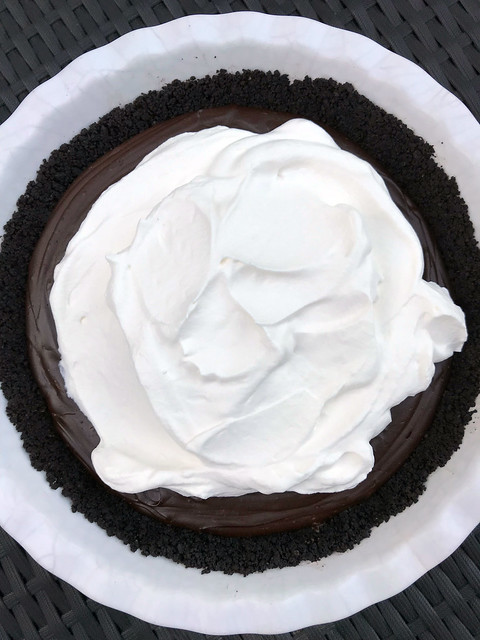
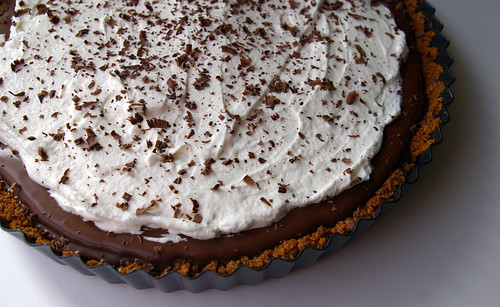
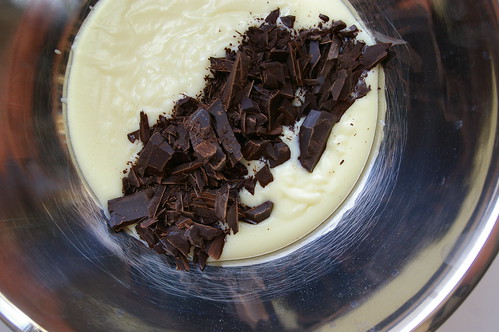
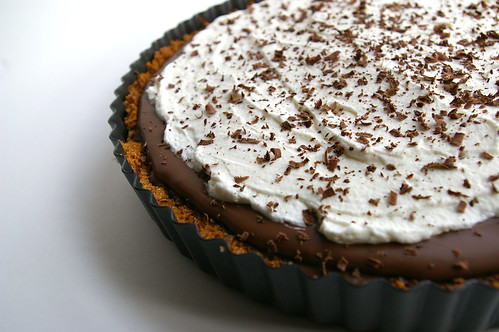
It might actually be blasphemous to compare that to this Bon Appetit version, but I couldn’t help drawing comparisons as I put it together and, eventually, finally got to slice into it and try a piece. The original recipe, yes, calls for a torched meringue on top. But I really liked the idea of a gently sweetened whipped cream slathered on top instead. Bonus points: no need for a kitchen torch.

No-Bake Chocolate Cream Pie

Double bonus: I can make a pavlova with the leftover egg whites and top it with more whipped cream and big handfuls of juicy summer berries.

Lastly, I could have started this post by talking about how I generally loathe comments posted below recipes online. That’s because they’re often things like, “I made this but I swapped this ingredient for that one and didn’t add butter because I’m on a diet and blah blah blah. It didn’t taste very good, so I’ll never make this again.”

In this case, though, I’m super glad to have read the comments because one person spent a lot of time and energy posting extensive recipe instructions far more detailed than the original and I have absolutely no doubt the only reason I had great success with this pie is because of that. Bless you, anonymous person!

(I do love that the only other comment on this recipe, posted before the helpful instructions, was: Biggest waste of my time. Tried this twice. Evidently you have to be a bloody witch to make this. Each time it cooked the egg yolks. Dumbest recipe EVER.)

The total trick to this pie is tempering THE HELL out of the yolks and corn starch. That’s going to make or break the pie filling.

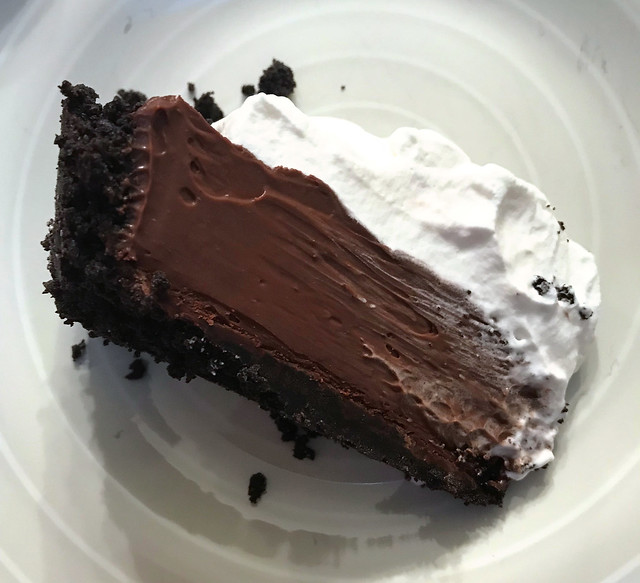
Yes, it’s a bit complicated to make. Patience is going to be the main ingredient. But…. Let me put it this way: whenever I make a dessert and take it to someone’s house for dinner, I generally want to come home with an empty serving dish because I kind of lose interest right after eating a piece of whatever I’ve brought. This time, I offered the last, healthy-sized wedge of pie to a friend to take back to her house and eat later.

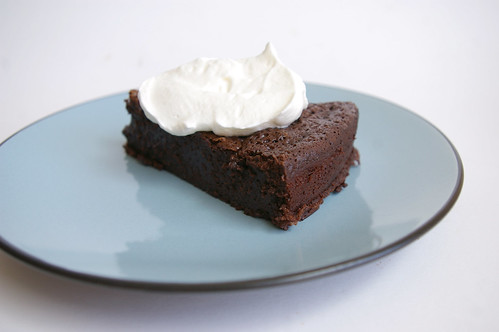
No-Bake Chocolate Cream Pie slice

Five minutes later, I wondered why I’d been so nice.

I guess I’ll just have to make this again.

IMG_7884

IMG_7892

IMG_7894

IMG_7908

No-Bake Chocolate Cream Pie

No-Bake Chocolate Cream Pie

Adapted slightly from Bon Appetit

  • 9 tablespoons butter
  • 6 ounces chocolate wafer cookies
  • Salt
  • 8 ounces bittersweet chocolate, melted, divided
  • 2 1/2 cups whipping cream, divided
  • 2 tablespoons unsweetened cocoa powder
  • 1 1/2 cups whole milk (aka 3.25 per cent)
  • 3/4 cup sweetened condensed milk
  • 4 large egg yolks
  • 3 tablespoons cornstarch
  • 1 – 2 tablespoons sugar

Melt butter in a small pot over medium heat. Set aside.

Blitz cookies in a food processor until finely ground and transfer to a medium bowl.

Add 5 tablespoons of the butter and a nice pinch of salt to the bowl with the cookie crumbs and mix until thoroughly combined. Transfer to a 9-inch pie dish and press evenly into the bottom and up the side using the bottom and side of a measuring cup to really pack it down. Put in the fridge to chill for 20 minutes.

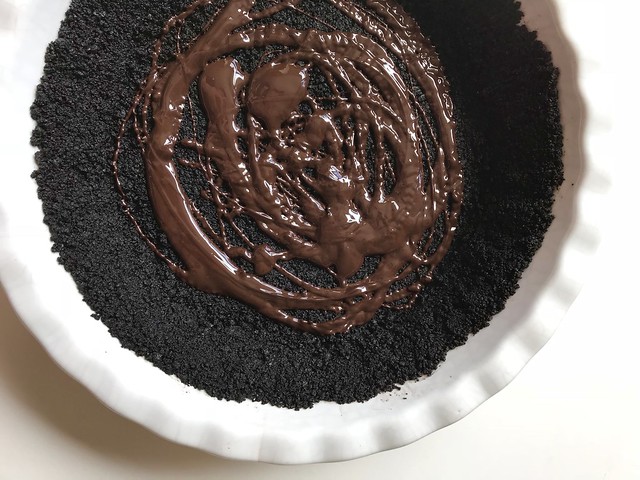
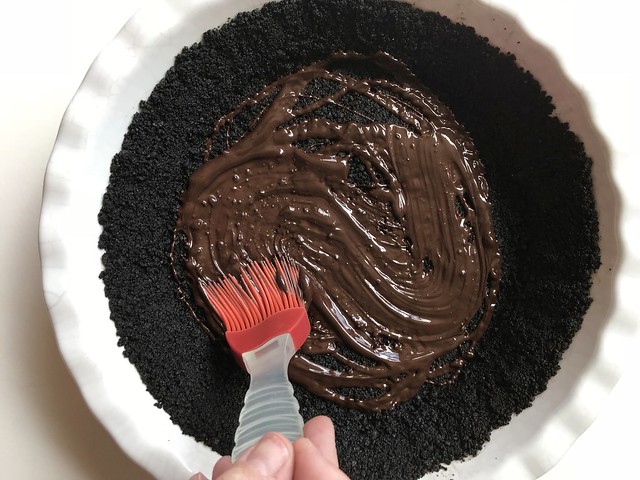
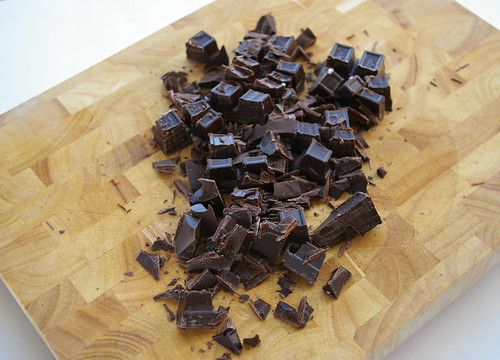
Brush the bottom of the crust with 2 ounces of the melted chocolate and put the pie dish back in the fridge.

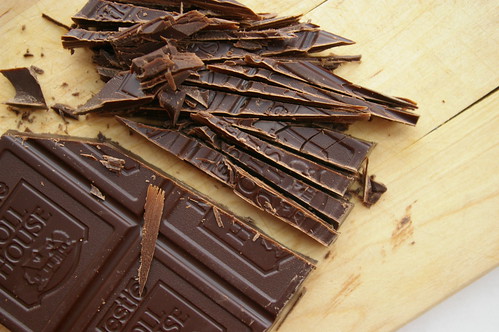
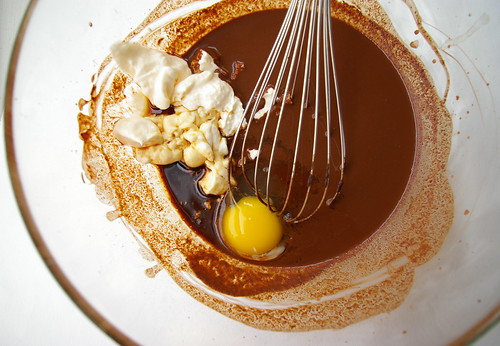
Whisk cream and cocoa powder in a medium saucepan until there are no lumps, then mix in the milk and sweetened condensed milk. Over medium-low heat, warm until the cream mixture just reaches 180F. While it’s heating, whisk the egg yolks and corn starch in a medium bowl.

Scoop up about 1/4 cup of the heated cream mixture and dribble a little bit at a time into the egg yolks while constantly whisking. This is where you need to go slowly because this keeps the eggs from scrambling! Once that’s all mixed in, repeat with another 1/4 cup of the cream. Repeat until you’ve added about half of the cream mixture to the yolks.

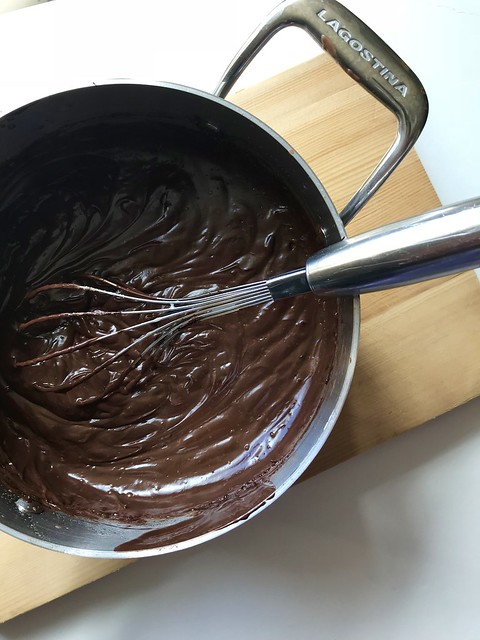
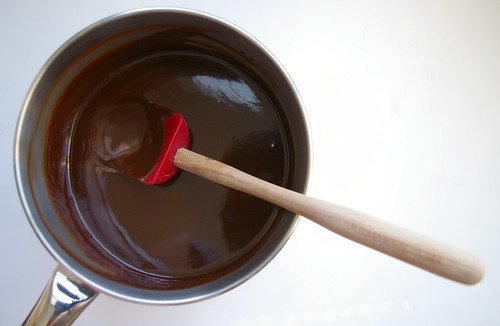
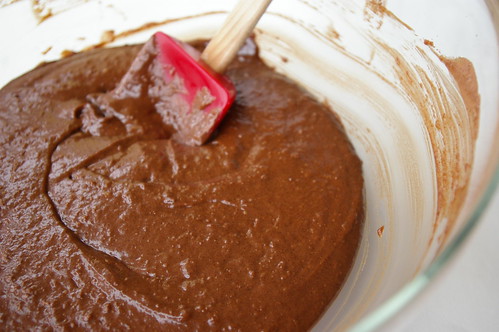
Pour the yolk mixture into the pot on the stove. Whisk, whisk, whisk as the entire mixture heats up. This will initially take what feels like a while, but then it will fairly suddenly thicken up to a pudding-like texture. Once it has a pudding consistency, remove the pot from the heat, add the remaining melted chocolate and the rest of the melted butter and whisk until completely combined.

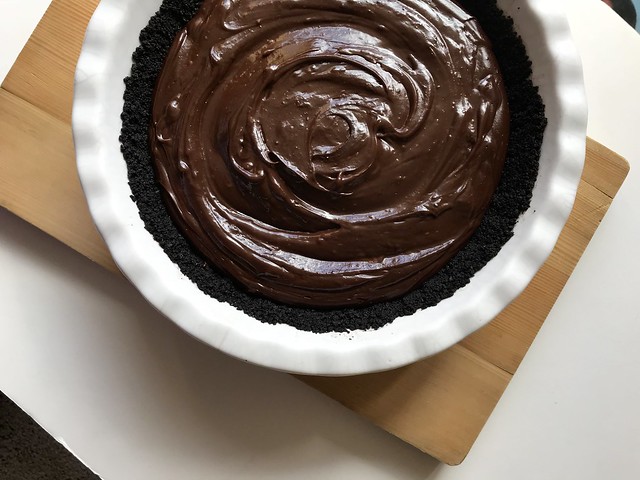
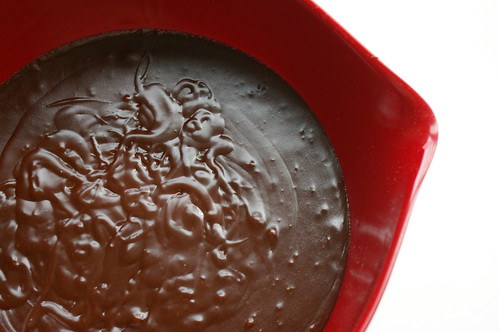
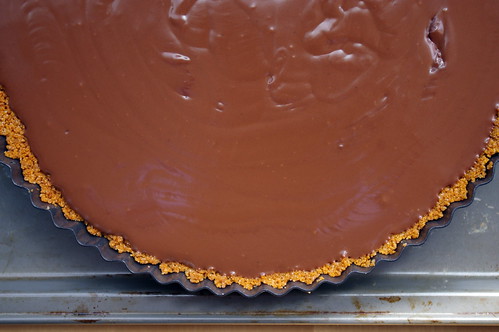
Scrape into the pie crust and chill until the chocolate custard is cold and set — at least two hours.

Just before serving, make the whipped cream. In a bowl (chilled, if possible, as this makes it faster to whip the cream), beat the remaining 1 cup of cream with 1 tablespoon of sugar until fluffy. (I like mine to slump a little bit, so it’s a bit softer than a really stiff whipped cream.) Taste partway through the beating process to see if it’s sweet enough for your liking. Add the rest of the sugar as you see fit.

Scoop over the pie and serve.

Continue Reading

S’mores Brownies

It could have been summer a week or so ago, even if the last couple of days have felt more like the spring we should be in. Still, I’ll take it. Everything is already green and lush; even the lilacs are already blooming — something I’m not sure has ever happened this early in the year since I moved here.

Inevitably that means gathering around backyard fire pits and camping . And those things mean s’mores.

S'Mores Brownies ingredients

Except when there’s a fire ban on.

Or, if you’re unlucky enough to not have a yard. <Raises hand.> Or perhaps don’t love camping. <Raises other hand.>

Marshmallow top I

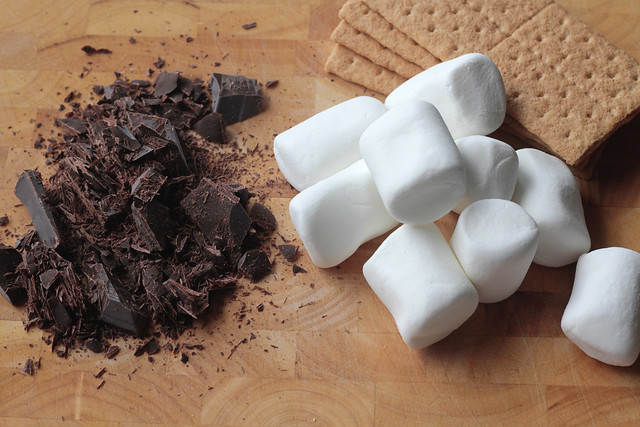
There’s a simple way around this, provided the weather isn’t so hot you’re left wilted over a piece of furniture: put some marshmallows on a baking sheet lined with parchment paper and broil them for a minute or two, until golden and melty — or your preferred level of roasted-ness (I like a dark shade of golden myself, which can be tricky over a crackling fire but easy to monitor under the steady heat of a broiler.) — before squishing them between two graham crackers and a slab of chocolate.

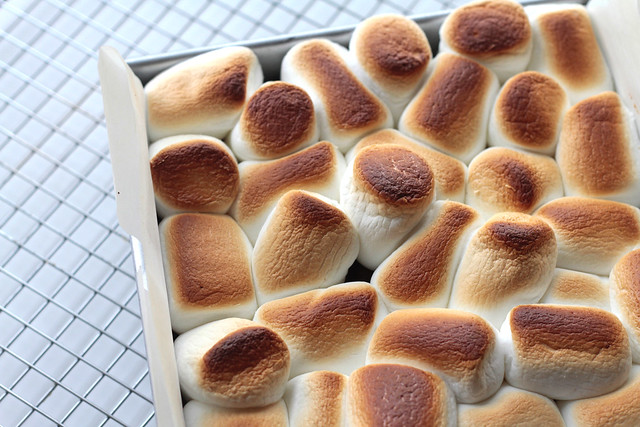
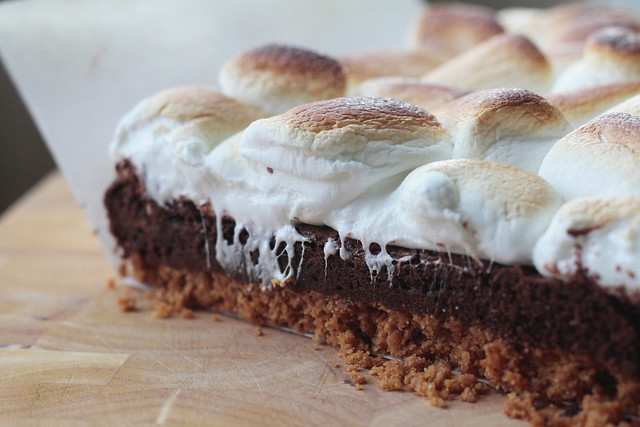
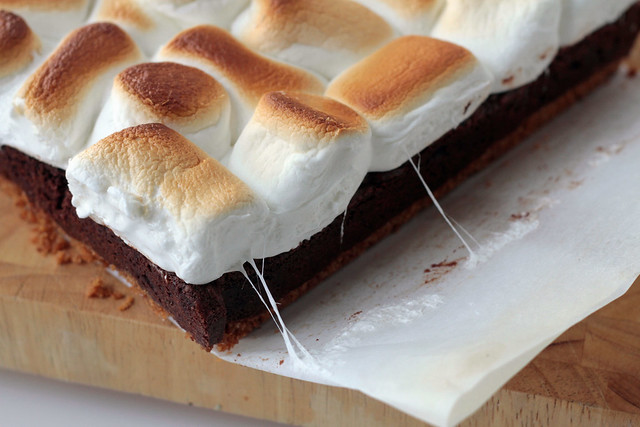
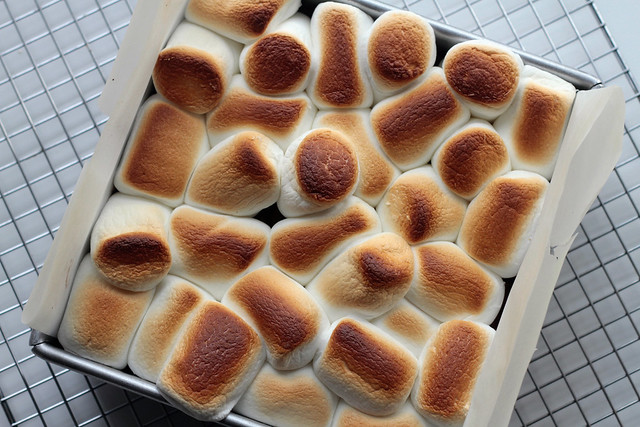
However, there’s a more portable and far more decadent way of eating something evocative of a s’more. Behold the S’mores Brownies.

S'Mores Brownies I

The backbone is the same, of course. Combining graham crackers, chocolate and marshmallows into a tasty sweet. In this form, however, the graham crackers are amped up by being turned into a graham cracker crust (enriched with butter and sugar, naturally), the chocolate becomes a thick layer of fudgy brownie and the marshmallows, well, they stay pretty much the same other than you get at least two of them per brownie instead of one lonely one per s’more.

Just like the originals, these are gooey and sticky as all get out, so prepare accordingly.

Sticky

Of course, this version of a s’more does require washing dishes after, so that may be a point in favour of their original counterparts.

Then again, you can still easily make and eat them when the weather isn’t cooperating.

 
Marshmallow top II

Marshmallow top III

S'mores Brownies II


S’mores Brownies

Adapted from The Kitchn. And by that I mean that I made the method a little more streamlined (read: lazier).

For the crust:

  • 6 tablespoons butter, melted and cooled
  • 1 1/2 cups graham cracker crumbs (about 10 full crackers)
  • 2 tablespoons sugar
  • 1/4 teaspoon salt

For the brownies:

  • 1/2 cup butter
  • 7 ounces bittersweet chocolate
  • 1/4 teaspoon salt
  • 2 large eggs
  • 1/2 cup sugar
  • 1/2 cup brown sugar
  • 1 teaspoon vanilla
  • 1 cup flour
  • 10 ounces large marshmallows (most of a large bag)

Preheat the oven to 325°F.

Butter an 8×8-inch pan and line with parchment with a slight overhang, like a sling, then butter the parchment that’s inside the pan.

In a bowl, mix together the graham cracker crumbs, sugar and salt. Pour over the melted butter and then stir until well combined. Pour into the prepared pan and press firmly along the bottom. (You really want to tamp it down here; I used the bottom of a small metal measuring cup.) Bake the crumb mixture for 20 minutes, until the edges are starting to get golden. Remove from the oven.

While it bakes, start preparing the brownie layer. In a medium saucepan set over low heat, slowly melt the butter and chocolate together, stirring often. Stir in the salt. Remove from the heat and let cool completely.

Once the crust is baked and out of the oven, raise the oven temperature to 350°F.

In a large bowl, whisk the eggs until slightly paler in colour. Add the two sugars and whisk again for several minutes, until the mixture is well incorporated. Whisk in the vanilla. Pour in the chocolate mixture and stir gently until just combined. Add the flour and use a spatula to fold it together, mixing gently and only until no white flour can be seen.

Pour the brownie batter over the cooked graham cracker crust and return the pan to the oven. Let it bake for 22 to 25 minutes, until no longer raw-looking in the centre when check with a toothpick. (It will still look fudgy and not come out entirely clean, but it will look cooked.)

In a stand mixer fitted with a paddle attachment, beat the eggs and sugars until fluffy, 2 to 3 minutes. Beat in the vanilla extract. Gently mix in the melted chocolate. Fold in the flour.

Evenly pour the brownie batter over the cooked graham cracker crust. Transfer the pan to the oven and cook for 23 to 25 minutes. Remove the pan from the oven.

Set the oven to broil and arrange the marshmallows over the cooked brownie layer. Cover the brownies well, but don’t pack them in too tightly. They will spread a bit in the oven. Set the pan back into the oven under the broiler and watch carefully to make sure they roast to your preferred level of doneness. Turn the pan frequently to ensure even broiling. This can take anywhere from 1 1/2 to 2 minutes for golden, a minute or two longer for a brown, bruleed topping.

Remove when the marshmallows are golden (or darker, depending on your preference) and let cool completely. Use the parchment sling to remove the brownies from the pan and slice. The marshmallows will be incredibly gooey, so keep a glass of hot water and a cloth at hand to wipe down the knife between slices.

Makes 8 to 16 brownies, depending on how they’re sliced.

Continue Reading

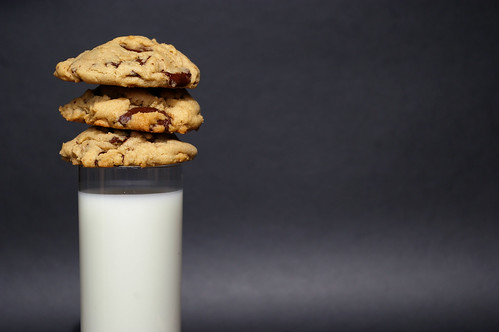
Kitchen Sink Cookies

Most of the time when I make cookies, I’ll eat one or two and then completely lose interest, taking the rest into work for my colleagues to enjoy. (Of which, I am sure, they have no complaints.)

Last year, over at my day job, I reviewed a cookbook called The Flying Brownie (The Harvard Common Press) by Shirley Fan that was all about sending edible care packages to people in the mail. I decided to try her recipe for so-called Kitchen Sink Cookies, which are similar to the more famous Compost Cookies from Momofuku in that, essentially, they’re about throwing in lots of different bits and bobs that may be lurking around the kitchen and in the baking cupboard. We all have those mostly empty bags of chocolate chips, nuts or dried fruit, perhaps a few random squares of chocolate for that recipe that didn’t require all of them in a box. I have amalgamated all my odds and ends — butterscotch chips, Skor bits, different types of chocolate chips — into a container, which is organized, at least, but doesn’t actually go very far when it comes to using them up. So, I was intrigued at the idea of making a cookie whose purpose was to do just that. (And, while I love Compost Cookies, I think we can agree they’re a lot more involved than what some of us want to tackle on a weekend afternoon when a cookie craving strikes.)

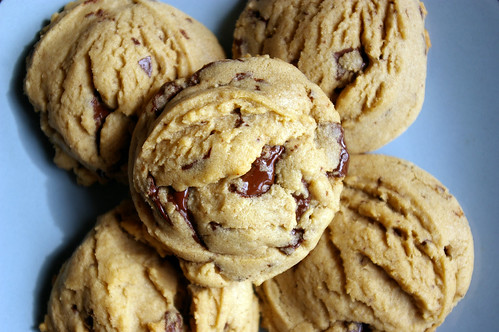
And, man, they did not disappoint. Rich, chewy, and salty-sweet, I could not resist their siren call.

As I said for my review of The Flying Brownie:

Since making them, however, I have eaten no fewer than a half-dozen cookies (over a 24-hour period) before bringing them to the office just to get them out of the house. They were snapped up immediately (as most baked goods in the newsroom are, for what it’s worth), but the reaction from colleagues was different: resounding compliments and requests for the recipe followed.

The cookies came out chewy and soft, with specks of chocolate and a slight crunch from the potato chips. Perfection.

I made more just a few nights later.

What I didn’t admit then is that I even held back a few because I knew I’d want a few more and didn’t want to give them all away.

I had a cookie craving the other day and they immediately came to mind.

The first time around I used up what was left in a bag of dark chocolate chips and some semi-sweet mini ones, as well as crushed ripple chips and some rolled oats.

Those who know me know well how much I love salty-sweet combinations, so the ripple chips (which I like for the texture as well) were a given. The fact that I had to buy some specifically to add them to the cookies maybe goes against this cookie recipe’s concept, but I’m OK with that.

Among the things buried in my baking cupboard, which I cleaned out and organized over the Labour Day weekend, was a bag of Valrhona Caramelia chocolates I bought several months ago from Duchess in Edmonton when I was up visiting friends. They are these little disks of chocolate that taste like a cross between milk chocolate and caramel. It’s tempting to eat them straight up, and I did do that with a few of them, no lie, and then I put them away so I didn’t eat the entire bag and then, of course, promptly forgot they were there until a much more recent trip to Edmonton (and the requisite visit to Duchess) when I remembered I still had them. Roughly chopped, I knew they’d be a great addition.

I decided to also throw in some semi-sweet chocolate chips, a handful of butterscotch chips, some roughly chopped pecans and those ripple chips.

Since making them that first time, I have adapted the recipe slightly. Since I decided I wanted the chocolate chips to be an option instead of a requirement, this adaption allows for a little more flexibility with the add-ins. However, I do recommend using a combination of sweet (like chocolate chips) and salty or crunchy or things with texture (coconut, nuts, potato chips, pretzels etc.). I use softened butter instead of melting it because I always have butter softening for one baking project or another and I am lazy enough that I don’t want to dirty a pot or pan just to melt it. I’m also so lazy that I don’t generally bother mixing the flour, baking soda and salt together in a separate bowl. I figure if I add the flour, then scatter the salt and baking soda evenly over it, it will all get mixed in well enough. Fan calls for golden sugar, but I’ve changed it to brown since that’s what most of us have around (and I think it totally contributes to that luscious, rich, caramel flavour).

Lastly, I found that while Fan’s recipe said it would make about 48 cookies, I got about half that. Not sure if that was bad math because I’m not convinced my cookies are much larger than what she calls for. I can say with some assurance there’s no way I ate that much dough. Though, yes, I ate dough. And it was damn good.

Kitchen Sink Cookies

Mildly adapted from Shirley Fan’s The Flying Brownie.

  • 3/4 cup (180 mL) unsalted butter, softened
  • 1 cup (250 mL) packed brown sugar
  • 1/4 cup (60 mL) granulated sugar
  • 1 large egg, at room temperature
  • 1 large egg yolk, at room temperature
  • 1 tsp (5 mL) pure vanilla extract
  • 2 cups (500 mL) all-purpose flour
  • 1/2 tsp (2 mL) baking soda
  • 1/2 tsp (2 mL) salt
  • 1 1/2 cups (375 mL) add-ins (such as chocolate chips, chopped chocolate, old-fashioned rolled oats, crushed potato chips, pretzels, raisins, nuts or unsweetened shredded coconut)

Preheat the oven to 350F (180C). Line two baking sheets with parchment paper or silicone baking liners; set aside.

In the bowl of an electric mixer, beat the butter and both sugars on medium speed until light and fluffy. Add the egg, egg yolk and vanilla and mix until well combined, scraping down the sides of the bowl if necessary. Add the flour, baking soda and salt and mix on low speed until blended. Fold in the add-ins. (If time permits, refrigerating the dough for at least 12 hours before baking will improve the flavour of these cookies.) Using your hands or a cookie dough scoop, form 1-inch (2.5-cm) balls with the dough. Place the dough balls on the prepared baking sheets, about two inches (5 cm) apart. Bake until the edges are lightly browned, 9 to 10 minutes. They will look slightly underdone in the centre.

Cool the cookies on the pans for five minutes before transferring to a rack to cool completely. Repeat with the remaining dough. Pack in zippertop plastic bags, pressing out any air, or in airtight containers, separating the layers with waxed or parchment paper.

Makes about 24 cookies.


Continue Reading

Katharine Hepburn Brownies

There is deep, dark and dangerous knowledge that comes from knowing how easy it is to make brownies.

A few standard ingredients, a pot and spatula, a bit of time and you are rewarded with deep, dark, chocolate goodness.

Late-night cravings for something a little bit sweet and decadent no longer need go unanswered. At least not in my house. Nor mid-afternoon cravings. Or even morning ones. (Don’t tell me you’ve never craved something deliciously chocolate in the middle of the morning.)

The trick, though, is to find the right brownie recipe.

By and large, they’re all easy — though the grades of difficulty increase when adding things like peanut butter or cheesecake swirls — because it’s a simple matter of melting butter with chocolate, adding sugar, eggs and flour, then baking the entire thing. No forethought is required because there’s not even a need to wait for the butter to soften.

Depending on the ratios of eggs, flour and butter, though, some brownies will come out cakey, while others dense and fudgy.

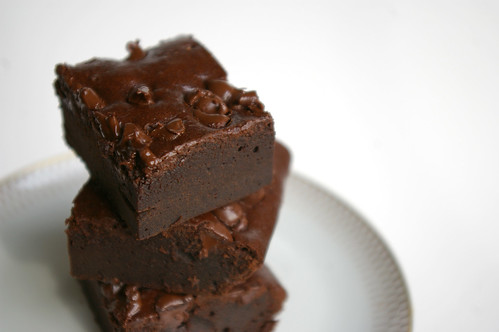
My ideal brownie is on the fudgy end of the spectrum, with that crackle-like top that hides the rich, dark bar below.

In my search for just such a brownie, I stumbled onto numerous posts extolling the virtues of the recipe from famed film actress Katharine Hepburn.

She may be better known for her film roles and assertive, unapologetic personality, but among baking circles, the woman who starred in The Philadelphia Story and the African Queen is also known for her brownies.

How the recipe first came to be part of the public realm varies as widely as the number of brownie recipes found on the Internet.

Some say she was persuaded to give it up to gossip columnist Liz Smith; others report a neighbour secured the recipe after bringing over a batch of brownies to the actress who declared they had too much flour and had been overbaked before she listed off her own recipe.

The story, though, is far less important than the recipe results; gooey and rich, fudgy with the requisite crackled top, these are the decadent brownies that do prompt cravings.

A scant amount of flour keeps them dense and chewy, the richness cut only by the chunks of toasted walnuts littered throughout.

Although easy enough, I wanted to simplify the recipe even further. With all due respect to Ms. Hepburn, if I can avoid washing additional dishes, I will. So, I skipped the step of using a double boiler to melt the butter and chocolate in favour of a one-pot method that doubles as a mixing bowl. Within just a few minutes, and with very little effort on my part, I was pouring the finished batter into the pan and putting the whole thing in the oven. The hardest part, truthfully, was waiting for the brownies to cool before slicing. (It’s possible I didn’t actually wait as long as I should have.)

With the craving answered — and a new favourite brownie recipe in hand — life could go back to normal.

But I know that when it comes again, it won’t take much to appease it. And that is dangerous.

Katharine Hepburn’s Brownies

Take caution not to overbake these as that will cause them to dry out. Swap the walnuts for other nuts, or omit entirely, as desired.

  • 1/2 cup (125 mL) unsalted butter
  • 2 oz (60 g) unsweetened chocolate
  • 1 cup (250 mL) sugar
  • 2 eggs
  • 1 tsp (5 mL) vanilla
  • 1/4 tsp (1 mL) salt
  • 1 cup (250 mL) walnuts, chopped
  • 1/4 cup (60 mL) flour

Preheat oven to 325F (160C).

Butter an 8×8-inch (20×20-cm) pan and line with parchment paper, letting a few inches hang over each side, like a sling.

In a medium saucepan set over low heat, melt the butter and chocolate, stirring often, until smooth. Remove from the heat and whisk in the sugar, then eggs and vanilla. Switch to a spatula to fold in the salt, walnuts and then the flour, stirring until just combined. Pour the batter into the prepared pan and bake until a toothpick inserted in the centre comes out with only a few moist crumbs on it, about 40 to 50 minutes. Cool completely before using the sling to remove the brownies from the pan and cutting into squares.

Makes 1 8×8-inch pan of bars.

Continue Reading

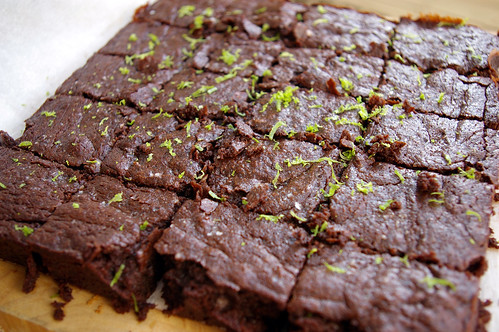
Brownies with Sea Salt and Lime

Oh, hello!

Thanks for joining me here on my inaugural post on my NEW blog. While I should be a little ashamed (and I am a bit, to be honest) that it took me this long to get my own domain and I certainly should be (and am) irked that waiting this long meant a lot more hiccups in making ye olde switch from my WordPress version to this one, I’m just tickled that I finally broke down and did it. I own real estate! Internet real estate!

(Side note: I guess this is a good time to say that you may want to update your bookmarks.)

I’m still trying to work out some design kinks. Those classes in HTML that I took in my undergrad (read: a long time ago) haven’t really kept up with the times. But I figured it would be better to just get this thing live and try to fix as I went along rather than wait until it was perfect and have you all give up on ever seeing me post again. (Thanks to the kind person on Twitter who gently nudged me into getting things rolling again.) (Related: if anyone has a quick fix to get the blog’s tagline all on one line and to get the “What It’s All about” over to the left side of the page, I’d be totally grateful.)

And just a few weeks shy of my four-year (four year!) anniversary. Four amazing, heartwrenching, uh, fattening years. But tasty ones too. Of course, I’ll wax a little more poetic when I actually get there. After all, it’s not an anniversary without some cake. Or not in my world, at least.

So, stay tuned for that.

Today, though, I’ve got some really, really, really good brownies.

With lime.

And flakes of sea salt.

Like the margarita of brownies.

Brownies with Lime and Sea Salt

But, you know, without the booze. (Unlike these and these. Oh yeah.)

I had bookmarked them a while ago from the Kitchn, which is a fabulous resource for recipes and kitchen tips. And then kind of forgot about them — surprising considering my love of all things citrus.

But as I was getting ready for (après) ski weekend a few weeks ago, they popped back into my head. (Après) ski weekend is becoming an awesome tradition. We rent a house right at Kicking Horse, pack up lots of goodies to eat (and maybe a couple of bottles of wine, ahem) and then hang out for the weekend. The others ski and board, but the mountain is a bit advanced for me, so I just do the après part. All the hot tubbing, snacking, reading and laughing, none of the actual hurtling down a mountain. Good times!

These brownies totally delivered on all my expectations. They were darkly rich, slightly sweet with the tang of lime and kiss of sea salt.

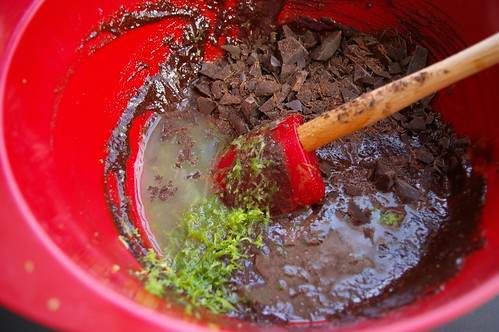
The most unexpectedly amazing part of these were the chunks of unsweetened chocolate that you stir in before baking. After, they’re these little pockets of chocolate-y goodness and they taste as if they are dark or semi-sweet chocolate. The addition just takes these brownies over the edge.

Well, that and the lime, of course.

We didn’t manage to eat them all over the weekend. (No judgment; I had also packed some Bourbon Blondies and, of course, the Dark Chocolate Chunk Cookies. Plus, everyone brought lots of other delicious dishes for dinner and the world’s supply of chips. Did I mention it’s a very good weekend?) So I took the rest in to work where they were gobbled up.

And now that I know how good they are, I certainly won’t be waiting until the next (apres) ski weekend to make another batch.
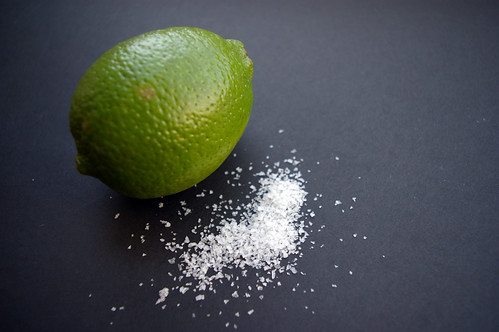
Lime and Salt

Brown, green and red

A sprinkle of salt

Brownie with Lime and Sea Salt

Brownies with Sea Salt and Lime

Adapted ever so slightly from The Kitchn.

  • 1/2 cup + 2 tablespoons unsalted butter
  • 4 ounces bittersweet chocolate, chopped coarsely
  • 1 cup sugar
  • 3/4 cup all purpose flour
  • 1/4 cup Dutch process cocoa powder
  • 2 large eggs, lightly beaten
  • 1 teaspoon vanilla
  • 1/4 teaspoon kosher salt
  • 1 lime, juiced and zested
  • zest of 1 lime
  • 2 ounces unsweetened chocolate, finely chopped
  • 3/4 teaspoon flaky sea salt

Preheat oven to 325F and line an 8×8-inch baking pan with parchment paper, leaving the paper extra-long and hanging over two sides.

In a medium saucepan, melt the butter and bittersweet chocolate over medium-low heat. Stir until smooth.

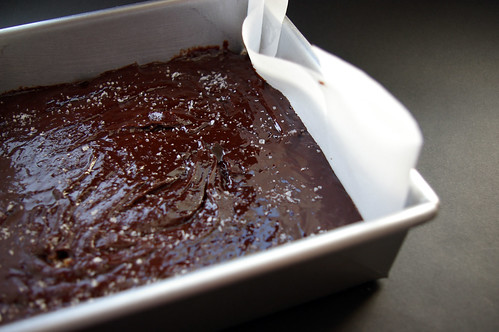
Remove pan from the heat and add the sugar, flour, cocoa powder, eggs, vanilla and kosher salt. Mix until combined. Then add lime juice and zest, as well as the finely chopped unsweetened chocolate. Stir to combine and pour into prepared pan. Sprinkle the sea salt on the top.

Bake for 30 to 35 minutes or until a tester comes out moist. It will not be perfectly clean, but it shouldn’t be sticky either. Allow pan to cool on a wire rack for 15 minutes before removing brownies from pan. To remove the brownies, run a knife around the sides of the pan to help release the brownies, then lift out the parchment paper. Place the brownies on the paper back on the wire rack. Cool completely and cut into 2 inch squares.

Continue Reading

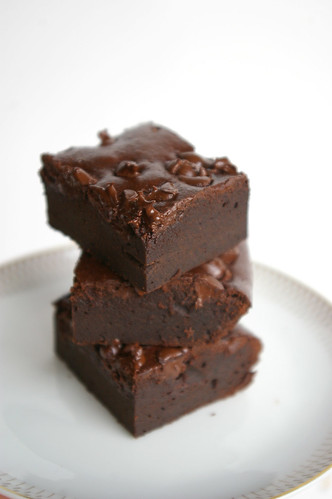
Guinness Brownies

I first heard about Guinness Brownies through another blog, but forgot to bookmark it and couldn’t remember where I had seen it. I had sent the link to a friend who’s a fan of beer-based baking, but then thought it would be nice to just make them for her instead. A quick Google search brought up myriad other blog posts, including the one I had seen originally, as well as some other variations. After cruising through a bunch, I realized most of them were riffs on one standard recipe — one I liked much more than the recipe I had first come across.

Guinness Brownies II

Now, normally, I like to leave recipes alone for the first attempt, figuring I need to give it a chance to wow me before I make changes. But most of the versions I found called for white chocolate, which I loathe. And I knew it would cook out and be undetectable in the final brownie, but I still wasn’t keen on buying white chocolate just for this recipe. One other blogger had subbed in milk chocolate chips, which seemed like a good idea to me. I think the object here is chocolate-y sweetness and milk chocolate can certainly achieve that, with the bonus of being an ingredient I can use in other things.

Random rant: why do they sell baking chocolate squares in packages of 6 ounces? Most of the recipes I’ve come across call for 8 ounces, which means buying two packages and then letting the remaining four ounces sitting around in the cupboard (where, yes, I am likely to forget I have them and then go buy more. I really need a more organized baking cupboard).

Cracking a beer at 11 a.m. felt a bit funny, though it’s not my first time. (Those Guinness Cupcakes are also an excellent recipe, if you’re looking for something else to do with the dark Irish beer.) And I was a bit nervous about cooking it down. I’m not a huge beer fan and was afraid reducing it and intensifying the flavour would make it stand out far too much in the final brownies. Plus, it did seem a bit weird to cook beer.

But what do I know?

Not much apparently because these were fantastic. They were rich and dense, flavourful but not overly beer-y. A definite keeper.

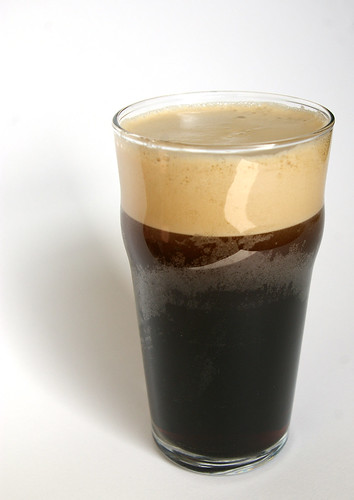
Guinness

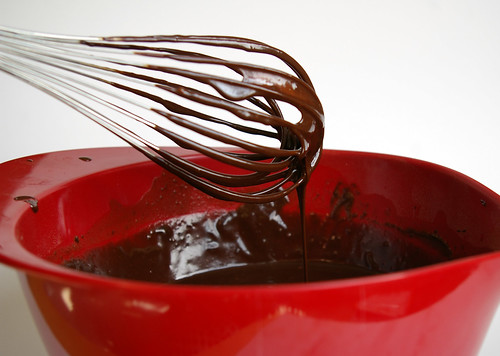
Guinness Brownie Batter

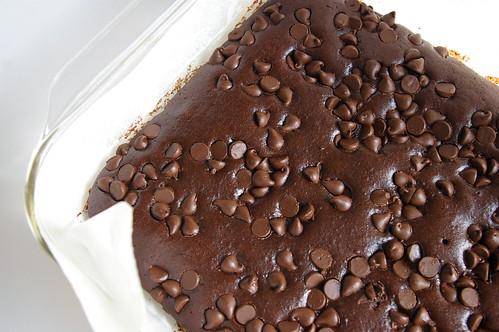
All Baked Up

Guinness Brownies I

Guinness Brownies III

Guinness Brownies

This is a hybrid recipe from a couple of sources, but I have to give Bitchin’ Camero a shout out because that is a seriously awesome blog name and Blondie’s Cakes for the smart idea of reducing the Guinness for additional flavour.

  • 1 cup all-purpose flour
  • 3/4 cup unsweetened cocoa powder
  • 1/4 teaspoon salt
  • 6 tablespoons unsalted room temperature butter, cut into cubes
  • 8 ounces dark bittersweet chocolate, chopped (I used 6 ounces of bittersweet and 2 of 70 per cent dark chocolate)
  • 3/4 cup milk chocolate chips
  • 4 large eggs, at room temperature
  • 1 cup granulated sugar
  • 2 bottles Guinness beer, reduced to 1 1/4 cups
  • 3/4 teaspoon vanilla
  • 1 cup semi-sweet chocolate chips
  • icing sugar for dusting (optional)

Preheat the oven to 375 degrees F. Line a 9 x 13-inch baking pan with parchment paper.

In a medium bowl, whisk together flour, cocoa powder, and salt until evenly combined. Set aside.

In a double boiler set over low heat, melt butter, bittersweet chocolate and milk chocolate chips. Remove from heat.

In a large mixing bowl, beat together eggs and sugar on high speed until light and fluffy. Pour in melted chocolate mixture and beat until combined.

Add flour-cocoa mixture and beat until just combined. Whisk in cooled Guinness and vanilla. (It will take a few minutes for the beer to incorporate. I used more of a folding technique with the whisk for the first minute or two to keep everything from slopping everywhere.)

Pour into prepared pan. Scatter over semi-sweet chips.

Bake 25 to 30 minutes, until a toothpick inserted in the centre comes out clean. Note: mine only took 24 minutes; start checking at the 20-minute mark.

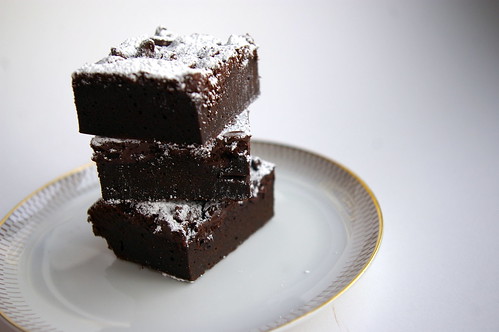
Let brownies cool. Dust with icing sugar if using and serve.
Continue Reading

Dark Chocolate Chunk Cookies

What’s the sign of a good recipe?

When you make it twice in one week. (And kind of wish you had the ingredients to make it again as you’re blogging about it.)

My friends, this is that kind of recipe.

And it’s for chocolate chunk cookies.

Milk and dark chocolate chunk cookies

I didn’t think there was anything revolutionary about chocolate chip cookie recipes. (Barring, of course, the New York Times one that pretty much everyone has tried, except me. One day, I will try this. It’s the same day I have a fridge large enough to store a bowl of cookie dough for a minimum of 24 hours. One day.) I was mistaken.

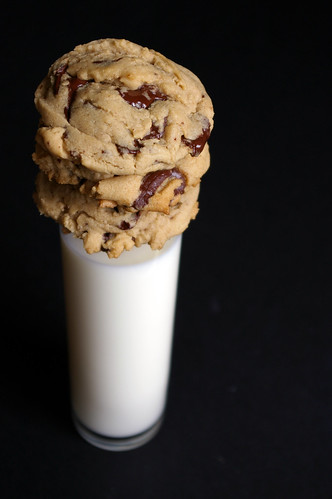
These are chewy delights of soft cookie with melty bits of dark chocolate. They are cookie perfection.

Dark chocolate chunk cookies I

I just really wanted to make some cookies one night last week, but had not put any thought into what kind. I innocently tweeted out I had a hankering to bake and my friend Robyn suggested I make these cookies from Anna Olson. I was intrigued by the addition corn starch, which Olson says gives the cookies a chewy centre.

And, perhaps more importantly, I knew I had all the required ingredients, including an assortment of dark chocolate bars that I wasn’t quite sure what to do with. One of the ones I ended up using was a more traditional thin, flattish bar, while the other was about a 1/2-inch thick.

I used my awesome cookie scoop to portion out the dough, which made these nice rounded, perfectly portioned balls of dough. What surprised me when they baked, though, is that there really wasn’t very much spread. They remain nicely thick and I’m sure that contributes to the chew.

I ate a couple that night, then took some in for work where people devoured them.

So, when it came to attending my first tailgate on Saturday (I know, I know, but I’m from Vancouver; we’re not really tailgate people), I knew exactly what I wanted to bring. And not just because I really wanted to eat some myself. But, yeah, that was part of it.

This time, I used two flat, thin bars of 70 per cent dark chocolate. I broke them into smaller pieces with my meat tenderizer. Let me tell you, that was oddly satisfying. And the end result was really nice. The pieces melted into strata of cookie and oozing chocolate. It was heavenly.

And for that, this is my new go-to cookie recipe.

Smashed chocolate

Dark chocolate chunk cookie dough

Scooped dough

Dark chocolate chunk cookies I

Milk and dark chocolate chunk cookies

Dark chocolate chunk cookies

Milk and dark chocolate chunk cookies

Dark Chocolate Chunk Cookies

This is, essentially, exactly as Anna Olson dictates, but I’ve made a few changes to the instructions and called for dark chocolate instead of bittersweet.

  • 3/4 cup unsalted butter, softened
  • 1 cup brown sugar
  • 1/4 cup granulated sugar
  • 1 egg
  • 2 teaspoons vanilla extract
  • 2 cups all-purpose flour
  • 2 teaspoons cornstarch
  • 1 teaspoon baking soda
  • 1/2 teaspoon salt
  • 8 ounces dark chocolate, cut or broken into chunks

Preheat oven to 350F.

Cream butter and both sugars until smooth. Add egg and vanilla and blend in.

In a separate bowl, whisk together flour, cornstarch, baking soda and salt. Add to butter mixture and mix until just blended. Fold in chunks of chocolate.

Line baking sheet with parchment paper. Drop cookie dough by spoonful onto the lined sheet and bake until just golden brown around the edges, between 8 and 10 minutes.

Continue Reading

Chocolate Lime Cheesecake

The problem with getting behind in blogging is you start to forget why you made something in the first place.

OK, that might not be a problem others have. This may be particular to me.

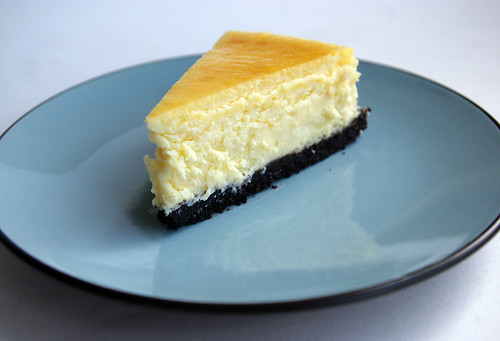
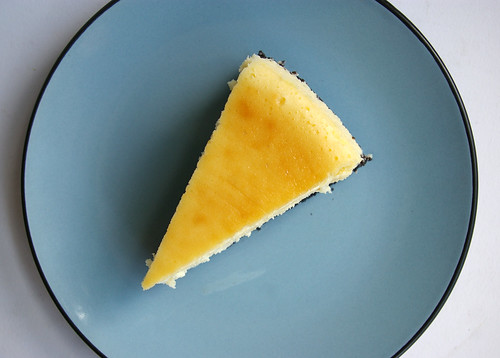
Chocolate Lime Cheesecake Slice I

I think I came up with the idea of making a Chocolate Lime Cheesecake while flipping through cookbooks one night and remembering this had been on my to-do list for eons. I’m almost sure I had pulled Nigella Lawson’s Nigella Bites from my (overstuffed) shelf looking for one of her salad recipes when I re-stumbled across this one. And it occurred to me, since it was a long weekend and I was going to be working on the stat holiday, that I should bake this up and bring it in to the rest of the Calgary Herald crew working on the holiday Monday just like I used to when I was over in the city section. (Back then, I worked Sundays every week and I often baked and brought in goodies for what became known as Civilized Sundays, which would see us sitting around at 10 a.m. eating cake and listening to the police scanner. And reading our horoscopes.)

Then, and I do remember this correctly, I told the people who I knew would be also working that I was going to bake a cheesecake, which actually made me do it.

And, man, am I glad I did.

Nigella, my friends, she knows her stuff.

You know I love lime. It’s no surprise I also like chocolate. These two together are a very nice, very unexpected treat.

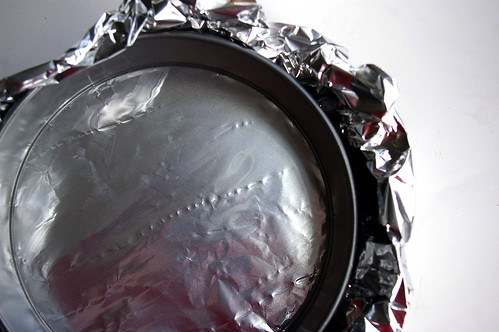
It may seem a bit fussy, but I followed all the instructions, including baking it in a water bath, which is a relatively common suggestion for baking cheesecake (a gentler way that theoretically keeps the top from cracking but always seemed like an unnecessary additional step). And I think it is indeed worth it. And the trick of snapping the aluminum foil into the springform pan (which sounds more confusing than it actually is) really does protect the crust and cake from any water.

Aluminum foil-wrapped pan

However, I must also add that I bought extra-wide aluminum foil thanks to the suggestion of my friend, Colette, who knew such a thing existed. Thanks Col! That way there was no panic about making sure the various pieces were secure enough. I would recommend this as a great way of alleviating any concern over seepage.

Seepage. What an odd thing to be mentioning on a food blog.

And, goodness, this is a very scattered post, isn’t it?

To summarize: this cheesecake is tasty. I enjoyed it. So did my friends. Make it. Don’t wait as long as I did to do so.

End.

Chocolate Lime Cheesecake I

Chocolate Lime Cheesecake II

Chocolate Lime Cheesecake Slice I

Chocolate Lime Cheesecake Slice I

Chocolate Lime Cheesecake

Straight from Nigella Lawson’s Nigella Bites.

  • 7 ounces chocolate wafer cookies
  • 1/3 cup unsalted butter, melted
  • 1 1/2 pound cream cheese (recommended: Philadelphia)
  • 1 cup sugar
  • 4 whole eggs
  • 2 egg yolks
  • 4 limes, juiced or 3/4 cup

Special equipment: springform pan

Preheat oven to 350 F.

Place a large overlapping piece of aluminum foil over the bottom of the springform pan, and then insert pan ring over it. Fold the foil extra foil up and around the pan and place the whole thing on a second piece of foil, also folding it and pressing it securely around the pan, having a water tight covering.

In a food processor, process cookies until they are crumb-like, add melted butter and continue to process. Pour crumb mixture into springform pan and press with your fingers to line the pan. Place the pan in the refrigerator to set while you prepare the cheesecake.

Place a kettle of water on for water bath. In a food processor beat the cream cheese until smooth, add the sugar, eggs, egg yolks, and lime juice.

Take crumbed pan from the refrigerator and place it in a roasting pan. Pour the cheesecake mixture into the crumb pan, and then carefully pour the hot kettle of water into the roasting pan so the water reaches 1/2 way up the pan so the water does not splash into cheese cake.

Place roasting pan in oven for 1 hour, checking after 50 minutes. It should feel set, but still wobbly in the center. Take the roasting pan out of the oven, carefully remove the springform pan from the roasting pan and place it on a rack. Peel off the outer layer of foil, and tear away the side bits of the first layer of foil and leave the pan to cool. Once the cake comes to room temperature, place it in the refrigerator for 20 minutes before serving. Transfer to the plate you’re going to serve it on, a plate without a lip, or a cake stand. Unclip the springform pan and remove the outer part. Carefully lift the cheesecake removing the metal bottom. The aluminum foil can stay on the cake. Serve chilled.

Continue Reading

Flourless Chocolate Cake

A milestone slipped past last week.

I took note of it, but said nothing because there was no point in celebrating unless there was cake.

Slice of Cake III

Actually, the original plan was to make a salted caramel tart but, once again, pastry bested me. One day, pastry. One day! Truth be told, it was flaky as all get out and tasted great, but uneven rolling led to some parts being more cooked than others and there were slumping and shrinking issues. My theory is that I’m actually not putting enough weight in when pre-baking and then taking the beans out too quickly. It worked much better with the second shell, which didn’t slump as much, but the unevenness of the baked pastry was a little more than this mostly-perfectionist could handle.

No matter, there was a back-up plan. Albeit one that would have to wait until post-milestone.

See, it’s my blog’s third birthday.

Three years.

Craziness.

I remember first broaching the idea with some friends after we had been out at the pub. We were outside, in the frigid cold, saying goodnight when I just sort of threw it out there. “I’m thinking of starting a food blog.”

And since then there have been many baking projects and, thankfully, many happy eaters. (A special thanks must go to the Civilized Sunday crew at the Herald who willingly — and, occassionally, expectantly — ate what I brought to work on the weekend shift. Cake for breakfast? Yeah, that was a good tradition.

There have been amazing times  and incredibly tough times.

So, I’m interested to see what the next year (and more) will bring.

For the last three years, I’ve kicked off the start of a new blogging year with cake. First, there was the inaugural Red Velvet Cake (wee bit embarrassed by the photos back then, but moving along), followed by a much-better version for my first blogiversary and then a triple layer chocolate cake last year.

This year is only slightly different. It’s still cake, but it’s a decadent and rich, truffle-like Flourless Chocolate Cake.

Slice of Cake II

At least in this case, unlike the pastry situation, slumping is expected.

This cake is deeply, darkly rich, ironically lightened by a topping of whipping and sour creams, beaten with icing sugar. (Or, if you think you have tons because there’s always about six bags in the cupboard where they appear to multiply like bunnies until the day you need some and then there isn’t any, a little bit of berry sugar will do the trick.) And it is Oh. So. Good.

I actually heard about it over Twitter from the gang at Real Simple one day. Made it a few days later for friends and was still thinking about it months later and how I really needed to make it again. That’s the sign of a good cake, I figure. (Original recipe here. Though I haven’t really made any changes.)

Baking like this is so lovely. I especially love adding the chopped chocolate to the hot butter-and-cream mixture and then stirring, stirring, stirring as it changes from a curdled-looking mass to silky smooth melted chocolate. And how it comes out of the oven all puffy and light looking before collapsing into a deeply dark slump of rich chocolate cake. The slight tang in the dollop of the whipped cream takes it to a whole new level.

I ate one slice and gave the rest away to friends. Now, as it nears bedtime, I wish I had saved myself just another sliver. Ah well. Reason to make it again soon.

This recipe is fantastic, but I would add a pinch or two of salt. I really feel that a tiny bit of salt in sweet things rounds them out. In this case, I didn’t quite have enough unsalted butter, so about half of the butter was salted. I think it worked perfectly and I may do this from now on. Only have unsalted? Just add a pinch or two of regular table salt.

Chopped Chocolate

Melted Chocolate

Batter in Pan

Puffed out of the oven

Slumped cake

Cake Slice I

Flourless Chocolate Cake

  • 1 cup unsalted butter, cut into pieces, plus more for the pan
  • 1/4 cup unsweetened cocoa powder, plus more for the pan
  • 1 1/4 cups whipping (heavy) cream, divided
  • 8 ounces bittersweet chocolate, chopped
  • 5 large eggs
  • 1 cup granulated sugar
  • 1/2 cup sour cream
  • 1/4 cup icing sugar, plus more for dusting
Heat oven to 350° F. Butter a 9-inch springform pan and dust with cocoa powder.
In a medium saucepan, heat the butter with ¼ cup of the whipping cream over medium-low heat until the butter is melted. Add the chocolate and stir until melted and smooth; remove from heat.
In a medium bowl, whisk together the eggs, granulated sugar, and cocoa powder; whisk in the chocolate mixture.
Transfer the batter to the prepared pan and bake until puffed and set, 35 to 40 minutes. Let cool in the pan for 1 hour. Run a knife around the edge of the cake before unmolding.
Using an electric mixer, beat the remaining 1 cup of whipping cream with the sour cream and icing sugar until soft peaks form. Dust the cake with confectioners’ sugar and serve with the whipped cream.
Continue Reading

Contests are So Nice

I’m a bit late to the party on this one, but there’s nothing like a tight deadline to get the creative juices going, right?

I was approached a couple of weeks ago and told about the contest that has been put together by So Nice, the soy beverage company. They’re asking people the question: How would you spend $5,000 toward a better organic world?

The answer will give one person the $5,000 to put their plan into action.

The hitch? The deadline is December 31, so it’s time to put your thinking caps on.

I’ve been trying to make some changes to green my world, so to speak. Eating more local food, eating organically a little more often, stepping up my recycling efforts. None of this is earth-shattering; it’s just simple everyday stuff that isn’t too hard to incorporate into everyday living.

But that’s just me.

But what about you? You probably have some big plans or cool ideas.

If you think you’ve got a winning idea (or not even; you can just go and vote on those others have put forward), head to the So Nice Facebook page and enter. Who knows, maybe you’ve got a winner.

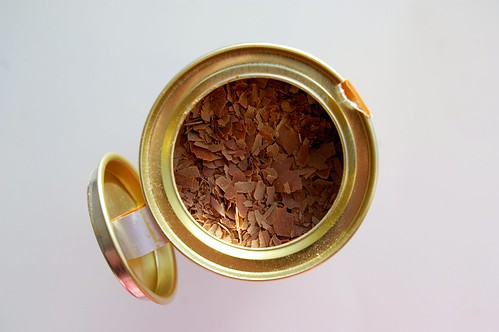
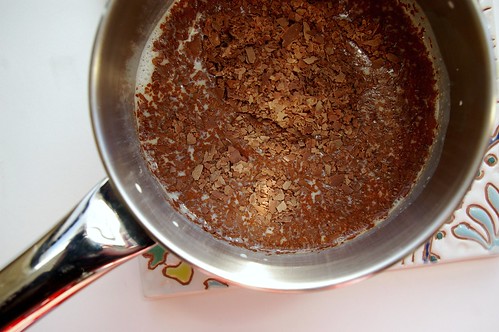
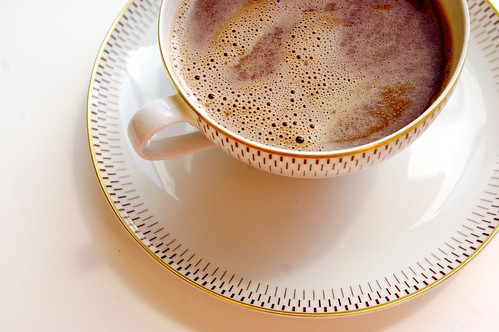
I have to admit, I don’t usually go for soy milk, but as part of the pitch I was given some of the So Nice original and these hot chocolate shavings from Cocoa West, an organic chocolatier located on Bowen Island (a very quick ferry ride from North Vancouver). I had never seen anything like them. Instead of a powder, they were literally small shavings of chocolate that easily melted into warmed milk (or, in this case, warmed soy milk). Heat, whisk, drink.

Yeah, it was good.

Disclosure: I was sent So Nice beverage and the chocolate shavings, along with information about the contest. There was no obligation to blog about any of it. I have chosen to because I think it’s a cool contest and the hot chocolate was tasty. Plus, you know, I was just fascinated with the hot chocolate shavings idea and thought it would be cool to tell you about it.

So Nice and Cocoa West Hot Chocolate

Cocoa West

Hot Chocolate - the beginning

Hot chocolate


Continue Reading

Goodbye Cake

I have a new job!

After more than a dozen years of covering news at newspapers all over hell’s half acre in B.C. before finally making it to the big leagues — the Vancouver Sun, the Globe & Mail and, now, the Calgary Herald — I have just taken over as the new full-time, permanent food writer for the Herald.

In my time as a news reporter, I’ve written about the birth of a baby beluga, health care, education, dinosaurs in Tumbler Ridge, BC, the deaths of three women killed by men they once loved even after reporting their safety concerns to RCMP. I’ve spoken with ministers and a minor celebrity or two. I’ve sat through heartbreaking testimony and watched people break down in courtrooms. I’ve cried with the family members of homicide victims.

I’ve loved it and hated it, been moved by stories and frustrated by them too.

And now I’m trading covering crime and calamity for cake, the seedy underbelly of the city for pork belly and so on.

It is, no doubt, a dream job and I’m excited. But it wasn’t without some sadness that I left the great team of city reporters. (OK, yes, I basically just moved my stuff about 20 feet from my old desk and I’m still sitting right next to my city peeps, but it’s a whole different world.) Most of all, I miss the camaraderie of so-called Civilized Sundays when I’d bring in baking, like red velvet cake, which we would eat while listening to the police scanner. It’s not so much that I miss working Sundays (because I think I could really get used to this Monday-Friday thing), it’s the ritual of it all.

So, of course, on my last city shift, I had to bring in a cake!

Iced Cake II

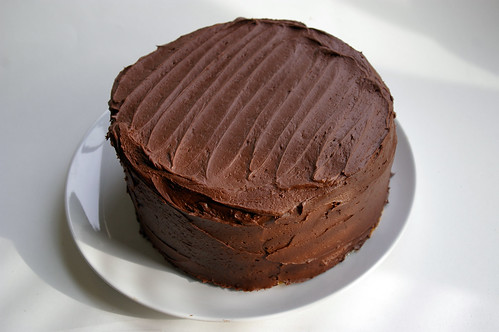
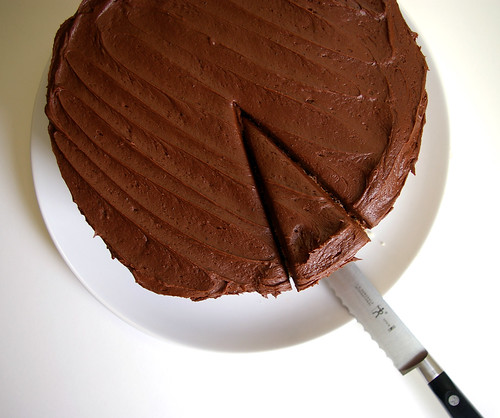
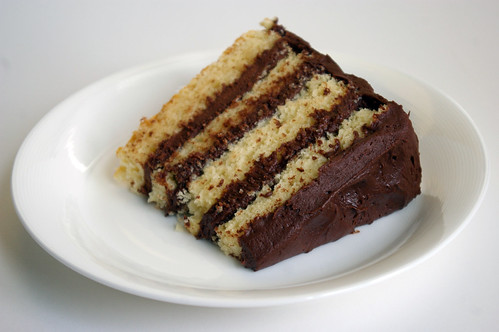
I did a really informal twitter poll and people voted for a vanilla cake with chocolate frosting. So, I found a recipe for both and got to work a few weekends ago. And, once it was baked, I thought it would be even better to slice the cake layers in half, double the icing and go for a quadruple-layer cake. For the most part that went well, barring some uneven slicing that led to some repair work to one of the layers. I hoped for the best cutting into it that I would bypass where things had gone sideways, but luck isn’t usually on my side. And it wasn’t this time around. So the beauty shot of the slice isn’t as good as it could be. (No doubt also because I didn’t let it cool down after putting on the icing, which would have made for a cleaner cut. But I was impatient (as usual) and just wanted to try a piece of the damn thing.

Barring that one piece, I gave half to some friends who just had a baby and took the rest in to work. Yes, we ate it for breakfast. And that made it perfect.

The cake recipe comes from Rock Recipes (though I have no idea how I stumbled on it originally), while the icing is from Joy of Baking.

Though both were fantastic, I wish I had tried something a little less overwhelming with the cake, like a lemon or basic buttercream. I have a feeling the chocolate icing overpowered the extremely vanilla cake instead of letting them better each other together.

Both are fantastic, though, and well worth trying on their own.

Vanilla Cake batter

Chocolate icing

Whipped chocolate icing

Iced Cake

Cake slice

Slice of cake

Vanilla Cake

  • 1 1/2 cups cake and pastry flour
  • 1 1/4 cups all-purpose flour
  • 2 1/2 teaspoons baking powder
  • 1/4 teaspoon salt
  • 1 cup unsalted butter, at room temperature
  • 2 cups sugar
  • 4 eggs at room temperature
  • 4 teaspoons vanilla extract
  • 1 cup undiluted evaporated milk

Preheat oven to 325.

Sift together flours, baking powder and salt. Cream the butter and sugar until fluffy and pale. Add, one at a time, the eggs, beating well after each to make sure they are fully incorporated. Beat in vanilla. Gently fold in the dry ingredients, alternating with the evaporated milk, in three parts, starting and ending with the dry ingredients.

Divide batter evenly between 2 well greased 9-inch cake pans. (I also put parchment circles on the bottom to ensure a good release.) Bake in oven for about 35 to 40 minutes or until an inserted toothpick comes out clean. Let cake rest in pans for 5 minutes before turning out onto a wire rack to cool completely.

Chocolate Frosting
(I doubled this recipe to have enough for a quadruple-layer cake. This is the recipe in its original measurements.)
  • 8 ounces bittersweet or semisweet, chopped
  • 1/4 cup cocoa powder
  • 3/4 cup milk
  • 1/2 cup unsalted butter, cut into pieces
  • 3 cups icing sugar, sifted to remove lumps
  • 1 1/2 teaspoons pure vanilla extract

In a stainless steel bowl placed over a saucepan of simmering water, put the chopped chocolate, cocoa, milk, and butter.  Stir until the chocolate has melted and the mixture is smooth.  Remove from heat and beat in, with a hand mixer or wire whisk, the confectioners sugar and vanilla extract.  If the frosting is lumpy, strain through a strainer to remove any lumps.  Cover and place the frosting in the refrigerator until it is firm (this may take a few hours).  Once the frosting is firm remove from refrigerator and place in your mixing bowl.  Beat the frosting for a minute or two or until it is nice and smooth and of spreading consistency.

Continue Reading

French Silk Pie

I love Jason Segel.

He meets most of my criteria for ideal man: tall, not overly thin nor athletic and oh-so-funny. (Or, as my friend once described as “tall, broad, goofy guy.”) You can have your pretty boys, girls. Give me a man who can make me laugh and I’m a smitten kitten.

I know this isn’t really the place for romantic confessions, you know, being a food blog and all. But, sigh. And, I swear, it’s relevant.

Chilled and ready

I missed the first season of How I Met Your Mother because I couldn’t figure out when the program was on. Some kind friends lent me it and season 2 on DVD. I’m not admitting anything but I may have watched them both in just a handful of days. That started a lovely tradition of discussing each episode on Tuesdays over email and getting together for season finales.

My crush on Segal started there and has continued through Forgetting Sarah Marshall and then I Love You, Man. (Even though his hair in I Love You, Man was beyond ridiculous and, unfortunately, spilled over into HIMYM because I guess they were filming bits of both at the same time.) (And, may I add, my love of him has absolutely nothing to do with the full-nude scene in Sarah Marshall. Ahem.)

This year, my friends and I set up the date as soon as we knew when the finale was going to air. I, naturally, offered to bring dessert. But, while Dawn and I are fans of anything lemon, Chris is less than interested in citrus desserts. For him, it’s chocolate all the way. I’m not against broadening my horizons away from lemon and I felt like it would be nice to cater to someone else’s tastes for once. Plus, c’mon, chocolate pie? I’m still all over that.

I thought this would be great with a straight-up pie crust and tried that vodka pastry recipe from Cook’s Illustrated that set the baking world on fire. (It’s a wet, easily workable dough that uses part water and part vodka. The vodka evaporates leaving this stunningly flaky crust without all the fuss.) Yes, it was easy to work with and I think it would have been fantastic if I hadn’t rolled it so thin that the bottom got a little too brown. Not burnt, but brown enough that I just couldn’t bring myself to serve it to friends. Yes, I’m a perfectionist.

So, I then went with a graham cracker crust because
a) I had the ingredients
b) It’s a lot harder to screw up.

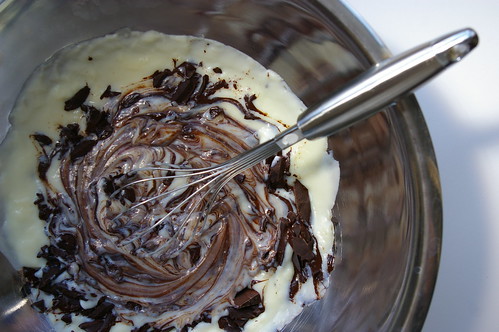
I loved photographing how this came together, especially the part where I got to mix in the chopped chocolate to the custard base, watching the cream and brown swirl together.

Mixing it in

The only hitch in all of it was this thing seriously took forever to set. That’s why there are no photos of slices because it was still setting while I was driving over to my friends’ house. I had set the tart tin on a baking sheet on the floor of my car and was freaking out every time I had to come to a stop as I watched the chocolate goo ripple slightly. We immediately put it in the fridge when I got there and let it chill for another three hours. It was perfect when it came time to cut in, but it was far too late for pictures. And, frankly, we just wanted to eat the damn thing.

It was so good.

Richly chocolate, smooth without being gloppy. It slumped ever-so-slightly in that perfectly decadent way. As if it was so full of goodness that it couldn’t contain itself.

I have it on good authority (OK, he was dimed out by his wife) that another slice or two went down after I left before bed time.

Yeah, it’s that good.

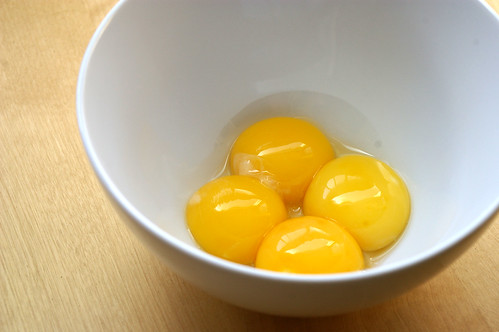
Yolks

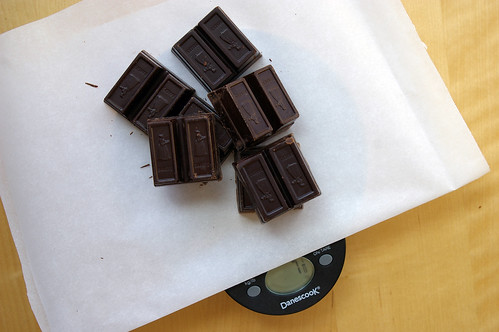
Weighing the chocolate

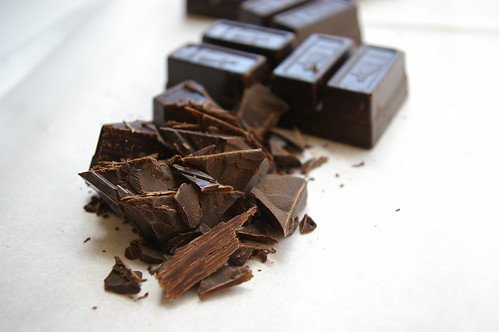
Chopped chocolate

Custard and chocolate

Time to chill

Chilled and ready II

French Silk Pie

For crust:

  • 1 1/3 cups graham cracker crumbs
  • 5 tablespoons unsalted butter, melted
  • 1/4 cup sugar

For filling:

  • 2/3 cup sugar
  • 1/4 cup cornstarch
  • 1/2 teaspoon salt
  • 4 large egg yolks
  • 3 cups whole milk
  • 5 oz fine-quality bittersweet chocolate, finely chopped
  • 2 oz unsweetened chocolate, finely chopped
  • 2 tablespoons unsalted butter, softened
  • 1 teaspoon vanilla

For topping:

  • 3/4 cup chilled heavy cream
  • 1 tablespoon sugar
  • 1 tablespoon cocoa powder, for dusting OR a small chunk of dark chocolate, shaved with a grater or rasp

Crust:
Put oven rack in middle position and preheat oven to 350°F.

Stir together crumbs, butter and sugar and press into 9″ pie plate or tart tin. Bake until slightly golden, about 15 minutes. Let cool on a rack.

Filling:

In a heavy-bottomed pot, whisk yolks, sugar, cornstarch and salt until well combined. Add milk in a stream, while still whisking. Over medium heat, while still whisking, bring to a boil. Reduce heat and simmer, still whisking, for about a minute. The filling will be quite thick.

Sieve the filling into a large bowl. Whisk in chocolates, butter and vanilla and stir until everything is melted together and fully incorporated. Cover with plastic wrap, pressing it against the custard mixture to keep it from forming a skin. Let cool completely, about two hours.

Spoon filling into cooled crust and then chill all together in the fridge for at least six hours. (Mine took more like eight.)

When ready to serve, beat whipping cream with sugar until it hold soft peaks. Cover pie and dust with cocoa powder or chocolate shavings.

Continue Reading

Flourless Chocolate-Walnut Cookies

There is often debate among brownie fans on whether it is better to be fudge-y or cake-y. I have mostly stayed away from this because I’m not enough of a brownie enthusiast to really care one way more than the other.

Besides, the only thing that really matters when it comes to the brownie is the slightly crisped edges and the crackled top. For me, that is where the beauty of the brownie lies.

But, let’s face it, unless you have one of those special “all edge” pans with their labyrinthine shape, someone is getting stuck with the middle bits.

And that’s how I thought things would always be, until I tried these flourless chocolate-walnut cookies.

Flourless Chocolate Cookies

OK, they are not brownies. For someone like me, they are even better. They are cookies that taste like the crinkled surface layer of a brownie with its slight chew and crackle goodness, studded with chunks of walnuts.

To be honest, flourless chocolate cookies were not high on my list of things to bake when I stumbled across the recipe. But I came upon it after I had put some egg whites in the freezer, unsure what to do with them after using up the yolks.

I could have saved them for a pavlova, but figured it was worth trying out something new.

The list of ingredients was straightforward, if not a bit puzzling. I’ve never measured out three cups of icing sugar for a cookie recipe before.

Nor was I actually convinced that the airy ingredients would transform in the oven to some sort of cookie delight.

However, it did have a few things going for it: I already had egg whites ready to go and the recipe reminded me of a package of cookies I bought from a chain store grocery store once.

I served them to friends with a dollop of vanilla ice cream sandwiched between: a gourmet version of the childhood treat. It seemed worthwhile to see if these could compare. Or, as the case ended up being, improve on the store bakery version. The chocolate chew and nuts in a tender cookie package were so right. And they were light and not overly sweet. (Though, that was dangerous too, as it was easy to eat more than one or two and feel I still had room for another.) Mine did not get as shiny as I have seen in other people’s photos of the same type of cookies.

Normally I’d get a bit worried. Or envious.

Why do mine look different?

But after sampling one — OK, several — of the cookies, I realized I didn’t care what they looked like. They were fantastic.

I have since found myself trying to find recipes that use up only yolks so that I can take advantage of this cookie recipe again.

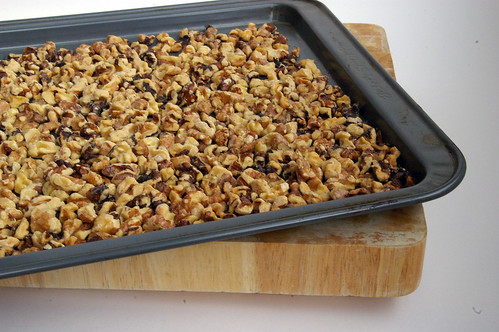
Toasted walnuts

Cocoa and Icing Sugar

Cocoa Sugar mix

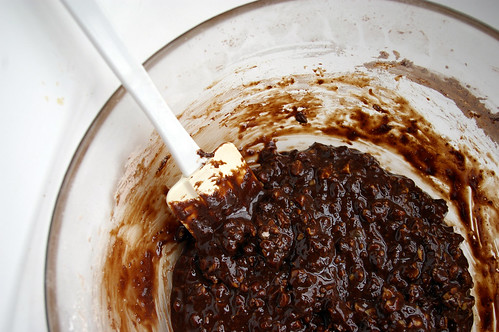
Flourless chocolate cookie batter

Cookie dough puddles

Chewy goodness

Francois Payard’s Flourless Chocolate-Walnut Cookies

from New York magazine

  • 2¾ cups (675 mL) walnut halves
  • 3 cups (750 mL) confectioners/ icing sugar
  • 1/2 cup plus 3 tbsp (170 mL) unsweetened Dutch process cocoa powder
  • 1/4 tsp (1 mL) salt
  • 4 large egg whites, at room temperature
  • 1 tbsp (15 mL) pure vanilla extract

Preheat oven to 350°F (180°C). Spread the walnut halves on a large-rimmed baking sheet and toast in the oven for about 9 minutes, until they are golden and fragrant. Let cool slightly, then move the walnut halves to a work surface and coarsely chop them.

Position two racks in the upper and lower thirds of the oven and lower temperature to 320°F (160°C). Line two large-rimmed baking sheets with parchment paper.

In a large bowl, whisk (or use an electric mixer on low speed) the confectioners’ sugar with the cocoa powder and salt followed by the chopped walnuts. While whisking (or once you change the speed to medium), add the egg whites and vanilla extract and beat just until the batter is moistened. Do not overbeat or it will stiffen.

Spoon the batter onto the baking sheets in 12 evenly spaced mounds, and bake for 14 to 16 minutes, until the tops are glossy and lightly cracked; shift the pans from front to back and top to bottom halfway through to ensure even baking.

Slide the parchment paper (with the cookies) onto 2 wire racks. Let cookies cool completely, and store in an airtight container for up to 3 days.

This story first appeared in the Real Life section in the Calgary Herald. For more delicious recipes, visit CalgaryHerald.com/life.

Continue Reading

Dolly Bars

I like my blog stats. I’m always interested to see where people are coming from or what search words have led them to my little site. I am usually grateful to anyone and everyone who has linked up to my blog and I am quick to investigate a referrer when I’m getting more than a handful of hits coming in from a particular place.

So, when I saw I was getting visitors from a bulletin board on the America’s Test Kitchen website, I got curious.

I wish I hadn’t.

It was a discussion linking back to my rhubarb crumb cake post (which seemed odd, how did they even find that one particular post) with the subject of: Okay, guys, am I the only one who thinks this photo is great?

At first I thought she was referring to my rhubarb and/or cake photos, but it turned out she was referring to my blog’s header. Me and my red patent shoes and my red mixing bowl.

There were a few nondescript responses. And then the original poster said something that left me feeling like ice. I think it’s a good thing that I don’t have a photographic memory because it’s probably best I don’t remember the comment exactly. Instead, I’ll give you a summary: It looks as if this woman and her “pleasantly plump” calves (because that I do remember) has eaten everything before it could go in the oven and has had to lie down to digest it all.

And then, further down, another comment that struck even deeper.

No (Original Poster), when I opened the link and saw that across the top, I thought “Wa-huh? Did she get murdered while she was stirring her cookie dough? Or did she go into a diabetic coma from too much sugar? Or is she trying to look alluring with that red plastic bowl from Target and the red plastic shoes from Payless?” I couldn’t quite figure out the point of the picture.

It certainly does not make me want to eat….her cooking.

I felt ill to read that.

I have long known the Internet to be a place where meanness spreads easily. After all, I’ve read the comments on some of my articles for the Herald. People are quick to criticize or make mean comments. Anonymity, no doubt, plays a significant role in how people choose to comport themselves online.

And I know there is a valuable lesson in here about paying attention to the 99 people who like you and ignoring the one critic.

But here’s the problem.

These comments from these women confirmed all the things I feared people thought about me.

The original poster later took down her comments, editing the first post to say she had never intended to offend anyone. My initial reaction was to be appreciative that she seemed sorry. But, after a few minutes, I realized that her edited comment was just as strange. How did she not think people would be offended? Did she believe her comments were being made in a vacuum and the object of her criticisms would not find out? Likely, yes. But she was mistaken.

More than 60 people visited my site because of that bulletin board discussion. I have no idea what the others thought, but I can safely say that I’d prefer to get my traffic some other way.

And yes, a small part of me thinks they would probably be less mean if they had a nice slice of cake once in a while.

So, on that note, (she says, clapping her hands together), that is enough time wasted on that. Let’s eat something delicious!

Dolly Bars I

For elective choices in Grade 8 at high school (because there was no junior high in Vancouver and I’ll spare you the woes of being a 12-year-old girl going to school with 18-year-old boys who would never look at a kid like me) one could decide between food/wood/metal and home ec (food and sewing). I had no interest in working around giant saws that would probably take my finger off, so I chose home ec.

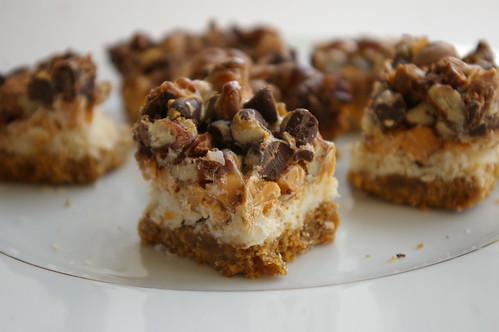
I don’t remember many recipes worth saving, except baby cheesecakes that used vanilla wafers for a crust and these things called Dream Bars. I kept the cheesecake recipe but have no idea where the one for the bars went, which is too bad because I think about them pretty often. (As in, more often than really is reasonable to reminisce about a baked good.) They were sort of chewy-gooey with a shortbread type crust and a sweet layer on top. I think there were pecans involved. And chocolate chips. And that’s about all I remember. I’ve googled until the cows come home, but nothing that calls itself a “dream bar” is actually what I remember.

And then I saw Dolly Bars. They seemed a reasonable facsimile and, therefore, worth a try.

I found this recipe on Smitten Kitchen who adapted it from Homesick Texan. I didn’t notice the discrepancy in the amount of sweetened condensed milk until after it became clear this recipe was a bit of a failure for me. A little more online research showed that almost every recipe calls for an entire can of the stuff, while the one I used called for about 1/3 of a cup. My toppings didn’t really stay stuck to the graham cracker base as a result. Still tasty, but a bit of a failure. So, I’m going to try this again and use the entire can.

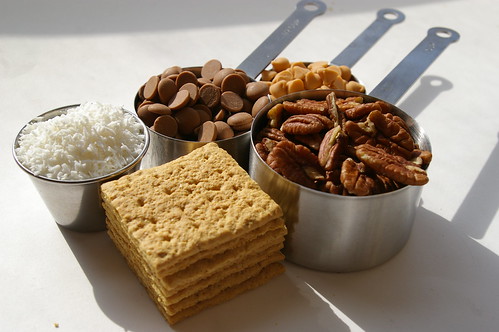
All the toppings

Condensed Milk II

Condensed Milk II

Dolly Bars before baking

IMGP1327

Dolly Bars II

Dolly Bars

  • 1/2 cup (1 stick) salted butter, cut into large pieces
  • 1 1/2 cups graham crackers crumbs (about 8 graham crackers, pulsed in a food processor)
  • 1 1/2 cups chocolate chips
  • 1 cup butterscotch chips
  • 1 cup shredded coconut
  • 1 cup pecans, coarsely chopped
  • 1 14 oz. can sweetened condensed milk

Preheat oven to 350 degrees.

Melt butter in microwave in heatproof bowl until just melted when stirred. Add graham cracker crumbs. Mix and then press evenly into the bottom of 8×8 baking pan.

Layer coconut, pecans, butterscotch and chocolate chips on top of graham cracker base. Pour sweetened condensed milk over whole mixture.

Bake in oven for 25 to 30 minutes, or until the top is light brown.

Continue Reading

Triple Layer Chocolate Cake

It’s my Blogiversary!

Two years ago I decided it was time for me to finally join the blogging world and I started up Patent and the Pantry as a way of celebrating my love of food and photography. But, let’s face it, mostly because of my love of food.

Chocolate Cake slice II

And I got a nice little present just in time for it. I just had my 200,000th page view. I never thought it would grow this much and I am so grateful to all my readers who have bookmarked my blog, forwarded recipes along and faithfully kept up with all my updates even if half of them have involved lemon recipes. Thanks too must go to all my friends and family, which have supported me in this little project.

Any good celebration requires cake. Or at least as far as I’m concerned.

I found this recipe while getting my hair done a few weeks back. Flipping through Bon Appetit, I came across this Chocolate Mayonnaise Cake and immediately wrote it all down with an eye of making it sooner rather than later. Although Red Velvet Cake was fun for the first entry and first anniversary, I wanted to switch things up this time around. And you can never go wrong with chocolate.

I took half over to Andree’s house to share with her. She has been a big supporter of P&P since I launched, offering tips, advice and gently encouraging me to do less baking, more cooking. So, I thought she might like it if she tasted some of the fruits of my baking labours.

The other half went in to work for my “Civilized Sunday” girls who are kind enough to eat all the baking I can’t keep at the house out of fear I will consume it all. Then we all sit around the desk at work eating goodies and reading our horoscopes . . . . And then, yes, we do get down to serious work because otherwise how would we fill the Monday paper?

The cake went over well, but I’m not entirely convinced it was as good as it could be. My main concern here is that the recipe indicates to beat the cake until well blended after each of the four additions of flour. I’ve always been told to go gently when adding flour to a cake and mix (not beat) only until blended because you don’t want to develop the gluten. I wish I had followed my instincts; I’m convinced this cake would have been even more tender. Not that anyone was complaining . . . .

So, if I attempt this again, I’m going to go gentle on the batter. I’m sure it will only improve things.

However, all that said, it was still a good little cake for a special little day.

Prepared pans

Melted chocolate and cocoa

Chocolate Cake Batter

Chocolate beaters

Chips and chunks for chocolate icing

Melted chocolate for the icing

Two layers

All iced up

Sky high cake

Chocolate Cake slice I

Chocolate Cake

  • 2 ounces bittersweet chocolate (do not exceed 61% cacao), chopped
  • 2/3 cup unsweetened cocoa powder
  • 1 3/4 cups boiling water
  • 2 3/4 cups all purpose flour
  • 1 1/4 teaspoons baking soda
  • 1/4 teaspoon baking powder
  • 1 cup sugar
  • 1 cup (packed) dark brown sugar
  • 1 1/3 cups mayonnaise (do not use reduced-fat or fat-free)
  • 2 large eggs
  • 1 teaspoon vanilla extract

Chocolate Frosting

  • 10 ounces bittersweet chocolate (do not exceed 61% cacao), chopped
  • 1 1/2 cups (3 sticks) unsalted butter, room temperature
  • 3 cups powdered sugar
  • 1 tablespoon vanilla extract
Preheat oven to 350°F.

Butter and flour three 8″ diameter cake pans with 1 and 1/2-inch-high sides. Combine chopped chocolate and cocoa powder in medium metal bowl. (I used a plastic bowl and it appeared to work just as well.) Add 1 and 3/4 cups boiling water and whisk until chocolate is melted and mixture is smooth. Sift flour, baking soda, and baking powder into another medium bowl. Using electric mixer, beat both sugars and mayonnaise in large bowl until well blended, 2 to 3 minutes. Add eggs 1 at a time, beating until well blended after each addition. Beat in vanilla. Add flour mixture in 4 additions alternately with chocolate mixture in 3 additions, beating until blended after each addition and occasionally scraping down sides of bowl. (Again, I’d take it easy here and only mix until just blended instead of beating it.) Divide batter among prepared cake pans (about 2 1/3 cups for each).

Bake cakes until tester inserted into center comes out clean, 30 to 32 minutes. Cool cakes in pans on racks 20 minutes. Run small knife around sides of cakes to loosen. Carefully invert cakes onto racks and let cool completely.

For the frosting, place chopped chocolate in medium metal bowl; set bowl over saucepan of simmering water and stir until chocolate is melted and smooth. Carefully remove bowl from over water; let melted chocolate cool until lukewarm, stirring occasionally.

Using electric mixer, beat butter in large bowl until smooth and creamy. Sift powdered sugar over butter and beat until well blended, about 2 minutes. Beat in vanilla. Add melted chocolate and beat until well blended and smooth, occasionally scraping down sides of bowl.

Place 1 cake layer on platter. Spread 3/4 cup frosting over top of cake layer to edges. Top with second cake layer; spread 3/4 cup frosting over. Top with third cake layer. Spread remaining frosting decoratively over top and sides of cake.

Cut cake into wedges and serve.
Continue Reading

Guinness Chocolate Cupcakes

I don’t like beer.

I was absent the night in university when my friends went to the grungy student pub, bought a pitcher and sat down, determined to acquire a taste for the stuff.

No idea where I was–I like to think I was responsibly studying somewhere–but it seems my decision means I will never really love beer the way I might have if I had sat in that smoky room with them.

Around St. Patrick’s Day, food bloggers were raving about cupcakes that included a rather unexpected ingredient: Guinness. Given my distaste for beer, I passed those entries by.

Frankly, the only thing that intrigues me about Guinness is the hypnotic rolling where the head meets the dark liquid in the pint glass just after it’s been poured. But I kept thinking about the recipes.

Cupcakes in profile

I think I was intrigued because they were so boldly unusual. Beer and chocolate? Really? Would the taste of stout be overpowering?Would it mellow into the background to add a perhaps unidentifiable richness? Or would it just be a chocolate cupcake with a good storyline?

It should come as no surprise this recipe comes from a British chef — Nigella Lawson — considering the other culinary oddities that have sprung from the United Kingdom. I mean, consider the blood sausage.
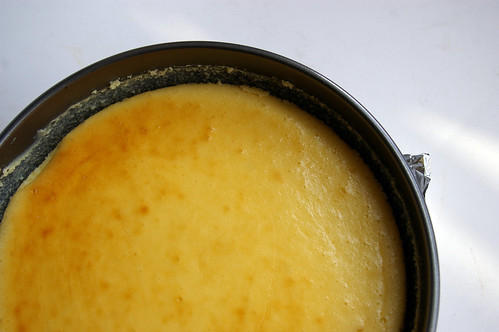
Her version makes an entire cake, though, and I prefer the idea of cupcakes, I suppose, for their portability. It is also much easier to pass them along to friends than a slice of cake. Leaving an entire cake in my fridge is not an option.
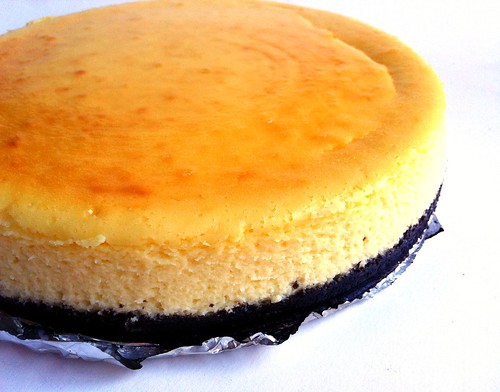
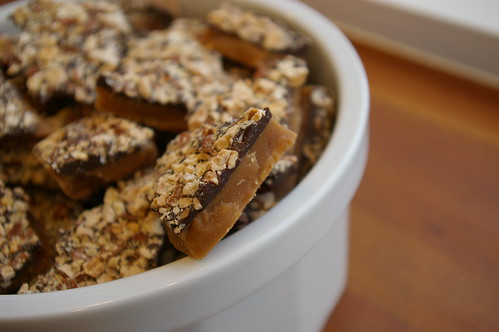
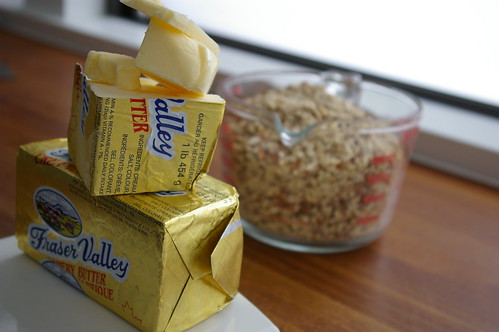
And she has paired it with a cream cheese icing, which creates a sort of play on the stout itself, with its creamy white head balancing atop the velvet dark drink.

Three whole cupcakes

I don’t believe in skimping on the icing. The original cream cheese icing recipe suggested adding more whipping cream to thin it out, but I reined in the extra liquid to ensure I had a nicely thick, spreadable topping. As a result, I also didn’t have enough. Given that I ate two cupcakes before even making the icing (quality control–OK, that’s a lie, I was dying of curiosity) and I still had four cupcakes left at the end that went unadorned, I suggest doubling the icing recipe. That way, there will be more than enough to coat all of the cupcakes.

The original recipe called for a half cup of whipping cream. I only used two tablespoons. If you’d like a thinner icing, feel free to add more cream.

My first bite made me realize –again–that Nigella certainly knows her stuff. These cupcakes are rich and dark with only a hint of their secret ingredient –certainly not enough to turn me off the idea of eating several more. Combined with the icing, the Chocolate Guinness cupcakes were heavenly. The icing, perhaps ironically, cuts some of the darkly chocolate flavour.

Bitten

A friend graciously offered to buy the remaining five bottles of Guinness from me, knowing full well they would simply gather dust next to my wine rack. But, having given these a shot, I think I will hang on to them. After all, I think I’d like to make the cake version next. Apparently, all it took for me to like beer was to add chocolate.

Bitten and whole

Bitten profile

Chocolate Guinness Cupcakes

Excerpted from Feast by Nigella Lawson (Hyperion Books, $39.95, 2006)

  • 1 cup (250 mL) Guinness
  • 4 oz (1/2 cup or 125 mL) unsalted butter, cut into chunks
  • 3/4 cup (175 mL) unsweetened cocoa powder
  • 2 cups (500 mL) granulated sugar
  • 3/4 cup (175 mL) sour cream
  • 2 large eggs, room temperature
  • 1 tbsp (15 mL) vanilla extract
  • 2 cups (500 mL) all-purpose flour
  • 2½tsp (12 mL) baking soda

Icing

  • 8 oz (250 g) cream cheese
  • 1 cup (250 mL) icing sugar
  • 2 tbsp (25 mL) whipping cream

Preheat oven to 350°F (180°C). Line two 12-cup muffin pans with paper liners.

Pour the Guinness into a large saucepan, add butter and heat at medium-low until melted. Whisk in the cocoa powder and sugar, then remove from heat. In a small bowl, beat together the sour cream, eggs and vanilla. Pour into the slightly cooled Guinness-butter mixture. Whisk in the flour and baking soda.

Spoon batter into cupcake pan, so each liner is about three-quarters full. Bake for 15 to 18 minutes or until a tester comes out clean. Let cool in the pan, then remove to a rack to cool completely.

Once completely cooled, make the icing.

Beat cream cheese and icing sugar until smooth. Add the whipping cream and beat again until it is thoroughly mixed and spreadable. Add more cream if you want a thinner icing. Spread onto cooled cupcakes.

Makes 24 cupcakes.

This story first appeared in the Real Life section in the Calgary Herald. For more delicious recipes, visit CalgaryHerald.com/life.

Continue Reading

English Toffee

Candy making kind of scares me.

Thread stage, soft ball, hard crack. It just all sounds like it could go horribly wrong with little or no notice. And the thought of burnt sugar (or, perhaps, more importantly, trying to clean up burnt sugar) is enough to put me completely off the idea entirely.

But when I went home at Christmas (and yes, that’s how long I’ve procrastinated on this post. I have no idea why.), my mum and I thought this would be a good afternoon project. Considering about three feet of snow was surrounding the house and even the four-wheel-drive SUV was having a hard time making it up the narrow gravel road, staying in to do some baking and candymaking seemed like a grand plan. Not to mention the newly renovated kitchen was ideal for photos. Hello natural light!

We’re both big fans of English Toffee, even though I’m generally not a huge fan of almonds. My mum is more of a connoisseur than me, though; she can judge good toffee from bad. So, it was entertaining to think we could have a go at making our own.

English Toffee

It was great to cook with someone else. Since I have no tripod, my photos tend to be very static. Just too tricky to try to pour or stir and shoot at the same time. Not to mention that my cave-like kitchen is terrible when it comes to lighting. I actually take things out of my kitchen and shoot them by the window to get the best light. So, I took full advantage of having another pair of hands.

Also, frankly, I wasn’t going to attempt this recipe without having someone there who has some expertise.

But this has made me feel that I could attempt candy again in the future.

It’s essentially a waiting (and stirring) game. Keeping an eye on the temperature and watching as two basic ingredients transform themselves into something completely different. I liked the molten lava look of the toffee as it grew closer to being ready and then how it changed again when it was poured into the sheet pan, taking on an almost stained glass type look: coloured and glossy and flat.

Mostly, though, what I enjoyed was a chance to hang out, catch up and just spend time together. I only get back to Vancouver once or twice a year and I’m usually rushing around to see old friends and poke around some of my favourite stores.

The giant piles of snow that continued to fall almost the entire time I was there over the Christmas holidays were a blessing, in the end. There was no reason to rush off on errands or to visit. Instead, we had the perfect excuse to stay in and just spend time in the kitchen, bonding over a bubbling pot of sugar and butter.

Butter and almonds

Butter

Bubbling hot toffee

Pouring the toffee

Smooth Toffee

Adding the chocolate chips

Making the chocolate layer

Spreading the chocolate

Almonds

Finished Toffee

Breaking it up

Smashed up

English Toffee

  • 3 cups salted butter (1.5 pounds)
  • 3 cups sugar
  • 2 cups semi-sweet chocolate chips
  • 3 cups roasted, unsalted almonds crushed

In a heavy bottom stock pot, start to melt the butter, adding the sugar after it has started to melt. Stir to emulsify the mixture, then add the candy thermometer, making sure there is enough of a gap between it and the bottom of the pot. (A wooden spoon should just be able to sweep underneath it.) Keep stirring the mixture. As it gets hotter, the mixture will thicken and start to darken. Keep cooking until the mixture reaches 294 degrees F. Caution, the temperature will climb quickly through the final 20 degrees.

Let the mixture cool slightly and then pour into a 13×18″ pan. Let cool for about 10 minutes, then sprinkle on the chocolate chips. The heat of the toffee should be enough to melt the chocolate. It didn’t for us, so we threw it in the oven (warm from roasting the almonds) for a minute or two until it was spreadable and then used a spatula to get the chocolate covering the toffee.

Sprinkle on chopped nuts and press into chocolate.

After it has cooled to room temperature, put another pan of the same size over the toffee and invert. It should pop right out.

We used a meat mallet to break it into manageable pieces.

Continue Reading

Chocolate Cake

So, I know I’ve mentioned before that I don’t drink coffee. I couldn’t brew a pot if my life depended on it and, for that matter, I don’t even have the supplies to make an attempt. So, noting that this Chocolate Cake recipe — like many others involving chocolate — called for brewed coffee, I knew I was going to have to resort to other measures. Yup, Starbucks. But, since I don’t drink coffee, I had no idea what to order.

Me: Um, can I get a tall, uh, um, Verona…?

Barista guy: Sure. (Starts to pour coffee.)

Me: Um, is that a dark roast? (It occurs to me that might be too much of a coffee flavour. I think? Isn’t that what dark roast means? Jesus, I need a coffee primer.)

Barista guy: Yup. (pause) Did you want something else?

Me: Uhhhhhh, yes…..? A medium roast…..?

Barista guy: (shrugs and dumps out dark roast, pours new one.)

Me: Um, I’m a coffee neophyte. (Wishes had stopped talking.)

Then, since the coffee had to be hot, I had to drive home immediately and start making the cake. Yes, I’m a baking nerd.

So, I found this recipe on the Cook’s Illustrated web site. I’ve always loved this magazine and now I love their site (thanks to my friend Julie for the birthday subscription!). The videos are especially great because sometimes you really do need to see what they are talking about. But it does crack me up that all the clips are about three minutes long. Anything looks easy when a) professional chefs do it b) they do it in three minutes.

But this recipe, actually is easy.

The other thing I liked about this recipe was that it isn’t unheard of to have all of these ingredients on hand. (Except, for me, coffee, of course.) And it bakes super quickly and it doesn’t really need frosting, so this would be easy to whip up any time.

This cake is really fantastic on it’s own, so I don’t suggest icing it. But I do feel that a little dollop of sweetened whipped cream is the perfect addition. It, possibly ironically, cuts some of the richness but without taking away from the chocolate-y goodness of the cake.

Chopped Chocolate

Chocolate and cocoa

Chocolate, egg and mayonnaise

Whisked together

The batter

What was left over

Chocolate cake topped with whipped cream

Easy Chocolate Cake

  • 1 1/2 cups unbleached all-purpose flour
  • 1 cup sugar
  • 1/2 teaspoon baking soda
  • 1/4 teaspoon table salt
  • 1/2 cup Dutch-processed cocoa powder (I used Fry’s)
  • 2 ounces bittersweet chocolate , chopped fine
  • 1 cup fresh black coffee, hot
  • 2/3 cup mayonnaise
  • 1 large egg
  • 2 teaspoons vanilla extract
  • whipped cream — for serving, optional

Preheat oven to 350. Spray an 8″-square baking dish with nonstick spray.

Whisk flour, sugar, baking soda and salt in a large bowl. In separate bowl, mix cocoa and chocolate, then pour hot coffee over and whisk until smooth. Set aside to cool slightly. Whisk in mayonnaise, egg and vanilla. Add to flour mixture and stir until combined. Pour into baking dish, smoothing top before putting in oven. Bake until toothpick or skewer inserted comes out with a few crumbs attached, about 30 to 35 minutes. Let cool in pan on wire rack for one to two hours. Serve dusted with icing sugar or a little lightly sweetened whipping cream.

Continue Reading

Chocolate Cupcakes with Peanut Butter Icing

Most smart bakers know to make sure everything is ready to go in advance of getting started. I am, apparently, not a smart baker.

Chocolate cupcake with peanut butter icing

We were celebrating a (much belated) birthday for a good friend. Some wiggling around with the schedule had the celebration moved from brunch to Sunday night dinner and I volunteered (most willingly — any excuse to bake) to bring the birthday dessert. All week I Googled for moist, rich chocolate cake recipes and then sat there trying to decide which would be better: mayo-based or buttermilk; white icing or chocolate; cupcakes or layer cake. Finally, when I shared my dilemma with a friend, she queried why I wasn’t using a Barefoot Contessa recipe. Indeed! Why wasn’t I?

She has two recipes in her books and one online at Food & Wine. Since I already bought the books, I figured I may as well try one of those and, at last, settled on the Chocolate Cupcakes with Peanut Butter Icing. My love of this combination knows no bounds, so I’m kind of surprised I didn’t think of this recipe immediately.

Initially, it was all going very well. I ran out to the store to buy sour cream, buttermilk and coffee, along with whipping cream for the icing, then returned to begin. There was butter to soften and dry ingredients to sift (and, boy did I sift those. I learned my lesson from the Red Velvet cake when not sifting the cocoa with the flour led to brown swirls through the cake.) and, of course, photos to take to document my progress.

Cakes still make me a bit nervous. I’m worried I’ll overmix and make a tough cake and that is not eased by the fact most recipes have this whole “mix in thirds” step. What if it’s not exactly thirds? Also, I think a lot of recipes these days assume people have stand mixers, which makes this step (among others) much easier, then when trying to hold the mixer while pouring in a third of the dry mixture and not end up covered in cocoa and flour dust.

Butter and sugar and eggs, oh my!

The batter trifecta

Chocolate cupcake better

Chocolate cupcakes ready to bake.

But, for the most part, it all went really well. The batter seemed incredibly light at the end (Okay, and, yes, it did taste good.) and I was all ready to put the batter into the tins. I pulled out my cupcake liners and found I only had five left. Gah! Thankfully, there’s a grocery store a little over a block away, so I turned off the oven and bolted down there where I bought some liners and then raced back. I was really worried that extra time would ruin the batter somehow.

In the end, it was only a 15-minute delay and I don’t think it affected the cupcakes. They baked up perfectly, though for less time than the recipe suggested owing, I suspect, to the fact that my muffin tins are more shallow and took less batter to fill. (I used a 1/8 cup scoop, which worked perfectly. No spillage.)

Chocolate Cupcakes

Solo chocolate cupcake

The cupcakes are not overly sweet, which was a nice counterpoint to the rich peanut butter icing.

Peanut butter icing

Row of cupcakes

This recipe is from Barefoot Contessa at Home.

Chocolate Cupcakes with Peanut Butter Icing

  • 12 tbsp. unsalted butter, at room temperature (that’s 3/4 cup for those of us that don’t use sticks of butter)
  • 2/3 cup granulated sugar
  • 2/3 cup light brown sugar, packed
  • 2 extra-large eggs, at room temperature
  • 2 tsp. pure vanilla extract
  • 1 cup buttermilk, shaken, at room temperature
  • 1/2 cup sour cream, at room temperature
  • 2 tbsp. brewed coffee (Full disclosure: I don’t drink coffee. I made a cup of instant and it tasted awful to me, so I only threw in less than a tablespoon. I suspect good coffee may be a great addition.)
  • 1 3/4 cups all-purpose flour
  • 1 cup good cocoa powder
  • 1 1/2 tsp. baking soda
  • 1/2 tsp. kosher salt

Preheat oven to 350 degrees. Line cupcake pans with paper liners.

In the bowl of an electric mixer fitted with a paddle attachment, cream the butter and two sugars on high speed until light and fluffy, approximately five minutes. (For those of us without a stand mixer, a handheld is just fine. It just makes it a bit trickier when mixing in the wet and dry ingredients.) Lower the speed to medium, add the eggs one at a time, then add the vanilla and mix well. In a separate bowl, whisk together the buttermilk, sour cream and coffee. In another bowl, sift together the flour, cocoa, baking soda and salt. On low speed, add the buttermilk mixture and the flour mixture alternately in thirds to the mixer bowl, beginning with the buttermilk mixture and ending with the flour mixture. Mix only until blended. Fold the batter with a rubber spatula to be sure it’s completely blended.

Divide the batter among the cupcake pans (one rounded standard ice cream scoop per cup is the right amount). Bake in the middle of the oven for 20 to 25 minutes, until a toothpick comes out clean. Cool for 10 minutes, remove from the pans, and allow to cool completely before frosting.

Frost each cupcake with peanut butter icing and sprinkle with chopped peanuts, if desired.

Kathleen’s Peanut Butter Icing

  • 1 cup confectioners’ sugar
  • 1 cup creamy peanut butter
  • 5 tbsp. unsalted butter, at room temperature
  • 3/4 tsp. pure vanilla extract
  • 1/4 tsp. kosher salt
  • 1/3 cup heavy cream (I used whipping cream)

Place the confectioners’ sugar, peanut butter, butter, vanilla and salt in the bowl of an electric mixer fitted with a paddle attachment. Mix on medium-low speed until creamy, scraping down the bowl with a rubber spatula as you work. Add the cream and beat on high speed until the mixture is light and smooth.

Continue Reading