Coca-cola Cupcakes with Glaze

I’m not going to tell you how exactly how long this has been sitting in the vault. But I’ll give you a hint; I made these for someone who had given up drinking coca-cola for Lent. Yeah, I should probably join some sort of 12-step program for procrastinators.

But I digress . . . .

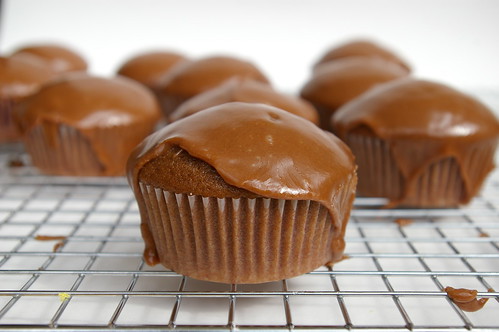
So, I thought it would be hilarious to make Coca-cola Cupcakes with Glaze for a friend. Only after I brought them to her did I realize that maybe her giving up Coke for Lent probably meant any consumption of the cola and that in my effort to be funny I might actually be undoing her commitment. She assured me that she had only given up drinking Coke and that she saw the humour in the cupcakes. I continued to feel guilt through much of Lent.

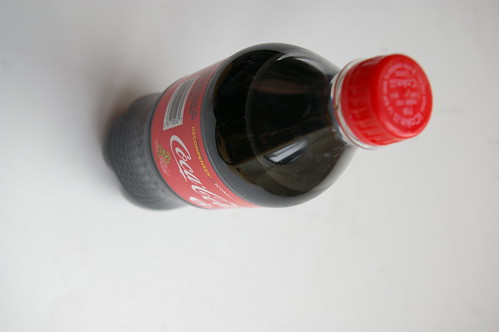
Coca-cola

Glazed Cupcakes II

I can’t actually remember how or when I stumbled on this recipe in Nigella Lawson’s How to Be a Domestic Goddess, but I had marked it with a Post-it note at some point and then I think I just connected the dots later. It’s only one of about 12 recipes that have little tags marking them as “to-make,” so I guess I should get going on that.

One of the things I love about Nigella’s recipes are some of them call for simply melting the butter instead of waiting it to come to room temperature. For someone like me, who sometimes wants to make things relatively on impulse (read: impatient), this means I still can. No waiting.

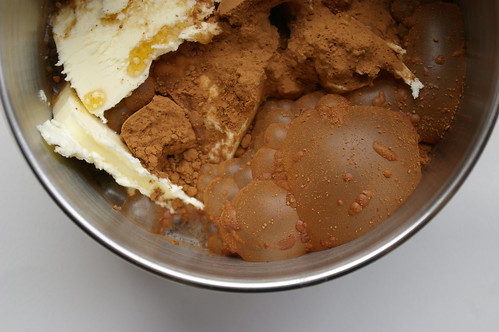
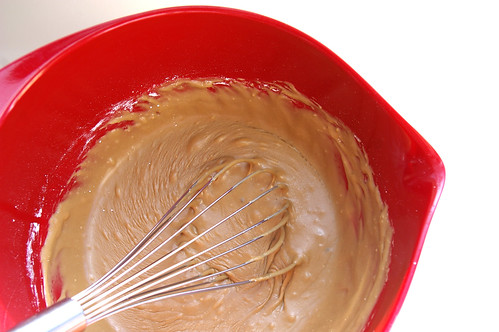
And it was kind of fun to make these. Not only because of the odd mix of ingredients but also because the reaction between the cocoa and Coke was a bit hypnotic. Giant bubbles, that pretty much sums it up.

Cocoa bubbles

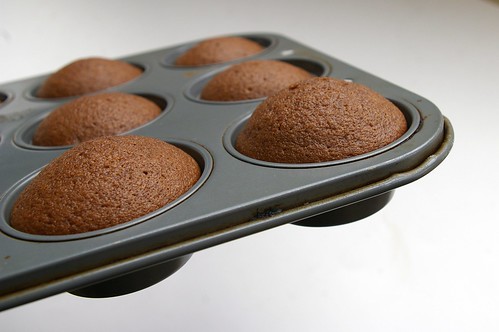
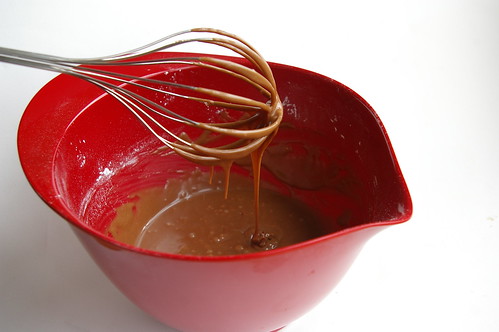
I was a little freaked out by how thin the batter was, but they bake up beautifully. They’re so . . . light. I don’t know how else to describe them. They certainly don’t taste like Coke, but it’s still charming to say that’s the not-so-secret ingredient.

The original recipe is for a full cake and, although Nigella suggests you can make cupcakes, she doesn’t give a baking time. I guessed at 15 minutes and when I checked them they were perfectly done. However, she says it will make 12 cupcakes and it made 16 for me (An ongoing problem for me is I always end up with more cupcakes than the recipe specifies. Unsure if I make them smaller or if my muffin tin is smaller? Ok, “problem” isn’t really the right word.)

So, if your batter fits perfectly in 12, I’d bank on it taking a few more minutes.

Coca-cola cupcake batter

Coca-cola Cupcakes

Coca-cola Glaze

Glazed cupcakes

Coca-cola Cupcakes with Glaze

  • 200 g plain flour
  • 250 g sugar
  • 1/2 teaspoon baking soda
  • 1/4 teaspoon salt
  • 1 large egg
  • 125 mL buttermilk
  • 1 teaspoon vanilla
  • 125 g unsalted butter
  • 2 tablespoons cocoa powder
  • 175 mL Coca-cola

Preheat the oven to 350F.

In a large bowl, combine the flour, sugar, baking soda and salt. Beat the egg, buttermilk and vanilla in in a measuring jug. In a heavy-based saucepan, melt the butter, cocoa and Coca-cola, heating it gently. Pour into the dry ingredients, stir well with a wooden spoon, and then add the liquid ingredients from the jug, beating until it is well blended.

Pour into a muffin tin that has been greased or lined with papers and bake for 15 minutes (or more, see above) until a tester comes out clean.

Glaze

  • 225 g icing sugar
  • 2 tablespoons butter
  • 3 tablespoons Coca-cola
  • 1 tablespoon cocoa powder
  • 1/2 teaspoon vanilla

Sieve the icing sugar and set aside. In a heavy-based saucepan, combine the butter, Coca-Cola and cocoa and stir over a low heat until the butter has melted. Remove from the heat, add the vanilla, and spoon in the sieved icing sugar, beating as you do, until you’ve got a good, spreadable, but still runny, icing.

Pour over the cupcakes while they are still warm, and leave to cool.

Continue Reading

No-knead Pumpkin Cinnamon Rolls

Last day of October and I’ve got a pumpkin recipe in just under the wire.

Though, truth be told, I made these a couple of weeks ago and took them in to the newsroom for election night, hoping the sugar rush would keep us all going through the tight deadlines and late night. With so many people voting and such a crazy race right up until the end, most of us stayed later than we ever have for an election. I can’t remember ever covering one as interesting and found myself watching the results roll in live as if it was some sort of TV show.

Anyway, back to the rolls.

They’re no-knead. Sensing a theme here? First no-knead pizza dough (if you haven’t tried this, please bookmark it, so very worth it) and then no-knead bread and now no-knead cinnamon rolls. God only knows what will be next, but I am loving this trend.

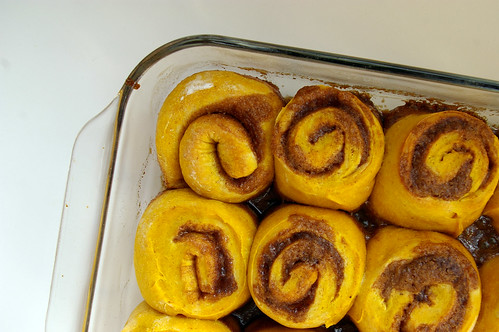
Once again, it takes some planning since it takes more time for these to rise. The recipe suggests, though, you can let them rise then refrigerate overnight and continue the next day, which is exactly what I did and it worked like a charm. Sure, there were some paranoid moments, like when I cut them into slices and let them rise in the pan prior to baking but couldn’t discern they actually rose a second time. I didn’t have much hope when I put them into the hot oven, but they came out all fat and puffy, shouldering each other in neat little rows.

I gave two to some friend who had popped by with her new baby since she was in the ‘hood and she texted me seemingly minutes after leaving to say she had eaten them both already and was tempted to lick the plastic wrap. That, my friends, is a pretty good endorsement.

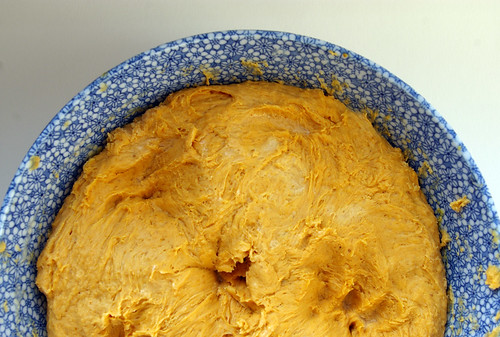
The dough is beyond sticky and please learn from my misstep by using a really big bowl. I had a difficult time incorporating all the flour in my small-ish bowl (which felt big before I combined the wet and dry ingredients) and eventually had to dive in with my hands. Let me repeat: beyond sticky. (But, you know, kind of fun at the same time.)

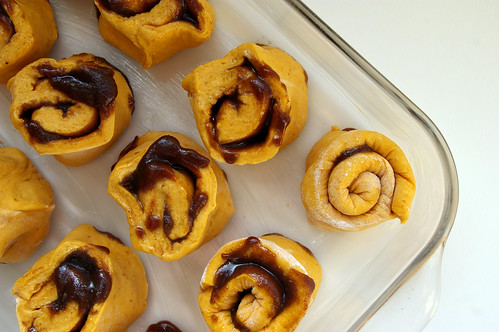
But beyond that, it was pretty easy to work with once it came time roll out and, uh, roll up again. Some of my filling leaked out the edges. Obviously, I’m no expert at cinnamon rolls. But I’ll take ugly and tasty any day. And man are these tasty. I mean, really, how can you go wrong? pumpkin, cinnamon, brown sugar, butter, glaze? Yeah, it’s all good.

So, this is kind of short and sweet but if I don’t post this soon, I’m going to miss my Oct. 31 deadline.

In short: these are good, pumpkin-y and easy. Enjoy.

No-knead pumpkin dough

Misshapen rolls

Pumpkin cinnamon rolls

Glaze

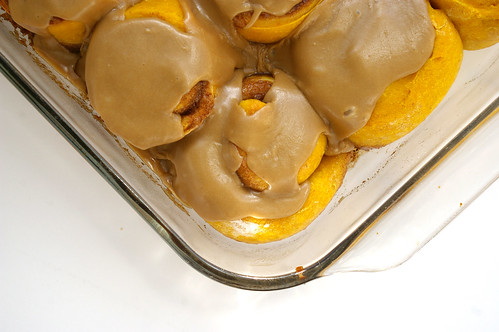
Glazed pumpkin cinnamon rolls

This comes from the folks over at the Kitchn, like quite a few recipes I’ve posted here. It’s almost to the point where I’m wondering if I need to create a tag for them . . . .

The only change I made was I omitted the pecans. I’ve got nothing against them but was just too lazy to get them out of the freezer, toast and chop them. Oh, and I didn’t use as much milk in the glaze which is why, I’m pretty sure, it’s so much thicker. Not that anyone was complaining.

No-Knead Pumpkin Rolls with Brown Sugar Glaze
Makes 16-18 rolls

For the dough:

  • 1/4 cup water
  • 1 scant tablespoon yeast (1 package)
  • 1 cup milk
  • 1/2 cup butter
  • 1/2 cup sugar
  • 1 15-ounce can pumpkin puree
  • 1 1/2 teaspoons kosher salt
  • 5 1/2 cups all-purpose flour

For the filling:

  • 1/2 cup butter
  • 1 cup packed brown sugar
  • 2 teaspoons cinnamon
  • 1/2 teaspoon ginger
  • 1/2 teaspoon nutmeg
  • 2 cups pecans – toasted, chopped, and divided in half (optional)

For the glaze:

  • 1/4 cup butter
  • 1/2 cup milk
  • 1 cup brown sugar
  • pinch salt
  • 2 1/2 cups powdered sugar

Sprinkle the yeast over the water and let it sit a few minutes until the yeast is dissolved.

Meanwhile, warm the milk and butter in a small saucepan on the stove top until the butter is melted. Combine this with the sugar in a large heat-proof mixing bowl and stir until the sugar is completely dissolved.

Let the milk mixture cool until it is just warm to the touch – NOT HOT. Then stir in the yeast and the pumpkin. Add the salt and five cups of the flour all at once, stirring until all the flour has been absorbed. Squish it between your hands if you’re having trouble incorporating the last of the flour. The dough will be sticky, but should come together in a shaggy ball. If it’s still more the consistency of cookie batter, work in an additional 1/2 cup of flower.

Cover the dough and let it rise for 1-3 hours. During this time, it should double in bulk. At this point, you can punch the dough down and refrigerate it overnight or continue shaping the rolls.

To shape the rolls (either immediately or with the refrigerated dough), sprinkle your work surface with a little flour and dump the dough on top. Pat it down into a rough rectangle and then use a floured rolling pin to roll it into a rectangular shape about a half an inch thick, longer than it is wide. If the dough gets sticky, sprinkle a little more flour on the dough’s surface and on your hands.

Melt the butter in the microwave and stir in the brown sugar and the spices. Spread this over the rectangle of dough, leaving an inch of bare dough at the top. Sprinkle one cup of the toasted pecans over the dough, if using. Starting at the edge closest to you, roll the dough into a cylinder and pinch it closed at the top.

Rub a tablespoon of soft butter into the bottom of two 9×13 baking dishes, two 9-inch cake pans, or a combination. Using a bench cutter or a sharp knife, cut the cylinder into individual rolls 1 – 1 1/2 inches thick. Place them into your baking dishes so they have a little wiggle room on all sides to rise. Cover them with a clean kitchen towel and let them rise until they fill the pan and look puffy, 30 minutes for already-warm dough and 1 hour for dough that’s been refrigerated.

About 20 minutes before baking, begin heating the oven to 375°. When the rolls are ready, bake them for 20-25 minutes, until the tops are golden and starting to look toasted around the edges. Rotate the pans halfway through cooking.

While they are baking, prepare the glaze. In a small saucepan over medium heat, combine the milk and butter. When the butter has melted, add the brown sugar and salt. Stir until the brown sugar has melted. Remove from heat and strain into a mixing bowl to remove any sugar clumps. Stir in the powdered sugar. This should form a thick but pourable glaze.

Let the baked rolls cool for about five minutes and then pour the glaze on top. Sprinkle the remaining cup of pecans over the top, if more nuttiness is desired. Eat them immediately. Leftovers will keep for several days and are best reheated for a minute in the microwave.

Continue Reading

Glazed Lemon Cakes

While winter seems to beg for rich, warm or comforting desserts — sticky toffee pudding, brownies and apple pie — I crave lemon.

Of course, I’ve always been a go-against-the-grain kind of girl.

I like all those desserts, too; they have their place. But lemon tang on a dark, wintry day takes me away from the snow and cold. It can brighten a dreary afternoon, send me a shot of virtual sunshine.

Glazed Lemon Cakes II

Sure, we’ve been enjoying a lengthy bout of relatively warm weather, but I’m not easily fooled. Real spring is still weeks away and if I can trick myself into feeling like winter has already snapped and the fresh green and blossoms are quickly nearing, then I have to take advantage of that.

But which lemon dessert?

Conservatively, I have about 40 lemon-based tarts, bars, cupcakes and other concoctions saved on the online bookmarking site, Delicious. (All right, I checked. There are 41. But probably not for much longer.) All of these things have caught my eye at one time or another and I’ve saved them for just such wintry occasions when I need a taste of bright and tart.

The lemon bars had their appeal. The pull-apart lemon loaf looked tempting, but a bit time-consuming for me in this fit of citrus craving. But glazed lemon cakes? Oh yes, those I could handle.

The hardest part of this recipe was remembering to pull the butter out of the fridge so it could come to room temperature. Almost all of the ingredients are standard in most fridges, except, perhaps, the plain low-fat yogurt or buttermilk. In this case I went with the yogurt because it seemed like something I could more easily use up. Buttermilk is great for baking, but it’s not something I tend to go through quickly.

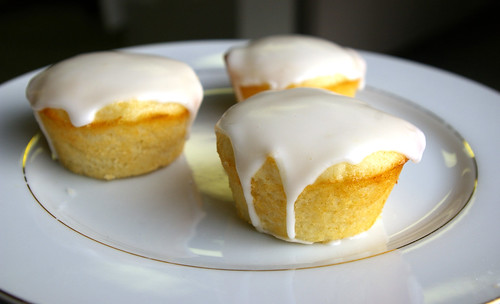
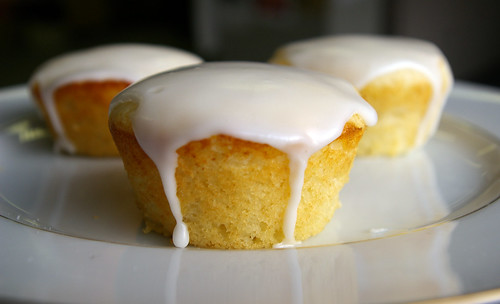
These little cakes were light, tender and full of tang. With the addition of the thick glaze that dripped down the edges, they reached lemon perfection. Not puckeringly tart, but deliciously citrus: a little injection of sunshine on an overcast day.

I can’t lie. I ate two before I even mixed the glaze.

And if that isn’t enough motivation to whip up a batch, I’m not sure what is.

One last note, the original recipe calls for a “6-cup jumbo muffin tin.” Since I try to avoid buying new bakeware for just one recipe, I decided to make do with what I had lying around.

My advice? Bake them in a regular muffin tin for 15 minutes (though consider starting to check them at the 10-minute mark, just in case) and eat two!

Lemon Cakes

Glazed Lemon Cakes I

Glazed Lemon Cakes III

This recipe is from Everyday Food.

Glazed Lemon Cakes

  • 1/2 cup (125 mL) unsalted butter, room temperature, plus more for muffin tin
  • 1½ cups (375 mL) all-purpose flour, plus more for muffin tin
  • 2 tsp (10 mL) baking powder
  • 1/2 tsp (2 mL) salt
  • 1/2 cup (125 mL) low-fat buttermilk, or plain low-fat yogurt
  • 1 tsp (5 mL) vanilla extract Zest of 1 lemon, finely grated, plus juice, plus 2 tbsp (25 mL) more lemon juice for the glaze
  • 1 cup (250 mL) granulated sugar
  • 2 large eggs
  • 1½ cups (375 mL) confectioners’ sugar

Preheat oven to 350°F (EDIT, this should be 180°C). Butter and flour a 6-cup jumbo muffin tin or 12-cup regular muffin tin. In a medium bowl, whisk the flour with the baking powder and salt. In a small bowl, whisk together the buttermilk, vanilla and lemon zest and juice of 1 lemon. Set aside.

With an electric mixer, cream butter and granulated sugar until light. Add eggs one at a time, beating well after each addition. With mixer on low speed, add flour mixture in three batches, alternating with two additions of buttermilk mixture.

Divide evenly among muffin cups. Bake until a toothpick inserted in centre of a cake comes out clean, 20 to 25 minutes. (Or about 15 minutes for a 12-cup muffin tin. Start checking at the 10-minute mark.) Cool 10 minutes in tin, then cool completely on a rack.

Set rack over wax or parchment paper. In a small bowl, stir confectioners’ sugar with remaining lemon juice until smooth. Pour over cakes, spreading to edges with a small knife. Let set 30 minutes.

This story first appeared in the Real Life section in the Calgary Herald. For more delicious recipes, visit CalgaryHerald.com/life.

Continue Reading