Kitchen Sink Cookies

Most of the time when I make cookies, I’ll eat one or two and then completely lose interest, taking the rest into work for my colleagues to enjoy. (Of which, I am sure, they have no complaints.)

Last year, over at my day job, I reviewed a cookbook called The Flying Brownie (The Harvard Common Press) by Shirley Fan that was all about sending edible care packages to people in the mail. I decided to try her recipe for so-called Kitchen Sink Cookies, which are similar to the more famous Compost Cookies from Momofuku in that, essentially, they’re about throwing in lots of different bits and bobs that may be lurking around the kitchen and in the baking cupboard. We all have those mostly empty bags of chocolate chips, nuts or dried fruit, perhaps a few random squares of chocolate for that recipe that didn’t require all of them in a box. I have amalgamated all my odds and ends — butterscotch chips, Skor bits, different types of chocolate chips — into a container, which is organized, at least, but doesn’t actually go very far when it comes to using them up. So, I was intrigued at the idea of making a cookie whose purpose was to do just that. (And, while I love Compost Cookies, I think we can agree they’re a lot more involved than what some of us want to tackle on a weekend afternoon when a cookie craving strikes.)

And, man, they did not disappoint. Rich, chewy, and salty-sweet, I could not resist their siren call.

As I said for my review of The Flying Brownie:

Since making them, however, I have eaten no fewer than a half-dozen cookies (over a 24-hour period) before bringing them to the office just to get them out of the house. They were snapped up immediately (as most baked goods in the newsroom are, for what it’s worth), but the reaction from colleagues was different: resounding compliments and requests for the recipe followed.

The cookies came out chewy and soft, with specks of chocolate and a slight crunch from the potato chips. Perfection.

I made more just a few nights later.

What I didn’t admit then is that I even held back a few because I knew I’d want a few more and didn’t want to give them all away.

I had a cookie craving the other day and they immediately came to mind.

The first time around I used up what was left in a bag of dark chocolate chips and some semi-sweet mini ones, as well as crushed ripple chips and some rolled oats.

Those who know me know well how much I love salty-sweet combinations, so the ripple chips (which I like for the texture as well) were a given. The fact that I had to buy some specifically to add them to the cookies maybe goes against this cookie recipe’s concept, but I’m OK with that.

Among the things buried in my baking cupboard, which I cleaned out and organized over the Labour Day weekend, was a bag of Valrhona Caramelia chocolates I bought several months ago from Duchess in Edmonton when I was up visiting friends. They are these little disks of chocolate that taste like a cross between milk chocolate and caramel. It’s tempting to eat them straight up, and I did do that with a few of them, no lie, and then I put them away so I didn’t eat the entire bag and then, of course, promptly forgot they were there until a much more recent trip to Edmonton (and the requisite visit to Duchess) when I remembered I still had them. Roughly chopped, I knew they’d be a great addition.

I decided to also throw in some semi-sweet chocolate chips, a handful of butterscotch chips, some roughly chopped pecans and those ripple chips.

Since making them that first time, I have adapted the recipe slightly. Since I decided I wanted the chocolate chips to be an option instead of a requirement, this adaption allows for a little more flexibility with the add-ins. However, I do recommend using a combination of sweet (like chocolate chips) and salty or crunchy or things with texture (coconut, nuts, potato chips, pretzels etc.). I use softened butter instead of melting it because I always have butter softening for one baking project or another and I am lazy enough that I don’t want to dirty a pot or pan just to melt it. I’m also so lazy that I don’t generally bother mixing the flour, baking soda and salt together in a separate bowl. I figure if I add the flour, then scatter the salt and baking soda evenly over it, it will all get mixed in well enough. Fan calls for golden sugar, but I’ve changed it to brown since that’s what most of us have around (and I think it totally contributes to that luscious, rich, caramel flavour).

Lastly, I found that while Fan’s recipe said it would make about 48 cookies, I got about half that. Not sure if that was bad math because I’m not convinced my cookies are much larger than what she calls for. I can say with some assurance there’s no way I ate that much dough. Though, yes, I ate dough. And it was damn good.

Kitchen Sink Cookies

Mildly adapted from Shirley Fan’s The Flying Brownie.

  • 3/4 cup (180 mL) unsalted butter, softened
  • 1 cup (250 mL) packed brown sugar
  • 1/4 cup (60 mL) granulated sugar
  • 1 large egg, at room temperature
  • 1 large egg yolk, at room temperature
  • 1 tsp (5 mL) pure vanilla extract
  • 2 cups (500 mL) all-purpose flour
  • 1/2 tsp (2 mL) baking soda
  • 1/2 tsp (2 mL) salt
  • 1 1/2 cups (375 mL) add-ins (such as chocolate chips, chopped chocolate, old-fashioned rolled oats, crushed potato chips, pretzels, raisins, nuts or unsweetened shredded coconut)

Preheat the oven to 350F (180C). Line two baking sheets with parchment paper or silicone baking liners; set aside.

In the bowl of an electric mixer, beat the butter and both sugars on medium speed until light and fluffy. Add the egg, egg yolk and vanilla and mix until well combined, scraping down the sides of the bowl if necessary. Add the flour, baking soda and salt and mix on low speed until blended. Fold in the add-ins. (If time permits, refrigerating the dough for at least 12 hours before baking will improve the flavour of these cookies.) Using your hands or a cookie dough scoop, form 1-inch (2.5-cm) balls with the dough. Place the dough balls on the prepared baking sheets, about two inches (5 cm) apart. Bake until the edges are lightly browned, 9 to 10 minutes. They will look slightly underdone in the centre.

Cool the cookies on the pans for five minutes before transferring to a rack to cool completely. Repeat with the remaining dough. Pack in zippertop plastic bags, pressing out any air, or in airtight containers, separating the layers with waxed or parchment paper.

Makes about 24 cookies.


Continue Reading

Kale Salad with Hazelnuts and Apple

No one would ever describe me as trendy.

I rarely look good in fashionable clothes and can’t figure out how to wear any new style of makeup.

Even when it comes to food, I’m often behind the times.

So, it’s no surprise I’m falling for kale just as it’s falling out of popular favour.

Kale became a culinary darling a few years ago, starting with an obsession for kale chips that spread like wildfire on food blogs. The simple recipe of tossing ripped leaves with a bit of olive oil, salt and pepper, then baking them to a crisp, spawned thousands of blog posts. Hailed as the ultimate snack, food blogs were filled with increasingly creative versions.

There was something about them popping up everywhere that made me specifically not want to try kale chips and, as a consequence of not really knowing what else to do with the cruciferous vegetable, not bothering to try kale at all.

And then I was served a kale salad at a potluck.

The greens were dressed with a vinaigrette spiked with grainy mustard and sprinkled with paper-thin radishes. I asked for seconds.

Turns out, my disinterest in following a trend had meant I had been missing out.

Since then, I’ve started making my own versions of that salad — adding apple for some sweetness and hazelnuts for crunch — taking advantage of the fact it pays to work ahead with kale. Dressing it in advance, unlike other salads, actually improves the salad, as the vinaigrette helps soften the otherwise tough leaves. The dark green vegetable stands up to the dressing so well, it makes for a great work lunch because there’s no need to keep the salad and the dressing separate.

A nutritional powerhouse, full of beta carotene and calcium, as well as vitamins K and C, kale should transcend trends.

But, of course, like anything that becomes a widespread hit, there is bound to a point in time when people begin tiring of it and want to move on to the next hot ingredient.

As 2014 marches on, some in the food community are starting to declare kale has reached a saturation point on restaurant menus and in recipes. It’s time for that trend to move along, they say.

I’m not against the idea of another ingredient getting some time in the spotlight.

But, luckily, since I never really pay attention to trends, that means kale will be on my menu for a long time to come.

Kale Salad with Hazelnuts and Apple

Like all salads, this one is infinitely adaptable. Swap out different nuts, replace the apple with dried cranberries or cherries or add thin slices of radish for a peppery punch.

Dressing:

  •  Zest of 1 lemon
  • 1 tbsp (15 mL) lemon juice
  • 1 tbsp (15 mL) apple cider vinegar
  • 1 tsp (5 mL) grainy mustard
  • 2 tsp (10 mL) honey
  • 1/4 tsp (1 mL) salt
  • 1/4 tsp (1 mL) freshly ground pepper
  • 1/4 cup (60 mL) olive oil

Salad:

  • 2 bunches kale, cored and roughly chopped
  • 1 crisp apple, julienned
  • 1/4 cup (60 mL) hazelnuts, toasted and roughly chopped
  • 2 green onions, thinly sliced

In a jar or bowl, shake or mix together the first seven dressing ingredients — from the lemon zest to the pepper — to dissolve the salt and honey. Add the olive oil and shake or mix again until the dressing has emulsified.

Add the chopped kale to a large bowl, pour over the dressing and toss well. Refrigerate for at least an hour to let the dressing soften the leaves. When ready to serve, add the apple, hazelnuts and green onions, tossing everything together.

Serves 4 to 6.

Continue Reading

Juice of a Few Flowers

Last year was one of celebrations: plenty of new babies and a wedding or two.

That, inevitably, meant many a shower.

Some involved sipping tea out of dainty china cups, others a glass of wine or two, perhaps a tipple of Champagne.

This year is gearing up to be slightly slower showerwise. No weddings on the calendar and only a few friends expecting to add to their families.

Which is too bad, because I’ve just discovered a lovely multi-purpose cocktail.

Juice of a Few Flowers

It’s a drink with a tart citrus punch and a nice kick of vodka. An ice-cold glass, a sugared rim, a sprig of mint.

It’s downright civilized.

So, it’s no surprise then that Juice of a Few Flowers was apparently created in the 1920s by a couple said to give glamorous parties in the East Hamptons.

The original version used gin, but Barefoot Contessa Ina Garten, in her book Back to Basics (Clarkson Potter, $40), has updated the recipe to use vodka.

She notes, though, Gerald Murphy often mixed up the drink without alcohol, pouring it into martini glasses and serving them to the children.

And that makes it a great mocktail for mothers-to-be.

Shower guests and the guest of honour can all sip (relatively) the same thing.

With puckery grapefruit and tart lemon and lime juices, this drink could head toward sour territory, but it’s mellowed by the addition of sweet orange juice, then tempered further with the sugared rim.

Shaken until ice cold (freeze the martini glasses in advance to keep it even further chilled), the drink is smooth and oh-so sippable.

So much so that I don’t think I’ll be waiting for a shower or other celebration to be pulling out this recipe again.

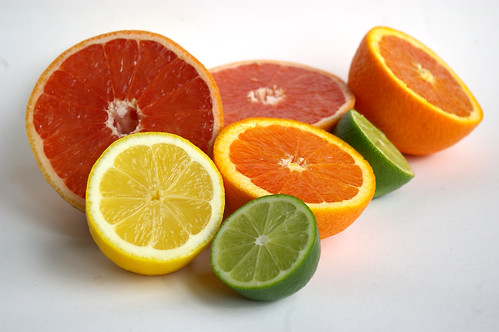
Citrus

Juice of a Few Flowers II

Juice of a Few Flowers

Ina Garten notes if your juicer doesn’t strain the juice, use a sieve to remove the pulp, otherwise it will clog the holes of the cocktail shaker.

  • 1/2 cup (125 mL) freshly squeezed orange juice (2 oranges)
  • 1/2 cup (125 mL) freshly squeezed pink grapefruit juice (1 grapefruit)
  • 1/4 cup (50 mL) freshly squeezed lemon juice (1 lemon)
  • 1/4 cup (50 mL) freshly squeezed lime juice (2 limes)
  • 1 cup (250 mL) vodka
  • extra lemon juice
  • granulated sugar
  • fresh mint sprigs

Combine the orange juice, grapefruit juice, lemon juice, lime juice and vodka in a pitcher.

Dip the rims of 4 martini glasses first in a dish of lemon juice and then in a dish with sugar. Set aside to dry.

Pour the cocktail mix into the glasses, garnish with mint and serve.

This story first appeared in the Real Life section in the Calgary Herald. For more delicious recipes, visit CalgaryHerald.com/life.

Continue Reading

No-knead Pumpkin Cinnamon Rolls

Last day of October and I’ve got a pumpkin recipe in just under the wire.

Though, truth be told, I made these a couple of weeks ago and took them in to the newsroom for election night, hoping the sugar rush would keep us all going through the tight deadlines and late night. With so many people voting and such a crazy race right up until the end, most of us stayed later than we ever have for an election. I can’t remember ever covering one as interesting and found myself watching the results roll in live as if it was some sort of TV show.

Anyway, back to the rolls.

They’re no-knead. Sensing a theme here? First no-knead pizza dough (if you haven’t tried this, please bookmark it, so very worth it) and then no-knead bread and now no-knead cinnamon rolls. God only knows what will be next, but I am loving this trend.

Once again, it takes some planning since it takes more time for these to rise. The recipe suggests, though, you can let them rise then refrigerate overnight and continue the next day, which is exactly what I did and it worked like a charm. Sure, there were some paranoid moments, like when I cut them into slices and let them rise in the pan prior to baking but couldn’t discern they actually rose a second time. I didn’t have much hope when I put them into the hot oven, but they came out all fat and puffy, shouldering each other in neat little rows.

I gave two to some friend who had popped by with her new baby since she was in the ‘hood and she texted me seemingly minutes after leaving to say she had eaten them both already and was tempted to lick the plastic wrap. That, my friends, is a pretty good endorsement.

The dough is beyond sticky and please learn from my misstep by using a really big bowl. I had a difficult time incorporating all the flour in my small-ish bowl (which felt big before I combined the wet and dry ingredients) and eventually had to dive in with my hands. Let me repeat: beyond sticky. (But, you know, kind of fun at the same time.)

But beyond that, it was pretty easy to work with once it came time roll out and, uh, roll up again. Some of my filling leaked out the edges. Obviously, I’m no expert at cinnamon rolls. But I’ll take ugly and tasty any day. And man are these tasty. I mean, really, how can you go wrong? pumpkin, cinnamon, brown sugar, butter, glaze? Yeah, it’s all good.

So, this is kind of short and sweet but if I don’t post this soon, I’m going to miss my Oct. 31 deadline.

In short: these are good, pumpkin-y and easy. Enjoy.

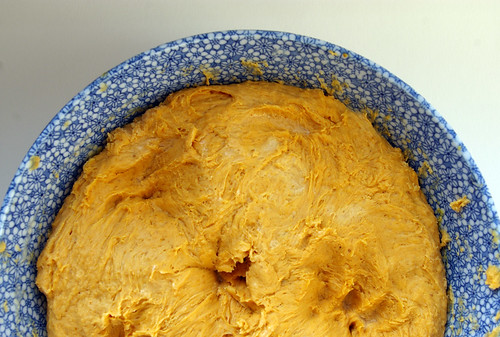
No-knead pumpkin dough

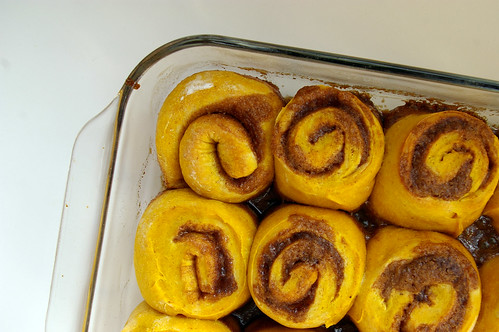
Misshapen rolls

Pumpkin cinnamon rolls

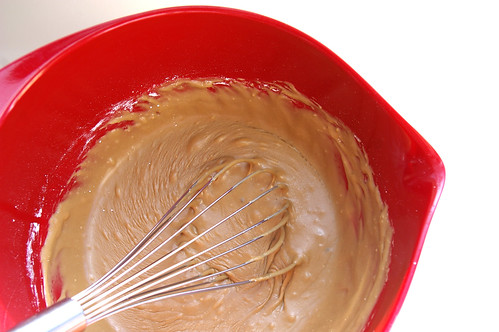
Glaze

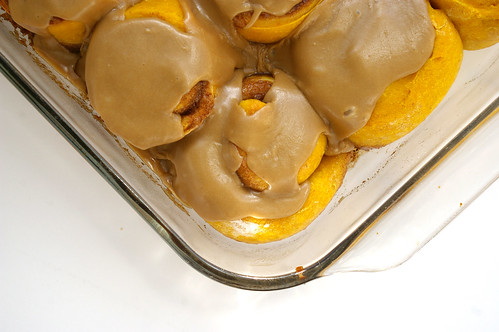
Glazed pumpkin cinnamon rolls

This comes from the folks over at the Kitchn, like quite a few recipes I’ve posted here. It’s almost to the point where I’m wondering if I need to create a tag for them . . . .

The only change I made was I omitted the pecans. I’ve got nothing against them but was just too lazy to get them out of the freezer, toast and chop them. Oh, and I didn’t use as much milk in the glaze which is why, I’m pretty sure, it’s so much thicker. Not that anyone was complaining.

No-Knead Pumpkin Rolls with Brown Sugar Glaze
Makes 16-18 rolls

For the dough:

  • 1/4 cup water
  • 1 scant tablespoon yeast (1 package)
  • 1 cup milk
  • 1/2 cup butter
  • 1/2 cup sugar
  • 1 15-ounce can pumpkin puree
  • 1 1/2 teaspoons kosher salt
  • 5 1/2 cups all-purpose flour

For the filling:

  • 1/2 cup butter
  • 1 cup packed brown sugar
  • 2 teaspoons cinnamon
  • 1/2 teaspoon ginger
  • 1/2 teaspoon nutmeg
  • 2 cups pecans – toasted, chopped, and divided in half (optional)

For the glaze:

  • 1/4 cup butter
  • 1/2 cup milk
  • 1 cup brown sugar
  • pinch salt
  • 2 1/2 cups powdered sugar

Sprinkle the yeast over the water and let it sit a few minutes until the yeast is dissolved.

Meanwhile, warm the milk and butter in a small saucepan on the stove top until the butter is melted. Combine this with the sugar in a large heat-proof mixing bowl and stir until the sugar is completely dissolved.

Let the milk mixture cool until it is just warm to the touch – NOT HOT. Then stir in the yeast and the pumpkin. Add the salt and five cups of the flour all at once, stirring until all the flour has been absorbed. Squish it between your hands if you’re having trouble incorporating the last of the flour. The dough will be sticky, but should come together in a shaggy ball. If it’s still more the consistency of cookie batter, work in an additional 1/2 cup of flower.

Cover the dough and let it rise for 1-3 hours. During this time, it should double in bulk. At this point, you can punch the dough down and refrigerate it overnight or continue shaping the rolls.

To shape the rolls (either immediately or with the refrigerated dough), sprinkle your work surface with a little flour and dump the dough on top. Pat it down into a rough rectangle and then use a floured rolling pin to roll it into a rectangular shape about a half an inch thick, longer than it is wide. If the dough gets sticky, sprinkle a little more flour on the dough’s surface and on your hands.

Melt the butter in the microwave and stir in the brown sugar and the spices. Spread this over the rectangle of dough, leaving an inch of bare dough at the top. Sprinkle one cup of the toasted pecans over the dough, if using. Starting at the edge closest to you, roll the dough into a cylinder and pinch it closed at the top.

Rub a tablespoon of soft butter into the bottom of two 9×13 baking dishes, two 9-inch cake pans, or a combination. Using a bench cutter or a sharp knife, cut the cylinder into individual rolls 1 – 1 1/2 inches thick. Place them into your baking dishes so they have a little wiggle room on all sides to rise. Cover them with a clean kitchen towel and let them rise until they fill the pan and look puffy, 30 minutes for already-warm dough and 1 hour for dough that’s been refrigerated.

About 20 minutes before baking, begin heating the oven to 375°. When the rolls are ready, bake them for 20-25 minutes, until the tops are golden and starting to look toasted around the edges. Rotate the pans halfway through cooking.

While they are baking, prepare the glaze. In a small saucepan over medium heat, combine the milk and butter. When the butter has melted, add the brown sugar and salt. Stir until the brown sugar has melted. Remove from heat and strain into a mixing bowl to remove any sugar clumps. Stir in the powdered sugar. This should form a thick but pourable glaze.

Let the baked rolls cool for about five minutes and then pour the glaze on top. Sprinkle the remaining cup of pecans over the top, if more nuttiness is desired. Eat them immediately. Leftovers will keep for several days and are best reheated for a minute in the microwave.

Continue Reading

No-knead bread

Little side note: Patent and the Pantry now has a page on Facebook. Come say hello and join in the discussion. Find it here.)

And now, on with the baking!

No one would ever call me trendy.

I’m not on top of the latest fashions, my music tastes are more eclectic than current and I’d label my style retro rather than cutting edge.

So, when food trends begin taking over the Internet, appearing on blogs and in newspaper articles alike, I don’t exactly jump on board. Macarons? Those look a bit tricky, I say. Whoopie Pies? Not sure what the allure is there. No-knead bread? Looks complicated.

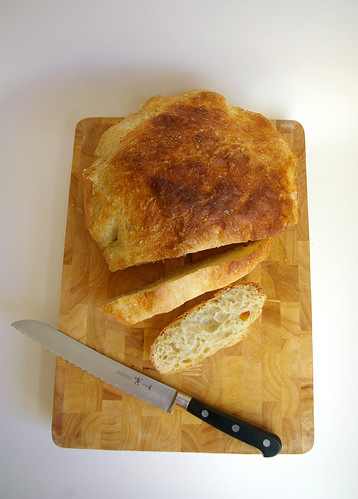
No-knead bread was everywhere about four years ago, shortly after the New York Times’ Mark Bittman wrote a piece about Jim Lahey and his revolutionary recipe for a crusty loaf of bread that required very little effort, only advance planning. Soon bloggers were extolling the virtues of this bread and posts abounded with photos of the round boule with its dark gold crust and large-holed interior.

Bread slice I

My parents jumped on the bandwagon and in the intervening years have abandoned their bread maker in favour of no-knead bread, making a loaf seemingly every other day.

So, on a recent visit with them, I was finally able to taste what all the fuss was about.

It’s no surprise everyone’s been raving.

Bread II

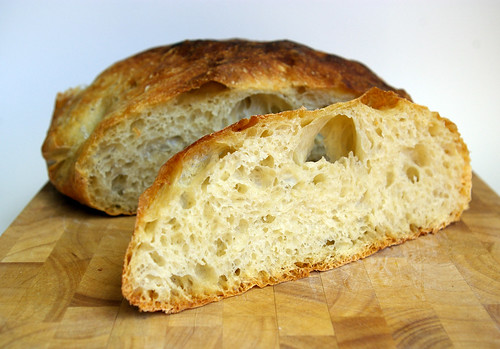
This bread has a crisp crust, but the interior — riddled with the large air bubbles that come from the long fermentation — is all soft chew. It tastes like bread should.

And it makes amazing toast.

But even with all those points, I still resisted for another year before finally deciding it was time to see if I could do it, too.

(I will readily admit here that part of that hesitation stemmed from the inevitable danger that comes from a carboholic realizing she can have access to fresh, homemade bread at will.)

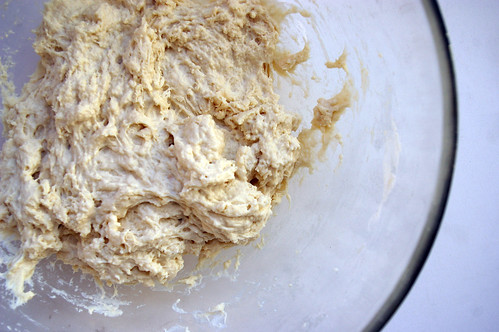
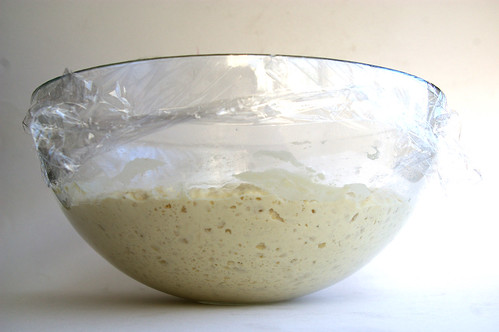
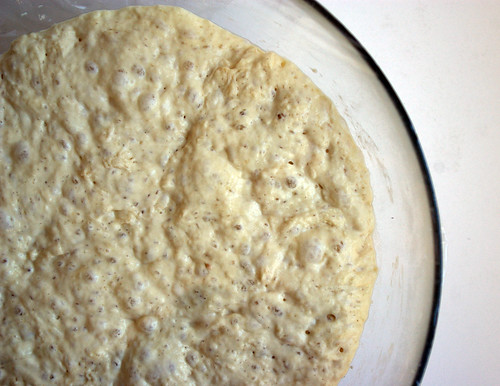
In my glass bowl, I mixed the flour, salt, instant yeast and cool water. I stirred it into a sticky, shaggy mess, covered it with plastic wrap and left it alone for 18 hours. The next day (the most reasonable way to make this bread, I figure, is to let it rise overnight), the dough had tripled in size and was dotted with hundreds of tiny bubbles.

It smelled of yeast and good things to come.

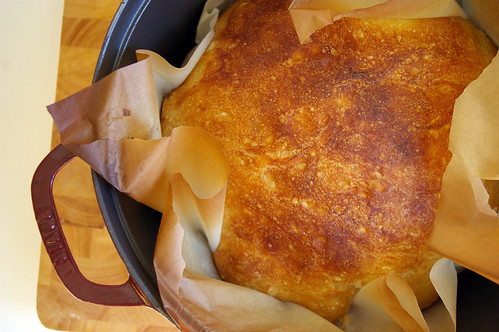
The only time I deviated from the recipe was when Lahey called for a second rise on a clean kitchen towel using wheat bran or additional flour to keep it from sticking, which is then used to dump the dough into a preheated cast iron or enamel pot. Instead, I let it rise again on a piece of parchment. When it came time to get the dough into the cooking vessel, it was just a matter of picking up the four corners of the paper and plopping it in the pot, greatly lessening any chances of getting burned.

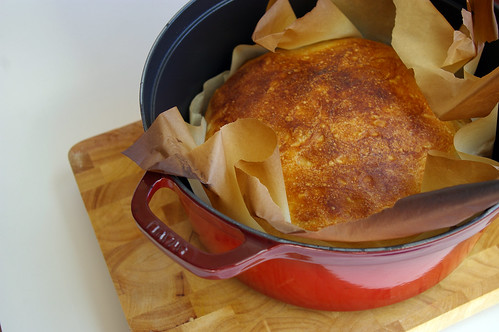
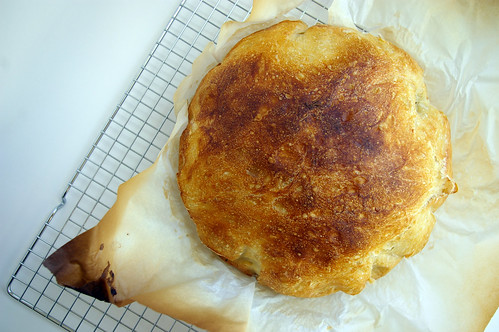
When it came out of the oven, and I lifted it out of the pot using two wooden spoons, I was excited. It looked and smelled like a perfect round loaf.

And that first slice was perfection, topped only with a thin smear of real butter.

Besides the undeniable beauty of eating a slice of bread still slightly warm from the oven (although Lahey calls for it to rest for at least an hour before cutting into it, it is often hard to resist waiting the entire 60 minutes), there is something so satisfying about baking a loaf of bread on your own.

So — I may be behind the times in finally trying it, but this bread is no passing fad.

(This is a Danish Dough Whisk — a tool that is great for mixing dough.)
Danish Dough Whisk

One gram over

Sticky dough

Risen

Risen from the top

Bread

Bread III

Bread slice II

The recipe is Lahey’s own, but I have adapted it to use parchment paper for the second rise. I also found the cooking time too long, so when I bake this bread I cut it down by about 10 minutes.

(The cooking times here are as Lahey suggests.)

Basic No-Knead Bread

Adapted slightly from Jim Lahey’s My Bread (W. W. Norton & Company, 2009, $37.50)

  • 3 cups (750 mL) bread flour
  • 1¼ tsp (6 mL) table salt
  • ¼ tsp (1 mL) instant yeast
  • 1 ¹/³ cups (325 mL) cool water, at 55°F to 65°F (12°C to 18°C)

In a medium bowl, stir together the flour, salt and yeast. Add the water and, using a wooden spoon or your hand, mix until you have a wet, sticky dough, about 30 seconds. Make sure it’s really sticky to the touch; if it’s not, mix in another tablespoon or two of water.

(Note: I’ve had to use more water almost every time. I suspect it’s because Calgary is so dry.)

Cover the bowl with a plate, tea towel or plastic wrap and let sit at room temperature (about 72°F/22°C), out of direct sunlight, until the surface is dotted with bubbles and the dough is more than double in size.

This will take a minimum of 12 hours and (Lahey’s preference) up to 18 hours. This slow rise -fermentation -is the key to flavour.

When the first fermentation is complete, generously dust a work surface (a wooden or plastic cutting board is fine) with flour. Use a bowl scraper or rubber spatula to scrape the dough on the board in one piece.

When you begin to pull the dough away from the bowl it will cling in long, thin strands (this is the developed gluten), and it will be quite loose and sticky, but do not add more flour.

Use lightly floured hands, a bowl scraper or spatula to lift the edges of the dough toward the centre. Nudge and tuck in the edges of the dough to make it round.

Place on a piece of parchment paper, seam side down. Cover with a clean towel and place in a warm, draft-free spot to rise for 1 to 2 hours. The dough is ready when it is almost doubled in size.

Half an hour before the end of the second rise, preheat the oven to 475°F (240°C), with a rack in the lower-third position and place a covered 4½ to 5½ quart (4¼ to 5 L) heavy pot in the centre of the rack.

Using pot holders, carefully remove the preheated pot from the oven and uncover it. Gather up the dough by holding the four corners of the parchment paper and place the entire thing, paper and all, into the pot.

Cover the pot and bake for 30 minutes.

Remove the lid and continue baking until the bread is a deep chestnut colour, but not burned, 15 to 30 minutes more.

Use a heatproof spatula or pot holders to carefully lift the bread out of the pot and place it on a rack to cool thoroughly. Don’t slice or tear into it until it has cooled, which usually takes at least an hour.

Makes one large loaf.

This article first appeared in the Calgary Herald’s Real Life section. For more delicious recipes, visit CalgaryHerald.com/life.

Continue Reading

Feta-Watermelon Salad

Fruit and cheese is a natural combination. I like a nice wedge of brie with pear, have enjoyed dried apricots and a little Gouda and, of course, apple and cheddar are a classic pairing for a reason.

Over the years I’ve seen the combination of feta and watermelon crop up in cookbooks, on blogs and in menus. For a long time I just could not wrap my head around the idea of matching the sharp, salty tang of feta with a sweet and luscious watermelon.

Feta-Watermelon Salad II

It seemed an incongruous match. A slightly chalky cheese with a juicy fruit? I could not be tempted. But I finally broke down and ordered a salad with feta and watermelon at a local restaurant a few months ago. Curiosity got the best of me, I guess. And then I mentally kicked myself for waiting so long.

Where I had expected incompatibility, I found harmony. A harmony that almost tempted me to lick my plate. Decorum reigned, but the salad has remained at the back of my mind for the last few months.

I was never a big watermelon eater. Sure, we’d eat wedges of it during summer as kids, coating our faces in the fruit’s juices as we sat on the back porch. It was a cool and refreshing treat and a nice way to pause between runs through the sprinkler on the lawn. I never did get the hang of spitting seeds, though.

Watermelon II

As I grew older, watermelon dropped off my radar. I never bought it for myself, ate it only when it was part of some fruit salad. Until this dinner out, when I realized this giant fruit could be just as sophisticated as the combination of brie and pear, while still holding that faint taste of childhood summers.

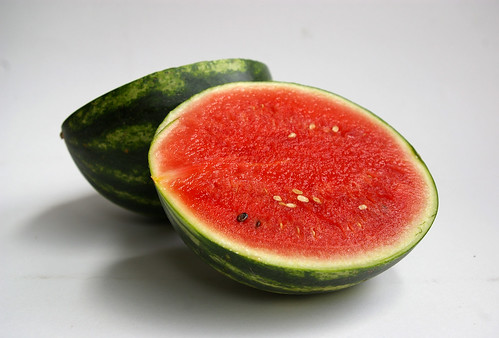
A baby watermelon I found at the farmer’s market sealed the deal. It was time to make this salad my own.

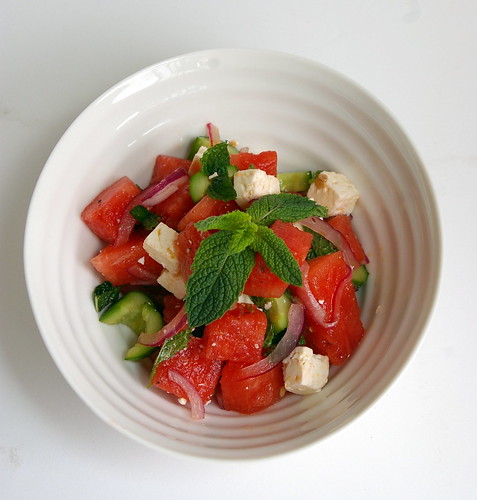
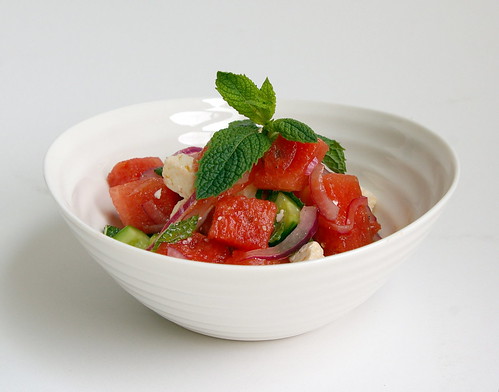
There are myriad variations of feta-watermelon salad on the Internet, and even one or two in my rather large cookbook collection. But each one had some ingredient that held no appeal for me or they appeared to be missing something I believed was crucial. In the end, I simply took from each what I thought was right: watermelon for the sweet; feta for the salt; cucumber for crunch; lime juice for tang; red onion for some sharpness; olive oil for that fruity, grassy flavour; and, of course, mint.

The mint certainly kicked it over the edge for me. That small addition transformed the simple salt-sweet combination into something spectacular.

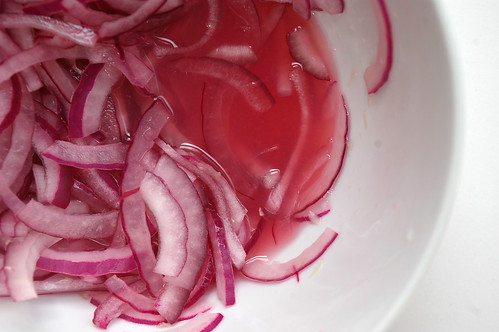
I used a Nigella Lawson trick of marinating the sliced onions in acid — in this case lime juice — which she uses in several recipes, including her own version of feta-watermelon salad. The lime juice takes some of the bite away from the red onions while not robbing their flavour, and also creates a lovely pink colour for the dressing.

I don’t want to get too romantic about this salad, but it did taste a lot like I was eating a summer afternoon. Refreshing like a cold drink, but with the punch of feta and soothing mint. I probably could have eaten the entire bowl.

Which would have been for the best, because this salad really doesn’t keep. Only make as much as you’re going to need, because the watermelon does break down relatively quickly. Not that it didn’t still taste as good — it just lost some of its visual appeal.

Lastly, don’t be afraid to make adjustments as you see fit. Want more feta? Go for it. Think the watermelon cubes should be bigger? Smaller? Not cubed at all? Be my guest. This is a salad, after all, so tailor it to your own tastes. As long as the core ingredients remain the same, it will be tasty.

Mint

Watermelon I

Onions

Feta-Watermelon Salad I

Feta-Watermelon Salad with Mint

  • ½ cup (125 mL) lime juice, from 3 to 4 limes
  • ½ red onion (or one small one), peeled and sliced thinly into half-moons
  • 8 cups (2L) watermelon, cut into ½ inch (2 cm) cubes, one tiny watermelon or ¼ of a large one
  • ½ English cucumber or 3 baby cucumbers, seeded and sliced
  • 1 cup (250 mL) feta, cut into small cubes
  • 2 tbsp (25 mL) extra virgin olive oil
  • ½ cup (125 mL) mint, chiffonade

Juice the limes into a bowl. Slice the red onion and add to the lime juice to marinate while you prepare the rest of the salad.

Cut watermelon into slices, remove rind and chop into chunks. Dump them in a large salad bowl and top with cucumber slices and feta cubes. Add olive oil to red onion-lime juice mixture, stir and then pour over salad.

Roll mint leaves into a cigar and slice thinly into strands. Sprinkle over salad, toss and serve.

This story first appeared in the Real Life section in the Calgary Herald. For more delicious recipes, visit CalgaryHerald.com/life.

Continue Reading

Lemon Curd Tart

Oh look! It’s something lemon!

Lemon Curd Tart - top

I know, I know. I have lemon issues. But, please forget about my lemon obsession for a few moments and let’s concentrate on the fact that I attempted pastry! Yes, that thing that everyone else makes and leaves me paralyzed for fear of disaster.

The fact that it’s advertised as “unshrinkable” and mine so very, very shrank like it was Alice in Wonderland after drinking that potion? Yeah, I’m going to ignore that part of it. Because, if I focus on what didn’t quite work, then I’ll never try to make pastry again and with so many pies and tarts to make, I can’t let that get in my way.

"Unshrinkable" tart shell

So, the occasion was perogy night at a friend’s house. Colette’s mom makes killer homemade perogies and Colette paired them up with fried onions and sour cream, the largest kielbasa I’ve ever seen in my life and a huge casserole dish of her mom’s equally delicious cabbage rolls. And salad. But I think Colette and I were the only ones that ate any. And then, of course, lemon tart.

I picked lemon because I figured it would be something light after all that delicious Ukrainian food. And I picked a tart because I really want to get better at making pastry. This Lemon Curd Tart would take care of both those things.

But it wasn’t without it’s challenges.

1) The “unshrinkable” tart shell that shrank. (Watching cooking shows on TV since this, I have learned that you just can’t stretch dough. It will shrink back. Uh-huh. Lesson learned.)

2) I burnt the living daylights out of my hand when whisking the lemon curd just after it came off the heat. But, I was proud of myself for continuing to whisk (the show must go on!) while stretching my way over to the sink and running cold water on the burn. Boiling hot lemon curd – 1. Me – 0.

My tart pan is also a bit bigger than suggested, which is probably why I had more trouble with the dough and felt the curd layer was a bit thin. Next time I’ll double the dough and make some jam tarts with leftovers. And I’ll double the curd, make a nice thick layer and then eat the rest with a spoon. :D

The lemon curd is pretty basic. The tart shell comes from Dorie Greenspan, as adapted by Smitten Kitchen. (I am leaving her instructions completely intact because she explains it very well.)

Lemons

Eggs

Lemon Curd

Curd in Tart

Lemon Curd Tart - side

Lemon Curd Tart

  • 3 large eggs
  • 1/3 cup fresh lemon juice (2 -3 lemons)
  • 3/4 cup sugar
  • 4 tablespoons unsalted butter, at room temperature and cut into small pieces
  • 1 tablespoon lemon zest (yeah, I did a lot more than that. Probably double.)

In a stainless steel bowl placed over a pot of simmering water, whisk eggs, lemon juice and sugar. Cook, constantly stirring, until mixture becomes thick. (This took about 10 minutes for me.) Remove bowl from heat and strain to remove lumps. Add small pieces of butter and whisk into lemon mixture until butter has melted. Stir in zest. Let cool. Cover with plastic wrap (I press mine right onto the curd to prevent a skin form forming) and refrigerate.

The Great Unshrinkable Sweet Tart Shell
Makes one 9-inch tart crust

  • 1 1/2 cups all-purpose flour
  • 1/2 cup confectioner’s sugar
  • 1/4 teaspoon salt
  • 1 stick plus 1 tablespoon (9 tablespoons; 4 1/2 ounces) very cold (or frozen) unsalted butter, cut into small pieces
  • 1 large egg

1. Pulse the flour, sugar and salt together in the bowl of a food processor. Scatter the pieces of butter over the dry ingredients and pulse until the butter is coarsely cut in. (You’re looking for some pieces the size of oatmeal flakes and some the size of peas.) Stir the egg, just to break it up, and add it a little at a time, pulsing after each addition. When the egg is in, process in long pulses–about 10 seconds each–until the dough, which will look granular soon after the egg is added, forms clumps and curds. Just before you reach this stage, the sound of the machine working the dough will change–heads up. Turn the dough out onto a work surface and, very lightly and sparingly, knead the dough just to incorporate any dry ingredients that might have escaped mixing. Chill the dough, wrapped in plastic, for about 2 hours before rolling.

2. To roll the dough: Butter a 9-inch fluted tart pan with a removable bottom. Roll out chilled dough on floured sheet of parchment paper to 12-inch round, lifting and turning dough occasionally to free from paper. (Alternately, you can roll this out between two pieces of plastic, though flour the dough a bit anyway.) Using paper as aid, turn dough into 9-inch-diameter tart pan with removable bottom; peel off paper. Seal any cracks in dough. Trim overhang to 1/2 inch. Fold overhang in, making double-thick sides. Pierce crust all over with fork.

Alternately, you can press the dough in as soon as it is processed: Press it evenly across the bottom and up the sides of the tart shell. You want to press hard enough that the pieces cling to one another, but not so hard that it loses its crumbly texture.

3. Freeze the crust for at least 30 minutes, preferably longer, before baking.

4. To fully or partially bake the crust: Center a rack in the oven and preheat the oven to 375 degrees F. Butter the shiny side of a piece of aluminum foil (or use nonstick foil) and fit the foil, buttered side down, tightly against the crust. And here is the very best part: Since you froze the crust, you can bake it without weights. Put the tart pan on a baking sheet and bake the crust for 20 to 25 minutes.

5. Carefully remove the foil. If the crust has puffed, press it down gently with the back of a spoon. Bake the crust about 10 minutes longer to fully bake it, or until it is firm and golden brown, brown being the important word: a pale crust doesn’t have a lot of flavor. (To partially bake it, only an additional 5 minutes is needed.) Transfer the pan to a rack and cool the crust to room temperature, and proceed with the rest of your recipe.

Do ahead: The dough can be wrapped and kept in the refrigerator for up to 5 days or frozen for up to 2 months. While the fully baked crust can be packed airtight and frozen for up to 2 months, the flavor will be fresher bake it directly from the freezer,

Continue Reading

Pasta Carbonara

I have had great need of comfort food lately.

And for me that often means cheese and cream and pasta. Emphasis on cream. Sure, throw bacon in there too. So, no, this is not going to be low-fat or healthy or in any way, shape or form good for you, unless you have a severe bacon deficiency. (And wouldn’t that be wonderful?)

This is a totally bastardized version of Pasta Carbonara. Yes, I sometimes make the real stuff. No, this isn’t it. Yes, it’s still good.

Pasta Carbonara

I’ve loved pasta carbonara since I was a kid when my grandfather would make it for me.

I like the contrast of the salty bacon and the slightly sweet onions and the smooth creaminess bundled with the slight chew of a wide, flat pasta. (Why do I always delay so long in writing blog posts. I’m killing myself right now, having eaten the last of this for lunch.)

You may notice that I put a pound of bacon in the ingredient list. I cook up a pound but can guarantee nothing near that actually makes it into the dish. A lot of bacon snacking goes on. I consider it part of the cooking process.

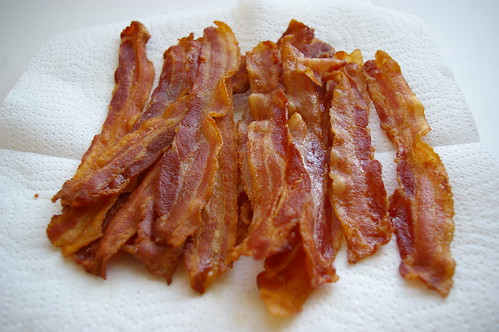
Oh, and I cook it in the oven. This may seem like a weird extra step, but it means I’m not standing around watching it cook in the pan (read: I can go mess around on the computer) and it makes relatively quick work when doing an entire package of the stuff.

Since I make enough for a family of six, I typically have a lot of leftovers. Let me offer you one tip when it comes to reheating: add a bit of milk or cream to the bowl/tupperware container. It will help steam and revitalize the noodles and sauce instead of frying it.

So, now that I’m drooling, I’m not going to keep waxing poetic on how good this is. Trust me. Make it. And don’t feel guilty about it. Sometimes life needs a bit of cream and bacon and pasta.

Diced onion

Bacon

Cream and Onions

In the pan

Pasta Carbonara

  • 500 gram package of pasta (linguine, spaghetti, fettucine)
  • 1 pound bacon
  • 1 tablespoon olive oil
  • 1 yellow onion, diced
  • 1 cup whipping cream
  • 1/4 cup Parmesan cheese (plus more for sprinkling)
  • salt
  • pepper

Feel free to cook the bacon as you prefer. Though, seriously, give this method a try.

Preheat oven to 400. Place bacon on cookie sheet/on rack over cookie sheet/on broiler pan (heck, I’ve even used a casserole dish; it just takes extra draining after). Cook bacon for 15 to 20 minutes or until crisp. (Err on the side of crisp because it will soften in the cream sauce later. Limp bacon will get limper. *Shudder*) Set on paper towels to drain, then set aside to cool. When cool enough to handle, cut into smaller pieces. I usually do them a centimetre or two wide.

Heat olive oil in a pan over medium heat, add onion and a pinch of salt. Saute onion until transluscent, but not brown. Add whipping cream and cook until it has reduced by about a third. It should be super thick and rich. (I usually have a little extra cream or half-and-half around just in case it reduces too much.)

While the cream is reducing, cook pasta according to the packages directions. Drain.

Mix together the cream sauce and the pasta, adding in the Parmesan cheese and tossing until mixed. Add bacon and toss again. Season to taste. (Wait until the end to season because the bacon and cheese are salty and you don’t want to oversalt it.) Serve with fresh cracked pepper and more Parmesan, if desired.

Continue Reading

Vichyssoise

What do you get when you bring together four food bloggers and the idea to all cook something from Julia Child’s Mastering the Art of French Cooking? A helluva lot of delicious food and many full bellies. Not that any of us were complaining, that’s for sure.
It was all Julie’s idea. In honour of the move Julie & Julia coming out, she invited over myself, Cheryl of Backseat Gourmet, Pierre of Kitchenscraps and Gail of The Pink Peppercorn, along with everyone’s significant others. Our only task was to bring one dish out of Child’s cookbook. Since I had to work that day, there seemed to be only one logical choice: a chilled soup. That way I could make it the day before and just let it sit in the fridge at work without doing any harm and no need to reheat. The fact that it turned out to be about -29C that day made my choice seem to be a bit ridiculous. After all, who wants to eat cold soup when it’s stupidly freezing out? But, after a first course of delicious French cheeses and Julie’s homemade Raincoast Crisps (along with a glass or two of bubbly), we had all warmed up enough that it didn’t seem so bad.

Soup on the table

There is something a bit daunting too about cooking for other food lovers, particularly two who have cookbooks out and are serious players on the local (and beyond) food scene. But, I’m happy to say, this soup is stupidly good.

“Potato milkshake!” Pierre declared.

Leek and Potato

Vichyssoise

And he’s not wrong. It was a rich, thick, creamy soup (I’m sure in no small part to the 3/4 cup of whipping cream that went into it!) that was intensely flavoured. I definitely could have eaten more the bowl I had, but I’m glad I didn’t because there was more courses to come.

The other thing that happens when you bring together four food bloggers is that the actual eating doesn’t take place until after all the photographing. We were all jammed into Julie’s kitchen snapping away for a good 15 minutes or so; what the significant others were doing during that time, I know not.

Bloggers

(For the record, yes, I shot the soup earlier in the day at work because the light was better. I really need to get better at flash photography.)

And it was a fine spread that needed to be documented. Boeuf Bourguignon with mashed potatoes, ratatouille, Pommes Parisien (read: cooked in delicous oil and butter) and a work-of-art Moussaka that had us all holding our breath as it was unmolded.

Unmolding

Moussaka

Potatoes

The Spread

And that was just dinner. For dessert, Cheryl outdid herself with Reine de Saba (a chocolate cake, though that is an understatement) and a Grand Marnier Souffle that I sous-chefed with her (thanks Cheryl!)

Grand Marnier Souffle

The food was fantastic; I stuffed myself silly and felt like I needed to roll myself out to the car after. The next time we do one of these, I’m wearing stretchy pants.

All done

Most of all, though, it was great to meet some great new people and hang out with some old (as in known for longer, for the record) friends.

Conversation

This is the original recipe from Julia Child’s Mastering the Art of French Cooking.

Vichyssoise
[Cold Leek and Potato Soup]

  • 3 cups peeled, sliced potatoes
  • 3 cups sliced white of leek
  • 1 1/2 quarts of white stock, chicken stock or canned chicken broth
  • salt, to taste
  • 1/2 to 1 cup whipping cream
  • 2 to 3 tablespoons minced chives

Simmer the vegetables in stock for about 40 to 50 minutes until tender. Puree in a blender or through a food mill. Stir in the cream. Season to taste, oversalting very slightly as the salt loses savor in a cold dish. Chill. Serve in chilled soup cups and decorated wtih minced chives.
The recipe says it serves 6 to 8. We stretched it to nine with no great effect. But, then again, we had about 10 other things to eat….

Continue Reading

Applesauce Cake

The original copy of this recipe is a decrepit piece of scrap paper with a lone hole punch that has been reinforced. It is battered, splattered and stained.

It has been typed on an old typewriter using a cloth ribbon, a large series of Xs cancelling out the erroneous title of Nanaimo Bars, while the correct name of Applesauce Cake has been underlined in red.

And there, in my mum’s bubbled handwriting, are the adjustments she has made over the almost four decades she has carried this recipe around. It has travelled from one kitchen to the next, slowly yellowing with age, garnering new splotches as time has passed by.

The original recipe

But the flavour of this applesauce cake — warmly spiced, slightly sweet and oh-so-apple — remains a constant. A taste of childhood and home and family.

The original still resides in my mum’s kitchen, tucked away among her other recipes, typed by her or clipped from the newspaper, newer ones printed from the Internet or photocopied from magazines. But with the technology of a scanner and e-mail, I now have my own digital copy of the beloved Applesauce Cake recipe, complete with brown stain and wrinkled edges.
At its heart, it is a simple loaf cake flavoured with applesauce, nutmeg and cinnamon. But it is also a trigger for childhood memories: trying to wait for it to be cool enough to eat as it sat on the wire baking rack; running little fingers under the rack glaze that had drizzled off the edge of the cake; finally getting a slice and eating it from the bottom up so the last few bites were coated with icing.

Applesauce Cake I

The apple flavour comes through well, but it is the cinnamon and nutmeg that make the cake a little more extraordinary. I’m not a food snob by any stretch, but I will say that there is no comparison between pre-grated nutmeg in a spice jar and the taste imparted by the freshly grated stuff.

These days whole nutmegs are not that hard to find and are well worth the effort for the improved flavour alone. Not to mention, they are gorgeous when grated: cream-coloured with darker brown veins, like marble.

(A fine grater will work, but my family is devoted to the rasps scoop up from Lee Valley Tools, which make quick work of nutmeg and are ideal for zesting citrus, mincing garlic and making fluffy clouds out of Parmesan.)

While the original version made one loaf in a 9.5-by 5-inch pan (24-by 12-centimetres), it left the baker with leftover applesauce. In her wisdom, my mum amended the measurements–writing them neatly down the side of the paper– so it would use up a full can, rather than leaving her to try to deal with roughly a half-cup of the stuff. Plus, in her words, it means “more cake!”

This comes together very quickly–especially if you have the forethought to pull out the butter or margarine early. Patience must come, though, with the hour-long baking time and the dreaded cooling period, which was such a source of frustration as a kid.

My glazing skills apparently need work, but, while unattractive, it tasted just as good as when I ate it in my mum’s kitchen.

Applesauce Cake II

And yes, when I had finally waited long enough for it to be glazed and I could slice off the first piece, I ate it starting at the bottom so the last bite would be the perfect combination of cake and glaze. After all, some things never change.

Applesauce Cake III

Applesauce Cake IV

Applesauce Cake

  • ¾ cup (175 mL) margarine or butter, softened
  • 1½ cups (375 mL) sugar
  • 3 eggs
  • 2¾ cups (675 mL) sifted flour
  • 1½ tsp (7 mL) salt
  • 1½ tsp (7 mL) baking powder
  • ¾ tsp (3 mL) baking soda
  • ¾ tsp (3 mL) nutmeg
  • ¾ tsp (3 mL) cinnamon
  • 1 14 oz (398 mL) can sweetened applesauce

Preheat oven to 350°F (180°C).

Cream together margarine and sugar until light and fluffy. Blend in eggs. Sift together dry ingredients. Add to creamed mixture, alternating with applesauce, beating after each addition.

If you like, stir in ¾ cup (175 mL) chopped walnuts before pouring batter into loaf pans.

Pour into two prepared (sprayed or rubbed with a bit of butter or margarine) 8-by 4-in. (20-by 10-cm) loaf pans. Bake for 1 hour or until done. (Start checking at the 50-minute mark.)

Remove and let cool for about 10 minutes before removing from pans and putting on rack to cool completely.

Sugar Glaze:

Combine ½ cup (125 mL) sifted icing sugar with 1 tbsp. (15 mL) water. Pour over cake.

This story first appeared in the Real Life section in the Calgary Herald. For more delicious recipes, visit CalgaryHerald.com/life.

Continue Reading

Big Crumb Rhubarb Coffee Cake

Holy crap, how is summer halfway over already?

I have, like, eight recipes for rhubarb stuff on my delicious (warning: about 80 lemon-related recipes ahead) and rhubarb season is already starting to slip away. Gah.

Rhubarb

At least I got this one out of the way.

Sadly, though, procrastination got the better of me and I’m only posting it now . . . about five weeks after making it. This is bad for several reasons.

1) Rhubarb season is slipping away quickly.

2) Now I am craving a piece of this cake and there is none to be had.

OK. Two reasons.

I love crumb cakes. And I love rhubarb. So, really, there was no debate on whether or not I’d be giving this recipe a shot.

Sadly, my crumb topping didn’t turn out quite as nicely. In fact, I had to kind of manipulate the crumb topping into actual “crumbs” (I suspect I needed a little more butter), but it was still delicious. A nice layer of sweetened rhubarb slices through the middle was a good contrast to the cake and sweetened crumble topping.

Normally, I’d meditate more on the failures of this attempt, but, let’s face it, it was cake, with rhubarb, topped in a mixture of sugar and butter. Even if the crumb topping was kind of crummy, it was still going to be fantastic.

Update: I just went back to Smitten Kitchen’s recipe and found that I’m not the only one who had problems with the crumb topping. Apparently, it’s all about the order in which you mix the crumb ingredients… (Instructions below the recipe will outline the correct way.) Yay! Now I’m ready to try this again and hope for much better results.

Sliced rhubarb

Cake pre-crumb

Big Crumb Rhubarb Coffee Cake

This is courtesy of Smitten Kitchen, which she apparently adapted from the New York Times.

‘Big Crumb’ Coffeecake with Rhubarb

Rhubarb filling

  • 1/2 pound rhubarb, trimmed
  • 1/4 cup sugar
  • 2 teaspoons cornstarch
  • 1/2 teaspoon ground ginger

Crumb topping

  • 1/3 cup dark brown sugar
  • 1/3 cup granulated sugar
  • 1 teaspoon ground cinnamon
  • 1/2 teaspoon ground ginger
  • 1/8 teaspoon salt
  • 1/2 cup butter, melted
  • 1 3/4 cups all-purpose flour

Cake

  • 1/3 cup sour cream
  • 1 large egg
  • 1 large egg yolk
  • 2 teaspoons vanilla extract
  • 1 cup all-purpose flour
  • 1/2 cup sugar
  • 1/2 teaspoon baking soda
  • 1/2 teaspoon baking powder
  • 1/4 teaspoon salt
  • 6 tablespoons softened butter, cut into 8 pieces.

Preheat oven to 325. Butter an 8-inch-square baking pan.

Slice the rhubarb into 1/2″ thick pieces, then toss with sugar, ginger and cornstarch.

In a large bowl, whisk together the sugars, spices and salt into melted butter until smooth. THEN, add flour with spatula or wooden spoon. It (should) will look and feel like a solid dough. Set aside.

Stir together sour cream, egg, yolk and vanilla. Using a mixer, stir together flour, sugar, baking soda, baking powder and salt. Mix in butter and a spoonful of the sour cream mixture until flour is moistened. Increase speed for 30 seconds. Add the rest of the sour cream mixture in two batches, beating for 20 seconds each time. Scoop out about 1/2 cup of the batter and set aside. Put the rest of the batter into the prepared pan.

Spoon rhubarb mix over the batter, then top with dollops of the 1/2 cup of batter set aside.

Using your fingers, break topping mixture into big crumbs — 1/2″ to 3/4″.  Sprinkle over cake.

Bake for between 45 and 55 minutes — until a toothpick inserted in the centre comes out clean.

Continue Reading

Lemon Rosemary Olive Oil Cake

OK.

It’s official.

I need an intervention.

My love of rosemary and lemon have reached new levels of ridiculousness.

Cake slice

And here’s how I know that.

As some of you may know, I write for the Calgary Herald’s Real Life section on occasion. I like to pitch the topic in advance, just in case it’s going to clash with any of the other upcoming articles the editor may have planned.

Me: Here’s what I’m thinking: Lemon Rosemary Olive Oil Cake

(Pause)

Her: Lemon?

Me: (confused) …Yes…?

Her: Wasn’t your last thing on lemon? And, um, the one before that?

Me: Okey-dokey. I’ll figure something out. Maybe I should do a boozy recipe….

Her: Good idea.

It was only when I got back to my desk and looked up the drink recipe I had added to my to-do list that I realized I may have a problem: Vodka Rosemary Lemonade Fizz.

Damn you, lemon, why do I love you so? And, uh, rosemary too.

Lemon and Rosemary

But, just because I couldn’t write it for the Herald didn’t mean this bad boy (and, at some point down the road, the vodka recipe too) wasn’t going to get made. After all, one can only deny their love for lemon desserts for so long. And, let’s face it, it was raining and snowing and sleeting out at the time, so what was a girl to do? Bake.

This is adapted slightly from Julie’s recipe (over at Dinner with Julie). Her original recipe calls for a finely chopped or grated pear. I omitted it this time around, but will be tempted to throw one in next time.

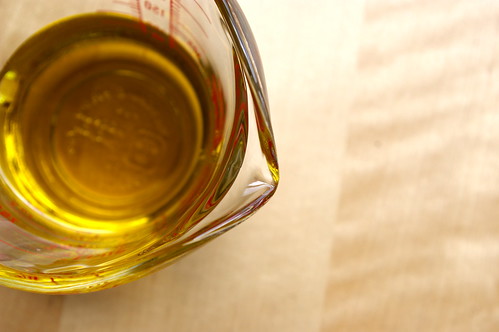
Olive Oil

Studded with rosemary

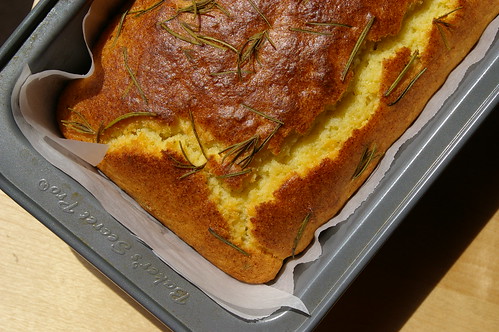
Golden cake

Lemon Rosemary Olive Oil Cake

  • 4 large eggs
  • 3/4 cup sugar
  • grated zest and juice of a lemon
  • 1/2 cup regular or extra virgin olive oil or canola oil
  • 1 1/2 cups all-purpose flour
  • 2 tsp. baking power
  • 1/4 tsp. salt
  • 2 sprigs of rosemary, leaves stripped off and chopped
  • a couple more sprigs of rosemary to decorate the top (optional)

Preheat oven to 350. In large bowl, beat eggs for about a minute until frothy. Add sugar and beat for a few minutes until mixture is thick and pale. Add lemon zest, juice and olive oil and beat again.

Combine flour, baking powder, rosemary and salt in another bowl, then add to egg mixture. Stir by hand until just combined.

Pour into prepared loaf pan (sprayed or lined with parchment). Lay decorative rosemary on top. Bake for 45 minutes, until golden. (Mine was done in a little less, so you may want to check earlier if your oven runs a bit hot.

Continue Reading

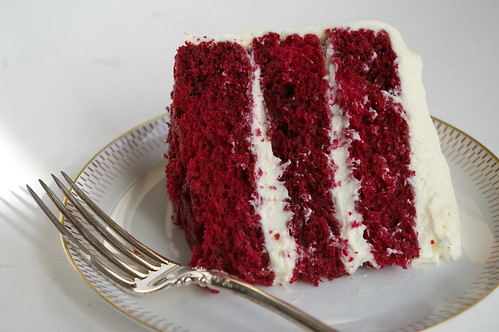
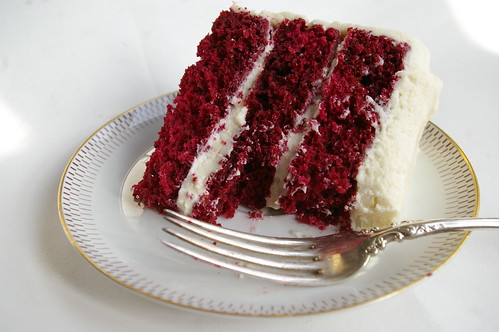
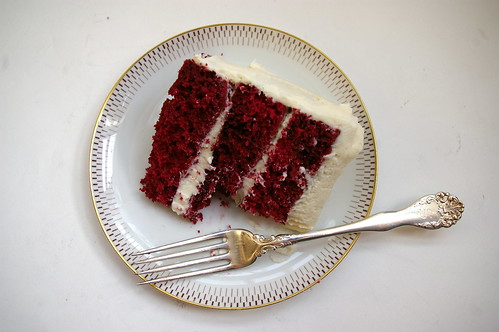
Red Velvet Cake

It was a year ago that I embarked on a very special relationship. It has, at times, been hard work. And, other times, very rewarding.

Yes, that’s right. It’s my first blogiversary. Yay!

I felt the best way to celebrate was to take another stab at a Red Velvet Cake. The first attempt was, well, less than stellar. And my fascination with this southern U.S. specialty hasn’t waned in the intervening months. Plus, there is something so appealing about ritual, no?

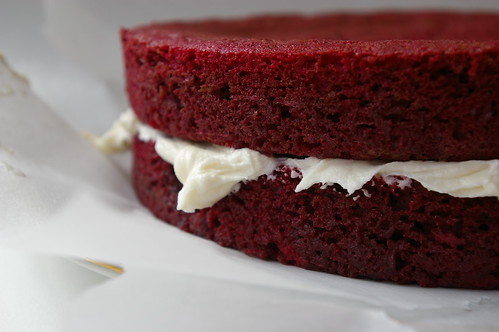
Red Velvet Slice III

There are about 800 million different red velvet cake recipes on the Internet.* (*Slight exaggeration possible.) And I have a collection of about seven that I’m slowly working my way through. One day I will find the perfect recipe. This one is certainly a step closer.

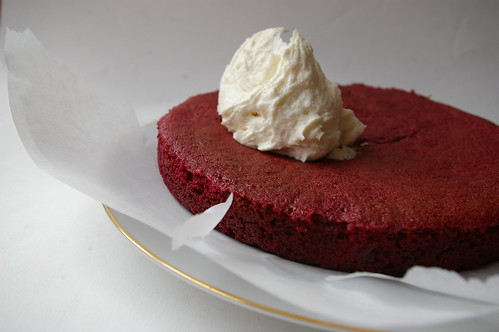
Take two was far and away better than my first attempt, though, troublingly, not perfect. Friends disagreed. Of course, when you layer that much cream cheese icing on anything it’s going to taste good.

Red Velvet Slice IV

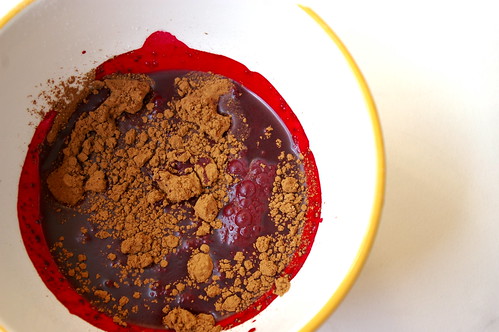
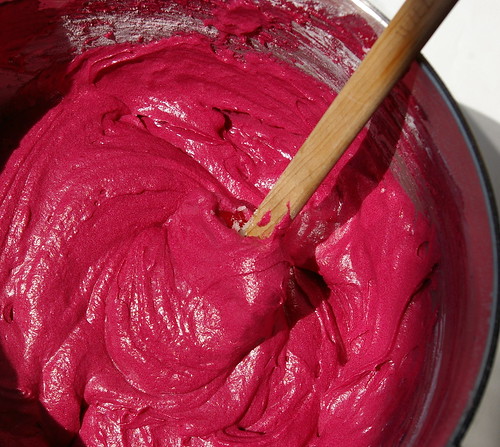
Even though I created a paste using the liquid food colouring and cocoa, I still got faint chocolate-coloured swirls in the batter. I suspect I was overly cautious when it came to mixing the paste in. But this time was definitely more red than the hot pink version from last year. Still, not quite the deep red I was looking for.

I also, decadently, decided to go with a triple layer cake instead of the usual double. (Anything to acquire new baking equipment; I am the worst when it comes to wanting new kitchen things. Single handedly fighting through the recession with baked goods and the stuff in which they are baked!)

And I ate the first piece with a lovely antique silver fork I bought a few days earlier during an antiquing trip with my friend Sherri Zickefoose to Nanton — a little town about an hour south of Calgary that has a handful of very fine shops. Because, when it is a celebration, even if you are alone, it should be done right.

Red Velvet Slice II

Red Velvet Slice

The next day I took the rest of the cake into work. So, on a Sunday morning, three of us sat around listening to the police scanner eating cake with plastic forks at our desks, hours before noon. A rather decadent weekend shift, to be sure.

Lining the cake pans

Cocoa and colouring

Cocoa and colouring

Empty bottle

Batter stained

Cake batter

Dye spot

Icing dollop

Icing the layers

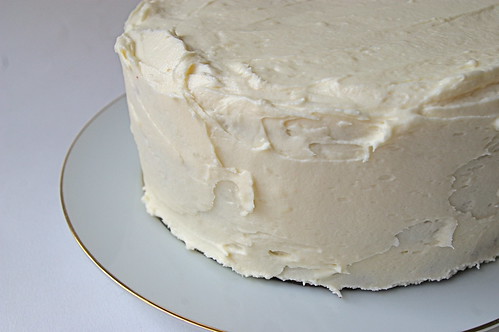
All iced up

Red Velvet Cake

  • 2 1/2 cups sifted cake flour
  • 1 teaspoon baking powder
  • 1 teaspoon salt
  • 2 tablespoons unsweetened cocoa
  • 2 oz. red food colouring (I used two bottles, which I think were 1 oz. each)
  • 1/2 cup unsalted butter, room temperature
  • 1 1/2 cups sugar
  • 2 eggs, room temperature
  • 1 teaspoon vanilla extract
  • 1 cup buttermilk, room temperature
  • 1 teaspoon white vinegar
  • 1 teaspoon baking soda

Preheat oven to 350.

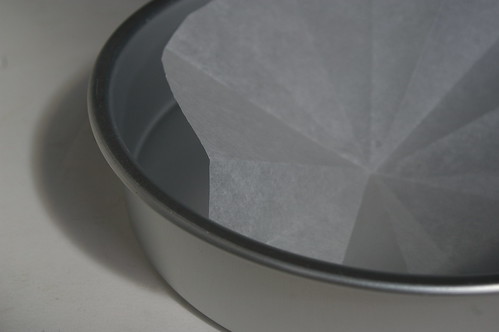
Butter and flour three 8″ cake pans. (Or, butter and line base with parchment.) Sift together cake flour, baking powder and salt in bowl, then set aside. In a small bowl, mix food colouring and cocoa powder until there are no lumps. Set aside.

In a large bowl, using a mixer, beat butter and sugar until light and fluffy. Beat in eggs one at a time, then add vanilla and cocoa-colouring mix. Add one-third of the flour mixture to the batter, beat well, then add half of the buttermilk. Beat in another third of the flour, then the rest of the buttermilk. End with the last third of the flour mix. Beat until just combined, making sure to scrape down the sides.

In a small bowl, mix vinegar and baking soda, then add straight to cake batter and stir well. Quickly divide batter between three pans and put in oven. Bake for 25 to 30 minutes. Cakes are baked when a toothpick inserted in the center comes out clean.

Let cakes cool in their pans on a wire rack for 10 minutes, then remove and let them cool completely. Frost with cream cheese icing.

Cream Cheese Frosting

  • 16 oz. cream cheese (2 packages), softened
  • 1/2 cup unsalted butter, room temperature
  • 1 teaspoon vanilla extract
  • 2 1/2 cups icing sugar, sifted
  • pinch of salt

Using a mixer, blend cream cheese and butter until smooth. Blend in salt, vanilla and then powdered sugar. Beat until light and fluffy and then ice cake.

Continue Reading

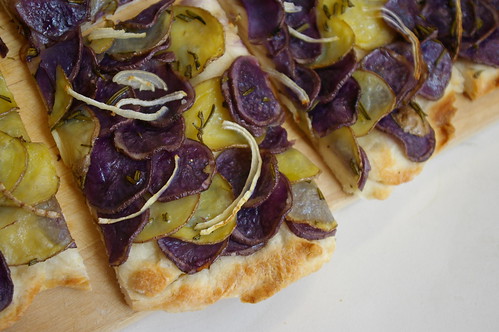
Potato Pizza with Rosemary

I love the French word for potato: pomme de terre.

Apple of the earth.

It’s so evocative. It speaks of wholesomeness and simplicity. The dusty rows in farmer’s fields, the pockmarked tubers hidden under clumps of dirt and the round potatoes that tumble out when finally unearthed.
Also, it’s a damn tasty vegetable.

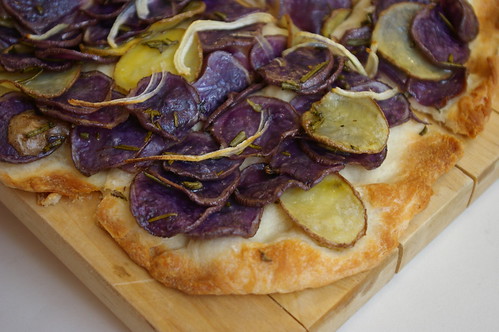
Potato Pizza with Rosemary I

My love of potatoes goes back to childhood. At one time I even had a potato scrapbook. I’m not kidding.

In the ’80s, the potato farmers in the U.S. had a big ad campaign to try to convince Americans that potatoes were vegetables. One was a photo of a big baker potato with a big daub of green paint on it, next to a jar of paint and dripping brush. Underneath was a caption that read something like, “What do we have to do to show it’s a vegetable?”

And, while the scrapbook has disappeared from my life, my love of potatoes remains.

I was so excited a couple of weeks ago to spy a massive (read: too big for a single person) bag of multi-coloured baby potatoes at Costco. I rooted through to find one that had a high proportion of purple potatoes. These things rock. I love their vibrant colour! Am tempted to boil and squash up the next batch for a little violet-coloured mash….

Purple Potato

So, I knew they would be perfect for this potato pizza. This recipe would have Atkins rolling over in his grave. A carb base, topped with carbs. Mmmm!

But, damn it, sometimes a girl just needs her potatoes.

Pizza dough rising

Sliced potatoes

Pizza for the oven

Potato Pizza with Rosemary II

Potato Pizza with Rosemary III

I apologize. I have no idea where this recipe came from originally. Something I found years ago, cut and paste into a plain document and then printed…. Even then, it’s been slightly adapted, of course.

Potato Pizza with Rosemary

  • 1 1/2 cups all-purpose flour
  • 1/2 teaspoon salt
  • 1/2 teaspoon sugar
  • 1/2 cup cold water
  • 1/2 teaspoon instant dry yeast
  • Olive oil for bowl and pan
  • thinly sliced potatoes (2 or 3 large potatoes, 10 or more baby potatoes)
  • 1/4 onion, cut in half and thinly sliced
  • 4 tablespoons extra virgin olive oil
  • 2 tablespoons fresh rosemary, chopped
  • sea salt for sprinkling

Combine flour, salt, sugar and yeast in a bowl, then slowly add water. Mix with spoon until ingredients start to come together, then using dough hook on a mixer, knead/mix for another 10 minutes until the dough is smooth and elastic.

Place in oiled bowl and let rise for two or more hours. (Note: mine didn’t rise quite as much. Unsure why, but ended up with pretty thin crust as a result.)

Using a mandoline or a knife, thinly slice potatoes. (The recipe then calls for the potatoes to be soaked in several changes of water. I didn’t do this because I was worried what would happen to the purple potatoes. Still tasted fine to me, so….?) Combine potatoes with pinch or two of salt, rosemary and 1 tablespoon of extra virgin olive oil.

Preheat the oven to 425. Spread thin layer of olive oil on rimmed baking sheet. Stretch dough out on pan until it reaches the edges. Evenly layer potatoes over dough, then drizzle on three tablespoons olive oil, along with sea salt and chopped rosemary.

Bake about 20 minutes until bottom is golden. Let cool slightly before cutting, then serve. Also good at room temperature.

Continue Reading

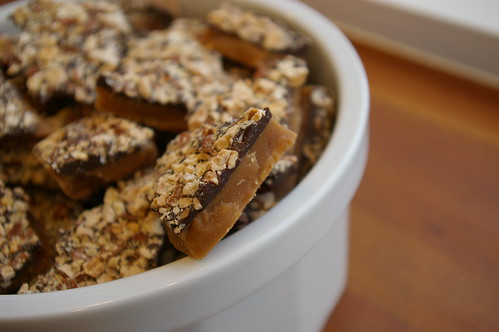
English Toffee

Candy making kind of scares me.

Thread stage, soft ball, hard crack. It just all sounds like it could go horribly wrong with little or no notice. And the thought of burnt sugar (or, perhaps, more importantly, trying to clean up burnt sugar) is enough to put me completely off the idea entirely.

But when I went home at Christmas (and yes, that’s how long I’ve procrastinated on this post. I have no idea why.), my mum and I thought this would be a good afternoon project. Considering about three feet of snow was surrounding the house and even the four-wheel-drive SUV was having a hard time making it up the narrow gravel road, staying in to do some baking and candymaking seemed like a grand plan. Not to mention the newly renovated kitchen was ideal for photos. Hello natural light!

We’re both big fans of English Toffee, even though I’m generally not a huge fan of almonds. My mum is more of a connoisseur than me, though; she can judge good toffee from bad. So, it was entertaining to think we could have a go at making our own.

English Toffee

It was great to cook with someone else. Since I have no tripod, my photos tend to be very static. Just too tricky to try to pour or stir and shoot at the same time. Not to mention that my cave-like kitchen is terrible when it comes to lighting. I actually take things out of my kitchen and shoot them by the window to get the best light. So, I took full advantage of having another pair of hands.

Also, frankly, I wasn’t going to attempt this recipe without having someone there who has some expertise.

But this has made me feel that I could attempt candy again in the future.

It’s essentially a waiting (and stirring) game. Keeping an eye on the temperature and watching as two basic ingredients transform themselves into something completely different. I liked the molten lava look of the toffee as it grew closer to being ready and then how it changed again when it was poured into the sheet pan, taking on an almost stained glass type look: coloured and glossy and flat.

Mostly, though, what I enjoyed was a chance to hang out, catch up and just spend time together. I only get back to Vancouver once or twice a year and I’m usually rushing around to see old friends and poke around some of my favourite stores.

The giant piles of snow that continued to fall almost the entire time I was there over the Christmas holidays were a blessing, in the end. There was no reason to rush off on errands or to visit. Instead, we had the perfect excuse to stay in and just spend time in the kitchen, bonding over a bubbling pot of sugar and butter.

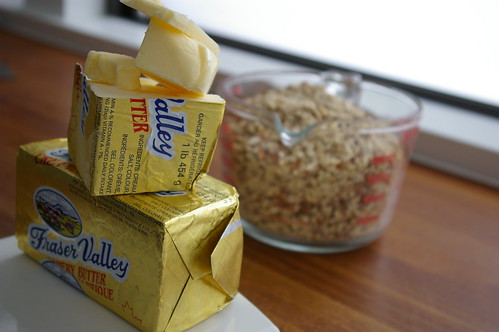
Butter and almonds

Butter

Bubbling hot toffee

Pouring the toffee

Smooth Toffee

Adding the chocolate chips

Making the chocolate layer

Spreading the chocolate

Almonds

Finished Toffee

Breaking it up

Smashed up

English Toffee

  • 3 cups salted butter (1.5 pounds)
  • 3 cups sugar
  • 2 cups semi-sweet chocolate chips
  • 3 cups roasted, unsalted almonds crushed

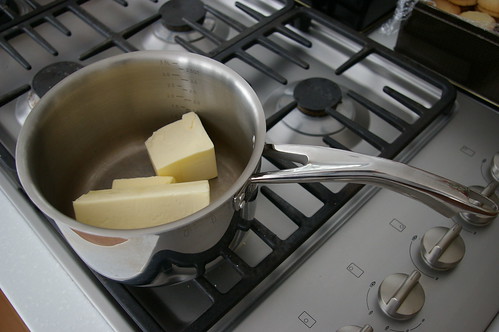
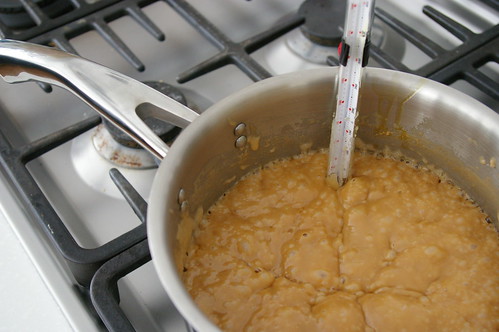
In a heavy bottom stock pot, start to melt the butter, adding the sugar after it has started to melt. Stir to emulsify the mixture, then add the candy thermometer, making sure there is enough of a gap between it and the bottom of the pot. (A wooden spoon should just be able to sweep underneath it.) Keep stirring the mixture. As it gets hotter, the mixture will thicken and start to darken. Keep cooking until the mixture reaches 294 degrees F. Caution, the temperature will climb quickly through the final 20 degrees.

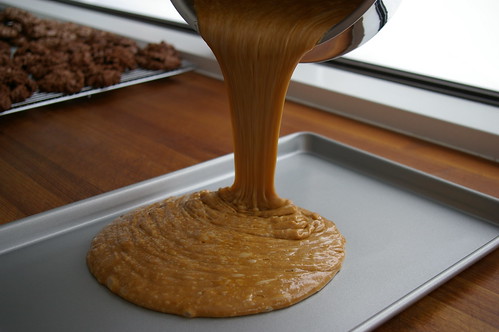
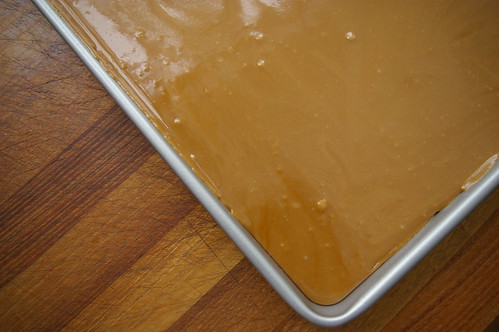
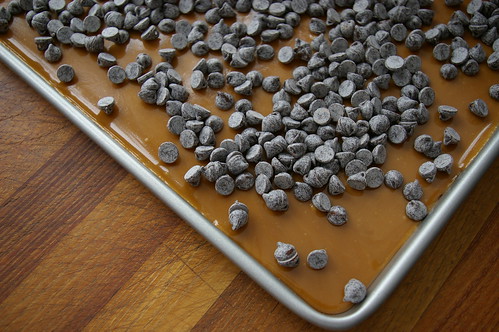
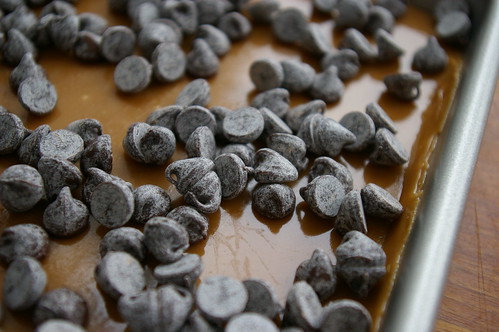
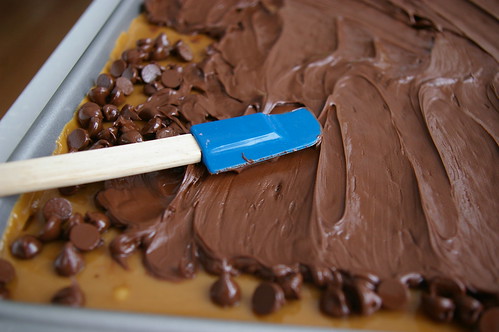
Let the mixture cool slightly and then pour into a 13×18″ pan. Let cool for about 10 minutes, then sprinkle on the chocolate chips. The heat of the toffee should be enough to melt the chocolate. It didn’t for us, so we threw it in the oven (warm from roasting the almonds) for a minute or two until it was spreadable and then used a spatula to get the chocolate covering the toffee.

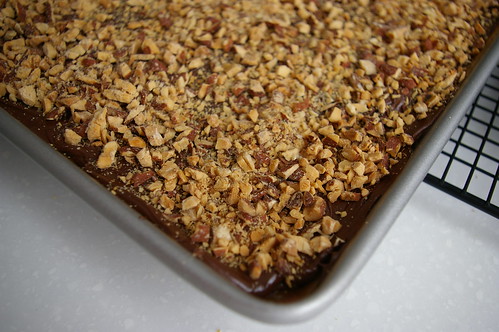
Sprinkle on chopped nuts and press into chocolate.

After it has cooled to room temperature, put another pan of the same size over the toffee and invert. It should pop right out.

We used a meat mallet to break it into manageable pieces.

Continue Reading

Penne alla Vodka

I don’t cook much with alcohol.

Vodka

Sure, there’s been the odd wine reduction sauce, a shot or two of brandy to a roasted tomato soup to round out the taste or a splash of sherry in my chicken tetrazzini. But the goal in these recipes is to add that hint of flavour, to enhance the other ingredients, not to dominate the dish.

So, I was a bit intrigued the first time I heard about Penne alla Vodka. There was no way the liquor was taking a back seat in this recipe; it’s in the name, after all. But how would the drink I associate with martinis and Caesars work over a plate of steaming pasta?

Vodka II

Let me be frank: it worked like a charm. So charming, in fact, I made it twice in one week–the sign of any good recipe, as far as I’m concerned.

I was a bit worried at first, because the instructions call for the vodka to be poured over the hot drained pasta instead of letting the alcohol cook out in the tomato part of the sauce. I feared it would be like eating a Bloody Mary for dinner with a scraping of Parmesan over it.

The tomato sauce

But a strange sort of alchemy happens once the butter starts to melt over the hot pasta and mingle with the boozy vodka.The flavours smooth together. (Because, yes, for experimentation purposes I did try a piece of penne with just the butter and vodka. You know, for scientific reasons and certainly not because I was getting hungry and curious.)

Adding the butter

Dumping in the tomato mixture, delicately perfumed with garlic and scattered with bits of soft, slightly caramelized onions, transformed some very basic pantry ingredients into a rich, guilty-pleasure type dish.

It should be said here that I like it saucy–as in, the pieces of penne should merely act as sauce conveyors. Spiked on the end of my fork, the pasta is swept around the bowl to pick up the last bits of onion and tomato, the last dribble of rich sauce.

And this sauce is dangerously good — enough to make you want to lick the bowl when no one else is looking. Ahem, not that I’m condoning that. So, I’ve adjusted the recipe slightly to al-low for my preference for more sauce. Feel free to add more pasta if desired.

Before the mixing

Unexpectedly, this is fantastic cold the next day. Perhaps it’s be-cause vodka is best when straight from the freezer? I ended up eating most of the leftovers straight from the fridge rather than waiting for the workplace microwave to be freed up. After all, with a dish like this, who would want to delay taking a bite?

Penne alla Vodka

The original Nigella Lawson recipe calls for garlic-flavoured olive oil. I don’t tend to keep that around, so I’ve adjusted accordingly. Of course, if you do have it, just go ahead and use it and skip the part about sauteing garlic in the first step.

Penne alla Vodka

  • 1 large onion, diced
  • 2 tablespoons (25 ml) olive oil
  • 2 garlic cloves, roughly chopped
  • Salt
  • 2 tablespoons (25 ml) whipping cream
  • 1 28-oz (796-ml) can diced tomatoes
  • 1 lb (500 g) penne
  • ½ cup (125 ml) vodka
  • 4 tablespoons (60 ml) unsalted butter
  • Parmesan

Add olive oil to large frying pan and bring up to medium-low heat. add garlic and saute for one or two minutes to flavour the oil. don’t let the garlic burn.

Remove the garlic and add the onion, along with a pinch or two of salt. Cook the onion, stirring occasionally until soft and just starting to caramelize. add the can of tomatoes and let simmer so the liquid has reduced. (this took about 10 minutes when i made it, so i put the pasta on to boil as the sauce was cooking.) when the sauce has thickened, remove from heat and stir in whipping cream.

Add pasta to salted, boiling water and cook as instructed until the noodles are al dente. drain and return the pasta to the pot. pour vodka over pasta and add butter and another pinch or two of salt. stir until the butter has melted, then add the tomato mixture. toss all together until coated evenly, then check for seasonings. add more salt if necessary.

Serve with fresh parmesan serves 5.

This story first appeared in the Real Life section in the Calgary Herald. For more delicious recipes, visit CalgaryHerald.com/life.

Continue Reading

Chocolate Cake

So, I know I’ve mentioned before that I don’t drink coffee. I couldn’t brew a pot if my life depended on it and, for that matter, I don’t even have the supplies to make an attempt. So, noting that this Chocolate Cake recipe — like many others involving chocolate — called for brewed coffee, I knew I was going to have to resort to other measures. Yup, Starbucks. But, since I don’t drink coffee, I had no idea what to order.

Me: Um, can I get a tall, uh, um, Verona…?

Barista guy: Sure. (Starts to pour coffee.)

Me: Um, is that a dark roast? (It occurs to me that might be too much of a coffee flavour. I think? Isn’t that what dark roast means? Jesus, I need a coffee primer.)

Barista guy: Yup. (pause) Did you want something else?

Me: Uhhhhhh, yes…..? A medium roast…..?

Barista guy: (shrugs and dumps out dark roast, pours new one.)

Me: Um, I’m a coffee neophyte. (Wishes had stopped talking.)

Then, since the coffee had to be hot, I had to drive home immediately and start making the cake. Yes, I’m a baking nerd.

So, I found this recipe on the Cook’s Illustrated web site. I’ve always loved this magazine and now I love their site (thanks to my friend Julie for the birthday subscription!). The videos are especially great because sometimes you really do need to see what they are talking about. But it does crack me up that all the clips are about three minutes long. Anything looks easy when a) professional chefs do it b) they do it in three minutes.

But this recipe, actually is easy.

The other thing I liked about this recipe was that it isn’t unheard of to have all of these ingredients on hand. (Except, for me, coffee, of course.) And it bakes super quickly and it doesn’t really need frosting, so this would be easy to whip up any time.

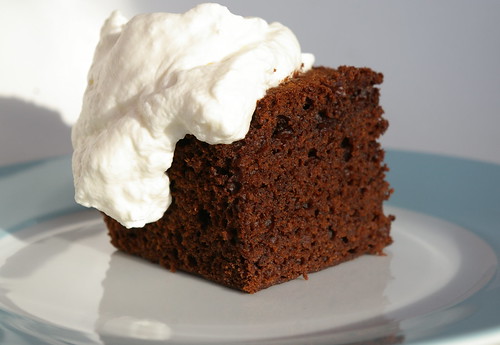
This cake is really fantastic on it’s own, so I don’t suggest icing it. But I do feel that a little dollop of sweetened whipped cream is the perfect addition. It, possibly ironically, cuts some of the richness but without taking away from the chocolate-y goodness of the cake.

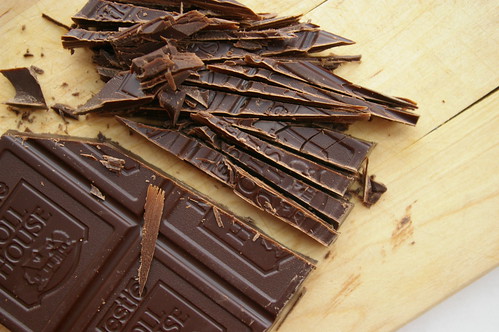
Chopped Chocolate

Chocolate and cocoa

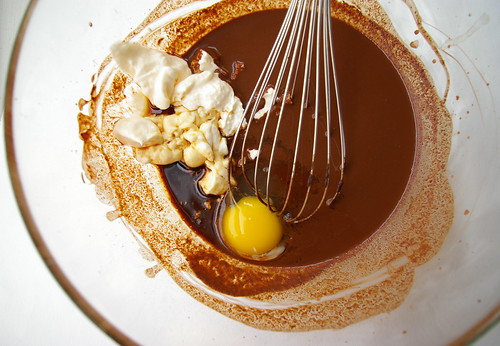
Chocolate, egg and mayonnaise

Whisked together

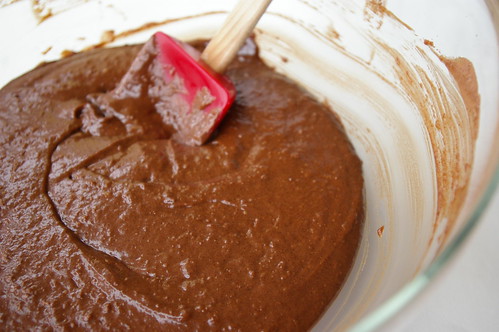
The batter

What was left over

Chocolate cake topped with whipped cream

Easy Chocolate Cake

  • 1 1/2 cups unbleached all-purpose flour
  • 1 cup sugar
  • 1/2 teaspoon baking soda
  • 1/4 teaspoon table salt
  • 1/2 cup Dutch-processed cocoa powder (I used Fry’s)
  • 2 ounces bittersweet chocolate , chopped fine
  • 1 cup fresh black coffee, hot
  • 2/3 cup mayonnaise
  • 1 large egg
  • 2 teaspoons vanilla extract
  • whipped cream — for serving, optional

Preheat oven to 350. Spray an 8″-square baking dish with nonstick spray.

Whisk flour, sugar, baking soda and salt in a large bowl. In separate bowl, mix cocoa and chocolate, then pour hot coffee over and whisk until smooth. Set aside to cool slightly. Whisk in mayonnaise, egg and vanilla. Add to flour mixture and stir until combined. Pour into baking dish, smoothing top before putting in oven. Bake until toothpick or skewer inserted comes out with a few crumbs attached, about 30 to 35 minutes. Let cool in pan on wire rack for one to two hours. Serve dusted with icing sugar or a little lightly sweetened whipping cream.

Continue Reading

Pasta Bolognese

I grew up in a family of six (four kids, two parents). I like to think this is why I’m completely incapable of making meals for just one or two people. It just never really occurs to me to halve a recipe. Or when I’m just creating something, it never looks to me like I’m making too much. Mostly, it’s not a problem. I, unlike most, like leftovers. I like them for breakfast or lunch or dinner. (There is nothing like pasta for breakfast. Mmmmm.) And, since I tend to cook big, I can usually feed myself for all three of those meals based on whatever I made for dinner the night before.

In the last year or so, though, I’ve finally come to appreciate my freezer. Sure, it was always a happy home to ice cream and the odd frozen pizza. Now I tend to freeze some leftovers for those crazy times when work is insane and there is a strange absence of groceries and I’m contemplating a dinner of peanut butter on crackers. And this Bolognese sauce is the perfect thing to have stashed away for dinner emergencies.

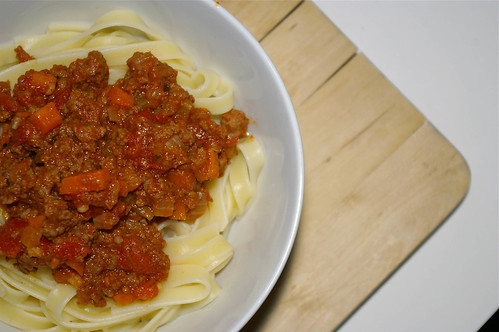
Ready to eat

I got it out of Real Simple magazine; the only magazine I’ve subscribed to since Chickadee and Owl when I was a kid.

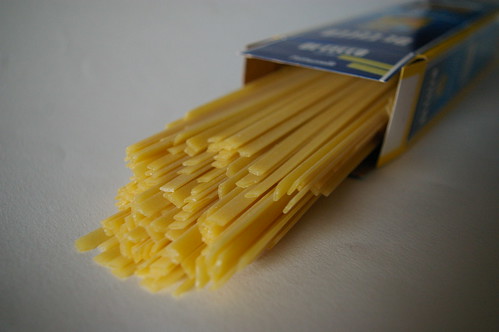
So, I used to make this with fettuccine and then one time when I went to buy pasta there was no De Cecco fettuccine. But there was fettuccelle. Sure, that’ll do. But it was so much better than that. It’s now my pasta of choice. It’s flat like fettuccine, but better. Thicker, I think. Or something. Sigh. Just better; let’s leave it at that.

Pasta

There is nothing more comforting than a big bowl of hot noodles (al dente, please!) with thick, rich sauce all chock full of tomatoes and beef that’s been simmering for an hour or so. So, I’m happy to make the whole batch of this, freeze half in ziplock bags and then eat the rest for a handful of meals. Then, the next time a craving comes, I still have my freezer stash.

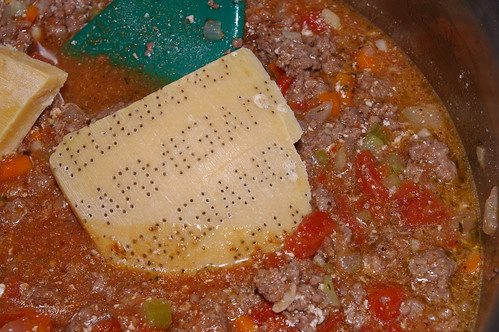
And let me offer this handy ‘recycling’ tip. Don’t throw away the heels of your parmesan wedges. Throw them in as the sauce simmers; they will add a nice richness. (When I’m down to the heel of the cheese, I throw them in a ziplock and into the freezer so they are ready to go when I make the sauce.)

As usual, this is with my adaptations. (These are, for the most part, another carrot — yeah for more vegetables — and no pancetta. I have nothing against pancetta — mmmm bacon-y goodness — but I don’t typically have it on hand and can’t be bothered to go get some for this recipe as I generally have all the other ingredients. Oh, and I add the garlic later than they suggest. There is nothing worse than burnt garlic, so adding it with the celery and carrot seems a bit premature.)

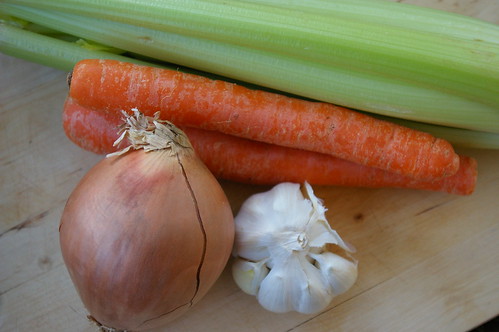
Carrots, onions, celery and garlic

Parmesan heels

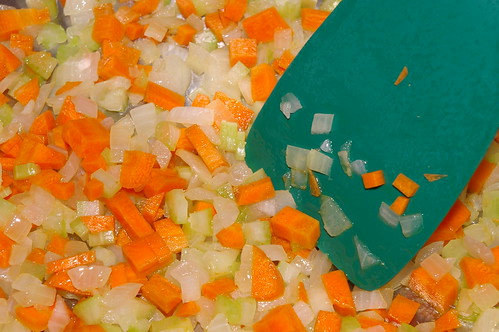
mirepoix

Beef, carrots, garlic, onions and celery

A good use for parmesan "heels"

Pasta Bolognese

Pasta Bolognese

  • 1  tablespoon  olive oil
  • 1 large yellow onion, diced
  • 2 stalks celery, diceed
  • 2 carrots, diced
  • 4 cloves garlic, minced
  • 1 1/2  pounds  lean ground beef
  • 1  cup  dry white wine
  • 1  cup  milk (I use 1 per cent)
  • 1 6-ounce can tomato paste
  • 1 14-ounce (398 mL) can diced tomatoes, undrained
  • 1/4  teaspoon  red pepper flakes
  • 1 tablespoon dried oregano
  • 2 1/2  teaspoons  kosher salt
  • 1/4  teaspoon  black pepper
  • 1/4  teaspoon  ground nutmeg
  • Parmesan heels (if you’ve got them)

In a Dutch oven or large, solid frying pan (I use one with straight sides), heat the oil. Add the onion and saute until they start to go transluscent, about three minutes. Add the celery and carrot and cook for five minutes more until they too start to soften. Add garlic and saute until you can smell it, about a minute. Add beef and cook until browned. Add wine, milk and the rest of the ingredients. (Don’t fret, the milk is going to look like it’s curdling a bit. It’s not.) Add the cheese heels and simmer for 45 minutes, stirring occasionally. Serve over hot, drained pasta with fresh Parmesan.

Continue Reading

Butternut Squash in Coconut Milk

Are you ever shopping and see something you think you need only to find when you get home that you already have, say, five of those already? No? Well, you’re smarter than me then.

A couple of months ago I saw coconut milk on sale, so I picked up a few cans. I like my curries and Thai Seafood Chowder and this great peanut sauce (which I should do a blog entry on; note to self) and so coconut milk is a good staple for me to have around. Unfortunately, I got home to find that I already had about four cans of it in the cupboard. Huh. Now I had eight cans.

On the upside, it means that I have the goods on hand when I see recipes like this one and want to give it a shot.

I’ve been on a butternut squash kick lately. Having never really eating squash for most of my life, I’ve found myself embracing it. It began with an acorn squash I randomly bought a few months ago. (It was so cute, and then it dawned on me that I’d actually have to do something with it.) I simply roasted it and then had it with a roasted chicken breast. Simple perfection. And there are apparently a lot of things you can do with squash. So goes my continuing education.

Butternut Squash

I liked the idea of this recipe. Soft, comforting squash with the exoticism of Thai flavours. And it was good, but if I can make one recommendation, I would suggest using this as a side dish. I’m sure this is the original intent of the recipe, but I made it on a whim and helped myself to a big bowlful. It was a bit rich to just eat on its own.

(I also should have reduced the sauce a bit more. Next time.)

Pre-simmering

Butternut Squash in Coconut Milk

This recipe comes from Closet Cooking, but has, as usual, been slightly adapted.

Butternut Squash in Coconut Milk

  • 1 tablespoon vegetable oil
  • 1 teaspoon garlic, minced
  • 1 teaspoon ginger, grated
  • 2 cups butternut squash, peeled and cut into 1″ cubes)
  • 1/2 cup coconut milk
  • 1 tablespoon sugar
  • 1 tablespoon fish sauce
  • 1/2 teaspoon chili sauce (such as sambal olek)

Heat oil in a pan. Add garlic and ginger and saute for about a minute until fragrant. Add chili sauce and saute for another 30 seconds, then add coconut milk, sugar, lime juice, fish sauce and squash. Cover and simmer until squash is tender, about 30 minutes. Remove squash and let coconut milk mixture continue to cook until it is reduced. Pour over cooked squash.

Continue Reading

Thai Seafood Chowder

Holy overdue blog update, Batman. Where have the last four weeks gone?

Oh yeah, into the fog that was subzero December, followed by a crazy flight home for the holidays and then nesting at the parents’ house as the snow never stopped falling and then back at work for a brutal one-week crime wave.

Phew.

I barely even know what I’ve been eating lately, but just before the haze set in, I made this lovely Thai Seafood Chowder. I’ve made this a few times now and have kept adjusting the recipe so that I’m really happy with it. This time, however, I had no luck finding ingredients. Lemongrass? Nowhere to be found. A fresh red chili? Vanished from the produce aisles. But I was so determined to make this, I picked up one of those squeeze tubes of lemongrass paste as a last resort and figured it wouldn’t hurt to use a few of the chili flakes from my seemingly never-ending supply. (As a person with a low heat tolerance, it is a bit baffling that I have one of those Costco-sized spice containers of dried chili flakes. I mean, really, I think I add those to my pasta bolognese and the occasional Thai or Vietnamese recipe. What was I thinking?) (Also, I’m sure my family wonders if I was switched at birth as the rest of the clan love spicy food. Strange. That said, I look a lot like my mum, so that’s very unlikely.)

I’m now devoted to the idea of the lemongrass squeeze tube. I love the flavour of lemongrass, but just find it much too woody for my liking (even if I only use the inner stalk and cut it quite fine). I usually just ended up picking it out while eating, which was rather indelicate and a bit annoying. But this paste is so, well, paste-like. It just blended in with the rest of the ingredients, offering up all the lovely flavour and none of the inconvenience.

So, I throw some rice into my lovely rice cooker just before I start making this because it really is best served over a scoop of rice (any kind will do). (What is my obsession with brackets in this post?) I love my rice cooker; I have no idea how to make rice on the stove. Pity, really, as I’m sure it’s a useful skill. But I really got addicted to them when I lived in Japan. The teachers’ housing I stayed in had one and it just became part of my routine most nights to throw some rice in and let the cooker get to it while I made whatever else to go with it. Mine is a Zojirushi (which I like to say), mostly because I wanted a *Japanese* rice cooker. I think I was still having some separation anxiety from that country when I got back. It took me at least a week to stop bowing to people.

This works really well as a weekday dinner because it takes almost no time at all.

(I should add here that, by definition, this isn’t exactly a chowder as it doesn’t contain traditional ingredients, such as bacon or flour. However, it’s too thin to be called a stew, as far as I’m concerned. And it just doesn’t feel like a soup to me.)

Snapper and Prawns

Shallots, chili flakes and garlic

Thai Seafood Chowder

Thai Seafood Chowder

  • 1 tablespoon vegetable oil
  • 2 shallots, thinly sliced
  • 2 cloves garlic, minced
  • 1 lemongrass stalk, finely chopped (or 1 tablespoon lemongrass paste — this stuff rocks, by the way)
  • 2 cups chicken stock
  • 1 can (398mL) coconut milk
  • 1/4 teaspoon chili flakes (or a minced fresh chili if you can find one)
  • 2 tablespoons rice vinegar
  • 1 tablespoon fish sauce
  • 1 tablespoon brown sugar
  • zest and juice of one lime
  • 3/4 pound snapper or other firm fish, cut into 1″ chunks
  • 1/2 pound prawns
  • 2 tablespoons basil, chiffonade

Heat oil in a pot over medium heat. Add shallots and saute until slightly transluscent, add garlic and chili flakes (or fresh, diced chili) and saute for another minute. Add stock, coconut milk, lemongrass, vinegar, fish sauce, sugar and lime zest and juice. Simmer for 10 minutes.

Add seafood and cook two to three minutes until prawns have turned pink and fish is cooked through. (This really takes almost no time at all, so I caution you against overcooking.) Add basil and serve.

Continue Reading