Lemon Curd Tart

Oh look! It’s something lemon!

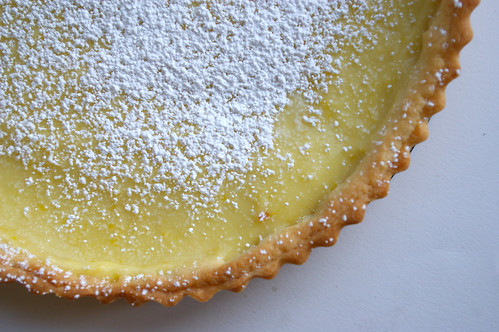
Lemon Curd Tart - top

I know, I know. I have lemon issues. But, please forget about my lemon obsession for a few moments and let’s concentrate on the fact that I attempted pastry! Yes, that thing that everyone else makes and leaves me paralyzed for fear of disaster.

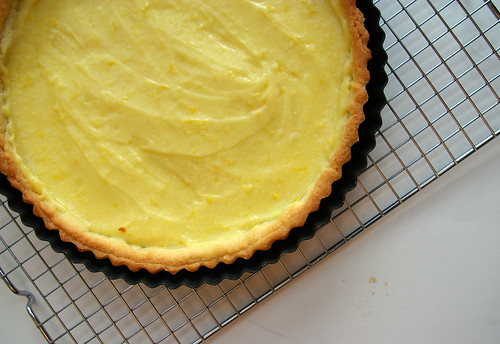
The fact that it’s advertised as “unshrinkable” and mine so very, very shrank like it was Alice in Wonderland after drinking that potion? Yeah, I’m going to ignore that part of it. Because, if I focus on what didn’t quite work, then I’ll never try to make pastry again and with so many pies and tarts to make, I can’t let that get in my way.

"Unshrinkable" tart shell

So, the occasion was perogy night at a friend’s house. Colette’s mom makes killer homemade perogies and Colette paired them up with fried onions and sour cream, the largest kielbasa I’ve ever seen in my life and a huge casserole dish of her mom’s equally delicious cabbage rolls. And salad. But I think Colette and I were the only ones that ate any. And then, of course, lemon tart.

I picked lemon because I figured it would be something light after all that delicious Ukrainian food. And I picked a tart because I really want to get better at making pastry. This Lemon Curd Tart would take care of both those things.

But it wasn’t without it’s challenges.

1) The “unshrinkable” tart shell that shrank. (Watching cooking shows on TV since this, I have learned that you just can’t stretch dough. It will shrink back. Uh-huh. Lesson learned.)

2) I burnt the living daylights out of my hand when whisking the lemon curd just after it came off the heat. But, I was proud of myself for continuing to whisk (the show must go on!) while stretching my way over to the sink and running cold water on the burn. Boiling hot lemon curd – 1. Me – 0.

My tart pan is also a bit bigger than suggested, which is probably why I had more trouble with the dough and felt the curd layer was a bit thin. Next time I’ll double the dough and make some jam tarts with leftovers. And I’ll double the curd, make a nice thick layer and then eat the rest with a spoon. :D

The lemon curd is pretty basic. The tart shell comes from Dorie Greenspan, as adapted by Smitten Kitchen. (I am leaving her instructions completely intact because she explains it very well.)

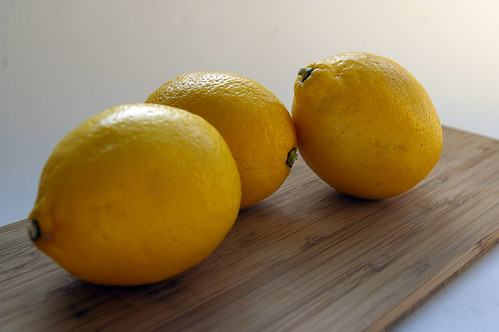
Lemons

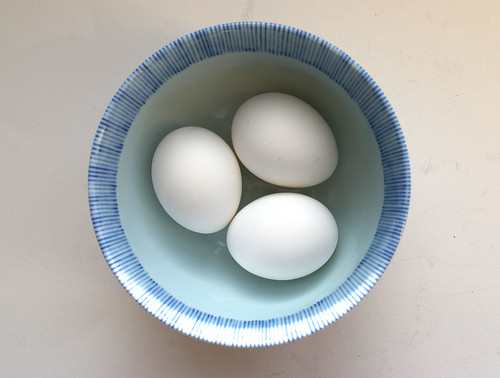
Eggs

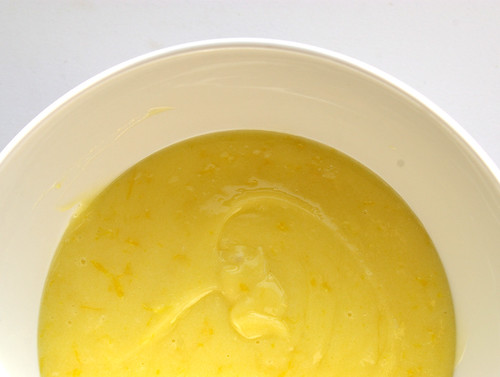
Lemon Curd

Curd in Tart

Lemon Curd Tart - side

Lemon Curd Tart

  • 3 large eggs
  • 1/3 cup fresh lemon juice (2 -3 lemons)
  • 3/4 cup sugar
  • 4 tablespoons unsalted butter, at room temperature and cut into small pieces
  • 1 tablespoon lemon zest (yeah, I did a lot more than that. Probably double.)

In a stainless steel bowl placed over a pot of simmering water, whisk eggs, lemon juice and sugar. Cook, constantly stirring, until mixture becomes thick. (This took about 10 minutes for me.) Remove bowl from heat and strain to remove lumps. Add small pieces of butter and whisk into lemon mixture until butter has melted. Stir in zest. Let cool. Cover with plastic wrap (I press mine right onto the curd to prevent a skin form forming) and refrigerate.

The Great Unshrinkable Sweet Tart Shell
Makes one 9-inch tart crust

  • 1 1/2 cups all-purpose flour
  • 1/2 cup confectioner’s sugar
  • 1/4 teaspoon salt
  • 1 stick plus 1 tablespoon (9 tablespoons; 4 1/2 ounces) very cold (or frozen) unsalted butter, cut into small pieces
  • 1 large egg

1. Pulse the flour, sugar and salt together in the bowl of a food processor. Scatter the pieces of butter over the dry ingredients and pulse until the butter is coarsely cut in. (You’re looking for some pieces the size of oatmeal flakes and some the size of peas.) Stir the egg, just to break it up, and add it a little at a time, pulsing after each addition. When the egg is in, process in long pulses–about 10 seconds each–until the dough, which will look granular soon after the egg is added, forms clumps and curds. Just before you reach this stage, the sound of the machine working the dough will change–heads up. Turn the dough out onto a work surface and, very lightly and sparingly, knead the dough just to incorporate any dry ingredients that might have escaped mixing. Chill the dough, wrapped in plastic, for about 2 hours before rolling.

2. To roll the dough: Butter a 9-inch fluted tart pan with a removable bottom. Roll out chilled dough on floured sheet of parchment paper to 12-inch round, lifting and turning dough occasionally to free from paper. (Alternately, you can roll this out between two pieces of plastic, though flour the dough a bit anyway.) Using paper as aid, turn dough into 9-inch-diameter tart pan with removable bottom; peel off paper. Seal any cracks in dough. Trim overhang to 1/2 inch. Fold overhang in, making double-thick sides. Pierce crust all over with fork.

Alternately, you can press the dough in as soon as it is processed: Press it evenly across the bottom and up the sides of the tart shell. You want to press hard enough that the pieces cling to one another, but not so hard that it loses its crumbly texture.

3. Freeze the crust for at least 30 minutes, preferably longer, before baking.

4. To fully or partially bake the crust: Center a rack in the oven and preheat the oven to 375 degrees F. Butter the shiny side of a piece of aluminum foil (or use nonstick foil) and fit the foil, buttered side down, tightly against the crust. And here is the very best part: Since you froze the crust, you can bake it without weights. Put the tart pan on a baking sheet and bake the crust for 20 to 25 minutes.

5. Carefully remove the foil. If the crust has puffed, press it down gently with the back of a spoon. Bake the crust about 10 minutes longer to fully bake it, or until it is firm and golden brown, brown being the important word: a pale crust doesn’t have a lot of flavor. (To partially bake it, only an additional 5 minutes is needed.) Transfer the pan to a rack and cool the crust to room temperature, and proceed with the rest of your recipe.

Do ahead: The dough can be wrapped and kept in the refrigerator for up to 5 days or frozen for up to 2 months. While the fully baked crust can be packed airtight and frozen for up to 2 months, the flavor will be fresher bake it directly from the freezer,

Continue Reading

White Bean Tartlets with Oven Roasted Tomatoes

This post is dedicated to my friend Elsbeth who is going to kick my butt for waiting two weeks to post. I could possibly be the most procrastinating-est blogger ever. It’s a curse.

So, Elsbeth, this one is for you.

Solo Tartlet

I had a little party on Friday two weeks ago to celebrate a blog milestone. The original plan was to have a few friends over for appies and wine to celebrate crossing the 100,000-views mark, but that didn’t work out because I ended up getting to that point faster than originally thought and the timing was off. (No, it was not procrastination related, for once.) Then I thought it would be cute to instead have people over for passing by 123,456 views.

So, that’s what it ended up being.

I sometimes get a bit of party anxiety, though. Will people have fun? Will there be enough food?

And, as usual, my fretting was all for naught. Besides having cheese, crackers, some salami and prosciutto, I also made two appetizers: prawns sauteed with chili, garlic and ginger served in wonton crisp cups and these White Bean Tartlets with Oven Roasted Tomatoes. And thankfully (with the addition of sending one care package home for a friend who couldn’t make it), all of the food was eaten! Frankly, that was the best part. Made me feel like everyone enjoyed the goodies. Plus, you know, less clean up.

(So, I’m making up for the lack of text here with bonus photos. Couldn’t narrow them down….)

Trio of tartlets III

I got the inspiration from one of my 8 million cookbooks, but adjusted the recipe quite a bit and figure that, at that point, it’s safe to call it my own. It was pleasantly garlicky and rich-tasting even though there was almost no fat involved. And, c’mon, they’re just so damn cute.

Thyme

Tomatoes and Thyme

Roasted Tomatoes with Thyme

White Beans pre-puree

Trio of Tartlets

Trio of tartlets II

White Bean Tartlets with Oven Roasted Tomatoes

  • 30 grape tomatoes
  • 30 tart shells or pastry to make 30 tarts
  • 3 tablespoons olive oil, divided
  • 4-5 sprigs of thyme
  • 1 teaspoon thyme leaves, minced
  • 3 cloves garlic, minced
  • 19 oz (540 mL) can white kidney beans
  • 1/2 cup white wine (can substitute stock or even water)
  • Salt and pepper to taste

Bake tart shells as indicated or blind bake homemade pastry until shells are completely cooked.

Preheat oven to 350. Put tomatoes in oven safe dish and toss with 2 tablespoons of olive oil. Sprinkle with a pinch or two of salt and add the sprigs of thyme. Roast in the oven for about 30 minutes until their skins have started to split. Set aside.

In a pot over medium heat, heat 1 tablespoon olive oil and minced garlic. Once the oil is hot and the garlic has started to soften, add the drained and rinsed beans and continue cooking until warmed through and the beans are starting to fall apart, stirring often. Add wine (or stock or water) and thyme leaves and cook until most of the liquid is gone. Remove from the heat. Dump the beans, garlic and thyme into a food processor and whiz until it forms a nice paste. If it appears to be a bit too dry, add some more wine/stock/water. Spoon into cooked pastry shells and top each one with a roasted tomato. At this point I also spooned any drippings from the roasted tomato pan onto the tartlets.

Continue Reading

Asparagus and Goat Cheese Tart

Puff pastry is my new nemesis.

This was supposed to be a ridiculously easy recipe — based on the “fake instead of really bake” principle of entertaining. I don’t believe in cheating, but I do believe that sometimes simplifying is a good way to go … especially when hosting a party. And this had all the things I like assembled together: puff pastry, goat cheese, roasted asparagus.

And yet, not a triumph.

Tart corner

I had my suspicions this wasn’t going to go right from the point of attempting to roll out the thawed pastry. Instead of a nice oblong rectangle, I got a wiggly-edged square that was about half the size of the crust in the photo ripped out of the magazine. No problem, I thought, I’ll make two tarts. It will be daintier, I figured.

After my wiggly-edged oblong was rolled out, I placed it on the parchment-paper-lined pan and docked the hell out of it with a fork. Theoretically, that should have made the centre of the tart not puff quite so much. Emphasis on theoretically.

After 10 minutes of baking, I took a peek into the oven only to be horrified by the mound of pastry puffing up into a golden pillow. NO! I docked you! I prickled your pastry skin with my four-tined fork! Get down! Actually, in reality, I’m pretty sure I just swore, then pulled the damn thing out of the oven and de-puffed it with the aforementioned fork, shattering the pastry.

Then came the attempt to smear on the layer of softened goat cheese. A bit more complicated now that the outer crust was in shards. On the upside, once I managed to successfully get the cheese on, no one could sense the puff pastry disaster that lay underneath. I added the lovely green spears of asparagus, some lemon zest and put it back on the oven, at the same time retrieving the second wobbly oblong that had also grown into a big puffed pillow. And repeat.

Mid-tart

As I assembled the second tart, I felt the urge to check the progress on the first only to discover the edges were starting to move beyond golden and into burnt territory. Gah! The asparagus still hadn’t fully roasted, but the pastry was cooking much too fast. I turned the temperature down and adjusted the rack higher and hoped for the best.

However, for all the fuss puff pastry involves, there is one undeniable benefit. Because it’s all thin layers, a solution for the slightly-burnt-bottom-problem was immediately apparent. With a little careful knife work, I pried off the blackened bottom layer. And, lo, all was right.

I don’t think I’ll be attempting this one again. At least not until I get better practiced with the puff pastry. But I would suggest more lemon zest. Also, I squeezed over some lemon juice when the tarts had just come out of the oven, which I think helped add some zing and slightly cut the richness of the goat cheese.

Asparagus and Goat Cheese Tart

The recipe comes courtesy from Real Simple magazine.


Asparagus Tart

  • 1 sheet frozen puff-pastry, thawed (apparently overnight in the fridge is best)
  • 1 10-ounce log goat cheese
  • 1 1/2 pounds asparagus, ends trimmed
  • 1 tbsp. olive oil
  • zest of 1/2 lemon
  • salt
  • freshly ground pepper

Preheat the oven to 400. Roll out the pastry into a 10″x18″ rectangle. Leaving a one-inch border, prick the surface of the pastry all over with a fork. (If this works for anyone else out there, please let me know.) Bake about 15 minutes or until golden, then remove from oven. Spread the cheese over the pastry. Lay the asparagus on top of the cheese. Brush with the oil and sprinkle with the zest salt and pepper. Bake an additional 20 to 25 minutes. Let cool before serving.

Continue Reading