Lockdown Libations no. 4: Gibson

Can I do two martini posts in a row? With the amount of gin I have, I would say the answer is yes.

But, more than that, I think I’ve discovered a new favourite cocktail so, yes, that’s more than enough reason to do so.

Gibson I

I was recently, gratefully, on the receiving end of a media drop featuring two bottles of liquor from a Quebecois distillery whose products are now hitting the Alberta market thanks to Spur Imports.

The package of holiday cheer featured a bottle each of gin and creme de menthe from Les Subversifs, among other goodies.

The small distillery currently offers four options: vodka, the aforementioned gin, a creme de menthe — which, don’t you dare raise your nose at; this is no mouthwash-evocative booze you used to drink as a teenager at clandestine house or bush parties —and a maple liqueur, each named for an historical Quebecois figure.

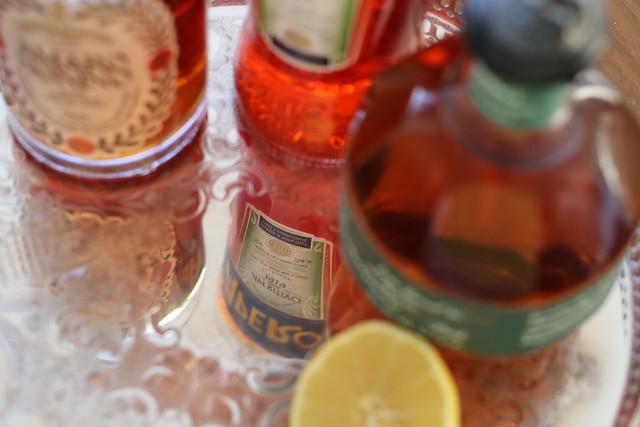
Les Subversifs gin

(I’d like to note here that I have been very fortunate in my career to be gifted products to try and opportunities to eat at new restaurants etc. I try to ensure it’s very clear when I’m being gifted something because it’s really important to me to make a distinction between a gift/media event and something I am posting about because I love and truly endorse it. This gin? It very much fits into the category of “gifted but 10/10 would purchase — and likely will.” Also, most of the time that you see me posting on social, it’s because I paid my own money for things. OK, I feel better for getting that out of the way.)

Which means that when I tell I consumed about a fifth of the bottle of Isabelle Montour creme de menthe, it is a legit endorsement of a delicious liqueur that works simply on the rocks, though I will definitely be trying it as a hot chocolate add-in.

But I digress.

Admittedly — and certainly confirmed by the Vesper Martini disaster — I’ve never been much of a martini drinker. I can remember the first I had, with my friend Julie at some bar in Victoria while we were still at UVic for our undergrads. (Pucker readers, it’s the same Julie who introduced me to the beauty of the Whiskey Sour, so any encouraging she did for me to have a martini is entirely forgivable.) Obviously, my tastes have changed a lot in the, cough, cough, number of years since then. But I still haven’t really managed to get into martinis.

Until this one.

Behold the Gibson!

Actually, let’s be clear: behold the Gibson made with Les Subversifs’ Gin Marie-Victorin.*

*Because, let me tell you, if I’ve learned nothing else in recent weeks it’s that some hard liquors are better in some applications over others. One gin is great with tonic, while another is really best where it can shine. And this gin? It’s the latter.

Gibson II

With similar leanings as a London dry, there are undertones of lemon, juniper, cardamom and coriander. But the subversion comes from using parsnip — surely an unexpected ingredient — to lend a slight sweet, earthy note that makes for a very smooth, highly drinkable gin.

The first time I tried it was straight-up… and I liked it.

So I was intrigued when it was suggested I try it as a Gibson. Gin + pickled onion? Yes, I am in.

Cocktail onions

This is not the martini where you skip over the vermouth because you really just want ice-cold gin in a fancy glass. Vermouth is crucial. As is the briney, acidic addition of a cocktail onion.

The ones I had the pleasure of enjoying — eight pearl onions over two cocktails — were made by a former colleague. I had been hoarding them for the last numerous months and, frankly, I’m glad I did. They were waiting for this cocktail. Now it won’t take long for the rest of them to disappear.

Cocktail onions

Like most martinis, the beauty here is in the simplicity and using liquors you genuinely enjoy. (It doesn’t have to be this gin. But it does have to be one you love the taste of, of course.) If I can, I would recommend adding just the smallest, dirtiest splash of pickled onion brine before stirring to chill.

It’s a drink and a snack all in one!

Gibson

  • 2 1/2 ounces gin
  • 1/2 ounce vermouth
  • cocktail onions

Add gin and vermouth to a mixing glass full of ice. Stir until well chilled.

Strain into a chilled cocktail glass. Garnish with cocktail onion — no judgment on how many.


Continue Reading

Lockdown Libations no. 3: Vesper Martini

Hello!

And helllloooooo….

Daniel Craig

No, that’s not entirely gratuitous. There is a point in having Mr. Craig join us here and that’s because he was the impetus for this week’s cocktail.

The streaming service Crave recently added the entire Bond library and I thought it would be fun to watch them in order. So, I started with Dr. No and … guys, it’s so boring! Good lord, movies have changed a lot. So, I changed my tactic and decided to do a mini marathon of all the most recent films, starting with Casino Royale. It is likely my favourite of all the Bond films, for many reasons — no, not just the bathing suit scene — not the least of which is I could listen to Eva Green read the dictionary.

That scene of them on the train? Fire.

Which brings me to the Vesper Martini.

Vesper Martini IV

It’s as much as a plot device as a cocktail — almost a character, even.

Although the majority of the cocktail is gin, what sets it apart from other martinis is the addition of Lillet, a French aperitif made from a blend of wine and citrus liqueur.

I had a bottle in the cupboard of wonders because, cough, cough, I bought it when Casino Royale first came out and I was intrigued by the Vesper. Can we file this under ‘better late than never?’

Vesper Martini ingredients

Most recipes call for Gordon’s, but I don’t have any. This seemed like a good time to crack my Sipsmith gin, which was part of the martini box I purchased during the first lockdown from Proof and to use some of my Schramm’s — an organic potato vodka from Pemberton, B.C.

This is a boozy wallop of a cocktail. More than four ounces of liquor — no filler.

Vesper Martini overhead

And, to be honest, not my favourite. While I can down a Bourbon Old Fashioned, a Boulevardier and a multitude of other straight-liquor cocktails, I struggled with this one. I think the flavour combination just didn’t do much for me.

So, while I’m glad I tried it, I am going to have to find other ways to enjoy Lillet. Perhaps, as the French do, just deeply chilled with a slice of lemon.

(Aside, interestingly, and so very Bond-like, there is a definite debate on whether this is better shaken or stirred. In this particular movie, Bond says he doesn’t care. Some sites argue shaking dilutes too much — which, incidentally, is why Bond does have that preference as it is said he needs to have his faculties about him — and it should be stirred instead. For what it’s worth, I used my shaker, which is why the instructions call for it. I’m sure Bond would be fine if you’d prefer to stir.)

Garnish

Making a lemon twist

Martini pour

Vesper Martini I

Vesper Martini

  • 3 ounces gin
  • 1 ounce vodka
  • 1/2 ounce Lillet Blanc
  • lemon twist

Add the gin, vodka and Lillet to a cocktail shaker with a healthy amount of ice and shake until well-chilled.

Strain into a chilled glass. Rub the lemon twist around the rim of the glass and then add to the drink.

Continue Reading

Lockdown Libations no. 2: Meyer Lemon Margarita

This is the story of two impulse purchases.

Queso and Marg

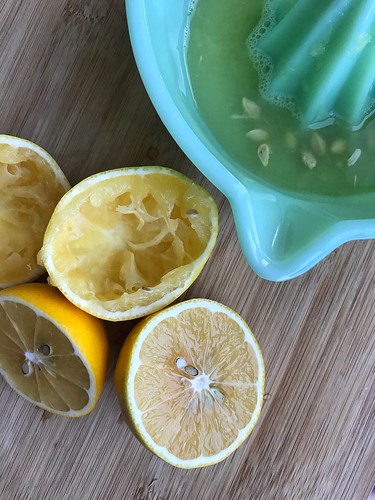
First, a bag of Meyer lemons I grabbed while grocery shopping. If you know anything about me at this point, you know I love a lemon. And Meyers must be embraced during their short season because that slight sweetness, floral note and thin skin truly set them apart from any standard citrus. (I have some similar feelings to the darkly flavoured blood oranges that also make fleeting appearances on store shelves, but nothing as strong as my excitement on seeing Meyers back again.) (Aside: blood oranges make a fabulous Bourbon Old Fashioned — you’re welcome.)

Squeezed

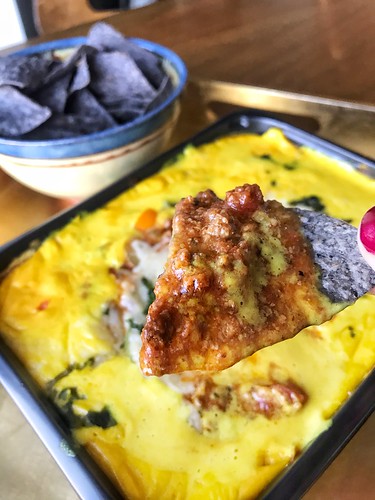
Second, a container of chili con queso from Empire Provisions.

This was truly unnecessary as I was only there to pick up an order I made online. (Have you tried the Korean sausage? You must. I like to stir fry it, throwing in some thinly sliced green onions toward the end, perhaps some chopped cilantro if I have it, and then put it onto a bowl of rice with a ton of quick cucumber pickles, a gross amount of pickled ginger — though usually store bought, I’ll confess — and some steamed veggies, if I have any. And then, I squeeze over some Kewpie mayo. I know, I know, it’s a bit horrifying. Think of it like the anti-Buddha bowl. But dear god, it is truly heaven — you’re welcome.)

Chili con Queso

Anyway, I was stopping in the fridge/freezer section for a Mexican Coca-Cola and my eye caught by the chili con queso in all of its electric orange-yellow. Did I need it? No. Did I suddenly have an undying craving to eat it? Yes.

Clearly, my subconscious was way ahead of me. I guess it remembered I had a piddly amount of tequila in my cupboard o’ wonders — not to mention three (THREE! Jesus wept.) bottles of Cointreau. (This is why I now have lists taped to the cupboard doors.)

Citrus + tequila + Cointreau = good times.

Good times x chili con queso = excellent times.

That’s just good math.

(Full disclosure: I’m writing this at the end of the margarita and… I think I’m pretty funny right now.)

Salted rim

Meyer Lemon Margarita II

Meyer Lemon Margarita

For all the slushy versions and fancy tequilas available and interesting fruits you can use, a margarita, I feel, is best when simple. See above. And when you have an ingredient like Meyer lemons, you’re halfway home. Sure, lime is traditional. Meyers? Magical.

You’re welcome.

Lockdown Libations achievement unlocked: there were exactly 1.5 ounces of tequila left in the bottle. Not only did I have enough to make this drink, but that’s one bottle not going back into the cupboard!

Meyer Lemon Margarita

  • 1 1/2 ounces tequila
  • 1 1/2 ounces freshly squeezed Meyer lemon juice
  • 1 ounce Cointreau
  • flaky or kosher salt for the glass rim

Set a couple of tablespoons of salt onto a small plate.

Cut your Meyer lemon and use the flesh side to rim your glass. The juice from the lemon will act as an adhesive for the salt.

Swirl the rim through the dish of salt — you can do the entire top of the glass or just half, whatever you’d like.

Put a handful of ice cubes into the glass.

To a cocktail shaker, add more ice, the tequila, lemon juice and Cointreau. Shake vigorously for 15 to 30 seconds, until the vessel is cold to the touch.

Strain the drink into the glass.


Continue Reading

Lockdown Libations no. 1: Peruvian Elder Sour

I need a project — so sayeth a lot of us right now as we face rising numbers of COVID-19 cases and decreasing ways to be with friends and family.

Peruvian Elder Sour II

I’m not going to make this a whole coronavirus thing, other than to say I need something to do with some regularity to keep myself occupied. And one thing I’ve had in the back of my mind for a few years now is to come up with a way to use all the odds and ends liquor bottles in my cupboard.

There are a lot of them. Like, I’ve-had-to-make-a-list-of-what’s-in-there-to-keep-it-straight a lot.

Liquor list

Liquor Cabinet II

Liquor cabinet I

Many are different brands of the same type of liquor — I have no fewer than six gins, for example. But others are one-offs that I’m not really sure what to do with. Like blueberry vodka and Pisco and two bottles of Cointreau. Yes, two bottles.

So, here we go. Project Lockdown Libations.

The rules are simple — and yes, I need rules. Otherwise the project will fall apart.

Rule no. 1: Each week, I need to make a cocktail. The results of this will be posted here.

Rule no. 2: Each cocktail must use something from the cupboard of wonders.

Rule no. 3: The primary ingredient may not be repeated until every single bottle — lord, help me — is used at least once. (Caveat: they can be used as secondary ingredients.)

That’s it.

Peruvian Elder Sour III

Down the road, I’m hoping to get some local bartenders involved — if you’re game, let me know! But otherwise it’s me, my liquor and Google.

Which led me to this recipe.

Pisco, St. Germain

I wanted to kick things off with pisco, that Peruvian liqueur that falls under the category of brandy, because I’ve had an unopened bottle of it for a few years. I thought I’d make a Pisco Sour — all y’all know I love a sour, but then I realized that as long as I’m using new liquors, I should try to expand my horizons at the same time. Which is how I landed on the Peruvian Elder Sour. Hey! It has citrus, I’m in.

The elderflower adds a nice floral undertone, while the lime adds a little tartness, though not as much as you might think.

Peruvian Elder Sour

  • 2 ounces Pisco
  • 2 ounces St. Germain
  • ½ ounce freshly squeezed lime juice
  • lime wheel or wedge for garnish

Shake with ice and strain into a chilled glass. Garnish with lime wheel or wedge.*
*Which I didn’t because the lime had seen better days and among the points of this project is to use what I have.

Peruvian Elder Sour I

Continue Reading

Paper Plane

Who needs a drink?

For what it’s worth, I don’t think I’m drinking any more than normal even though we’re in the middle of an unprecedented time of pandemic and physical distancing.

The main difference is that I am, of course, doing it alone in my apartment because … well, Covid-19.

Maybe you are too. And maybe, just maybe, you’d like to add something new to your repertoire?

Meet the Paper Plane.

082A0021

Fun fact: it has all the hallmarks of a classic cocktail, but it’s actually quite a modern drink — invented by Australian bartender Sam Ross, ostensibly as a nod to the song of the same name by M.I.A.

It was the bourbon that drew me in. Well, and lemon, obviously.

Those two — which form the basis of my entry point into the world of bourbon (via a classic Bourbon Sour) — are a natural pairing. But the drink becomes much more complex with addition of Amaro Nonino and Aperol, which add herbaceous and bitter elements.

The result is a well balanced cocktail that is remarkably easy to make. I mean, it is literally equal parts of four ingredients — one measuring implement (What? Sometimes I don’t want to dig out my jigger. *shrug*), no math.

082A0006

082A0012

Paper Plane

  • 3/4 ounce bourbon
  • 3/4 ounce Aperol
  • 3/4 ounce Amaro Nonino
  • 3/4 ounce fresh lemon juice
Add all the ingredients and ice into a shaker. Shake vigorously until the shaker begins to chill.
Strain into a coupe glass.
Garnish with lemon peel, if desired.

Continue Reading

No-Bake Chocolate Cream Pie

This post is dedicated to the lovely woman I met (and whose name I, naturally, embarrassingly forgot) at the Half Your Plate fundraiser dinner at Winsport. I don’t know if you’re even going to check my blog again after such a long absence, but please know I have not forgotten your kind words and encouragement.)

My thoughts are bubbling over as I try to figure out how to start talking about this pie.

I mean, part of me isn’t really sure any words are needed.

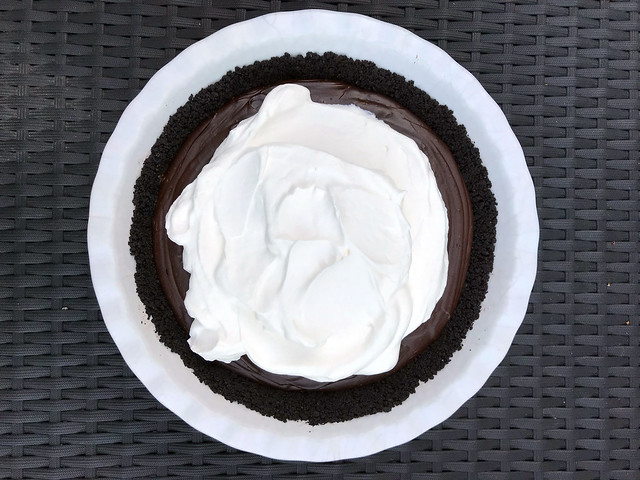
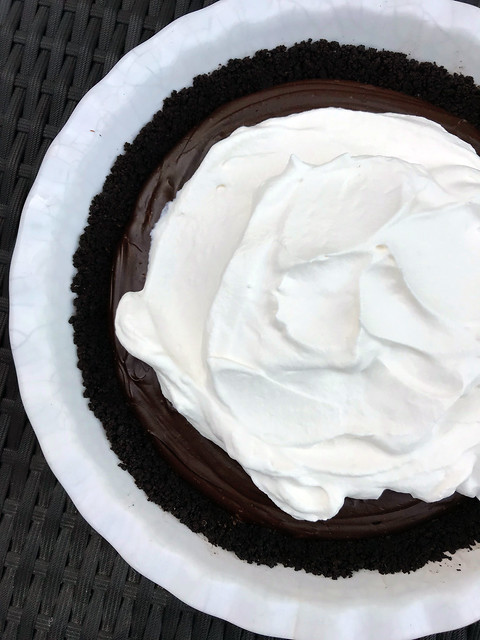
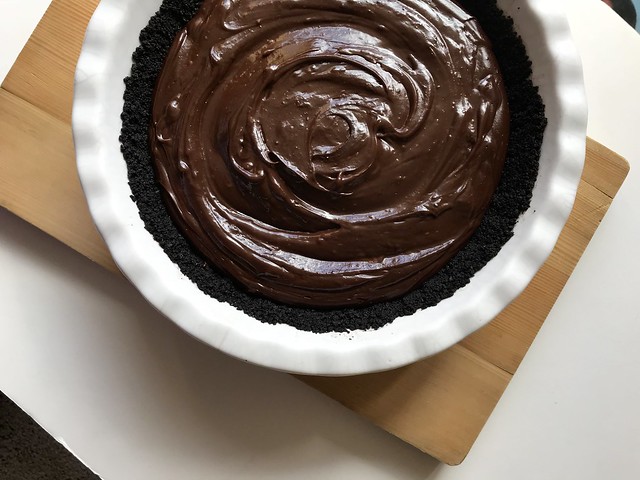
No-Bake Chocolate Cream Pie
Right? (TL:DR version, if you’re skipping to the bottom: this tastes like the chocolate cream pie of your dreams.)

I guess I could start with how the tweet from Bon Appetit stopped me in my tracks when I was scrolling through Twitter the other day and I immediately favourited it, so I could return to it later.

Now, truthfully, I probably have a few hundred recipes bookmarked this way and have never actually got around to making any of them. But this pie? I don’t know. It felt… doable. More importantly, it requires no oven to be turned on. And, frankly, I’m already no good in a heat wave. Heat my apartment by turning on the oven and I’d be passed out in front of a fan while whatever I was baking burned.

Or I could start with the fact that it was perfect timing to have found this recipe just as friends invited me over for a barbecue feast dinner party, complete with ribs, brisket, cornbread and deep-fried balls of macaroni and cheese. Would I consider bringing dessert? Yes, I absolutely would. After all, it’s more motivating to make a massive chocolate cream pie when you get to enjoy it with good friends. (And also because you’ve had these ribs before, they are ridiculously good and I feel that making an awesome pie is only a drop in the bucket when it comes to returning the favour.)

Or maybe I’ll just point out that while in high school I never once ate in the cafeteria (opting to play cards in the hallway in front of my locker), but on the rare occasion I would head there for a snack — either this doughy, saucy pizza bread or a slice of McCain’s chocolate cream pie. You know the one. With the star-tipped “cream” frosting over a pudding-like piece of pie.

It might actually be blasphemous to compare that to this Bon Appetit version, but I couldn’t help drawing comparisons as I put it together and, eventually, finally got to slice into it and try a piece. The original recipe, yes, calls for a torched meringue on top. But I really liked the idea of a gently sweetened whipped cream slathered on top instead. Bonus points: no need for a kitchen torch.

No-Bake Chocolate Cream Pie

Double bonus: I can make a pavlova with the leftover egg whites and top it with more whipped cream and big handfuls of juicy summer berries.

Lastly, I could have started this post by talking about how I generally loathe comments posted below recipes online. That’s because they’re often things like, “I made this but I swapped this ingredient for that one and didn’t add butter because I’m on a diet and blah blah blah. It didn’t taste very good, so I’ll never make this again.”

In this case, though, I’m super glad to have read the comments because one person spent a lot of time and energy posting extensive recipe instructions far more detailed than the original and I have absolutely no doubt the only reason I had great success with this pie is because of that. Bless you, anonymous person!

(I do love that the only other comment on this recipe, posted before the helpful instructions, was: Biggest waste of my time. Tried this twice. Evidently you have to be a bloody witch to make this. Each time it cooked the egg yolks. Dumbest recipe EVER.)

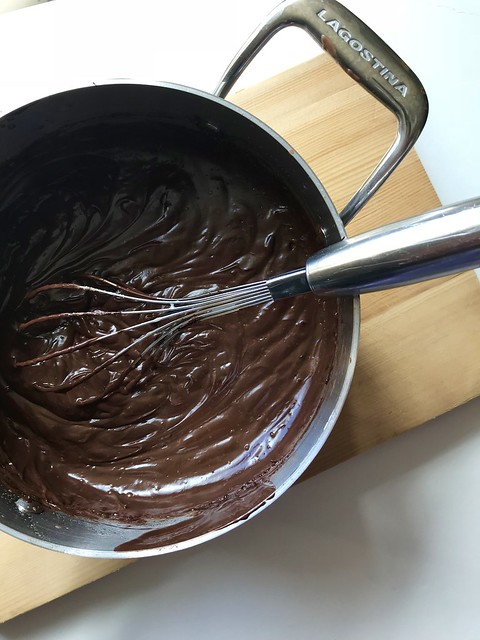
The total trick to this pie is tempering THE HELL out of the yolks and corn starch. That’s going to make or break the pie filling.

Yes, it’s a bit complicated to make. Patience is going to be the main ingredient. But…. Let me put it this way: whenever I make a dessert and take it to someone’s house for dinner, I generally want to come home with an empty serving dish because I kind of lose interest right after eating a piece of whatever I’ve brought. This time, I offered the last, healthy-sized wedge of pie to a friend to take back to her house and eat later.

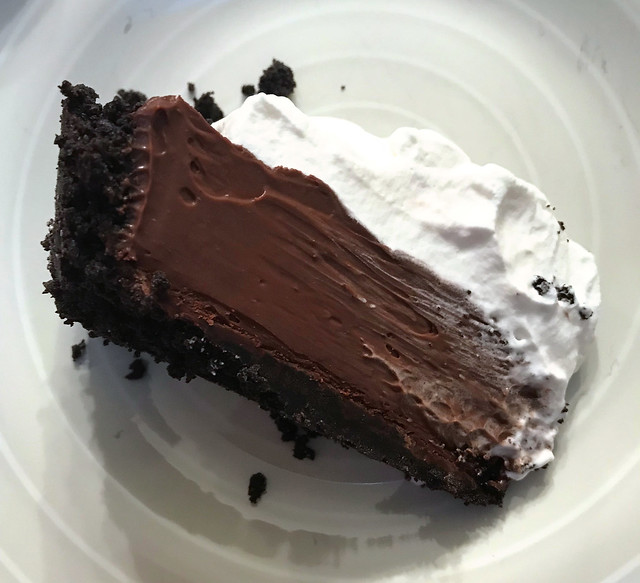
No-Bake Chocolate Cream Pie slice

Five minutes later, I wondered why I’d been so nice.

I guess I’ll just have to make this again.

IMG_7884

IMG_7892

IMG_7894

IMG_7908

No-Bake Chocolate Cream Pie

No-Bake Chocolate Cream Pie

Adapted slightly from Bon Appetit

  • 9 tablespoons butter
  • 6 ounces chocolate wafer cookies
  • Salt
  • 8 ounces bittersweet chocolate, melted, divided
  • 2 1/2 cups whipping cream, divided
  • 2 tablespoons unsweetened cocoa powder
  • 1 1/2 cups whole milk (aka 3.25 per cent)
  • 3/4 cup sweetened condensed milk
  • 4 large egg yolks
  • 3 tablespoons cornstarch
  • 1 – 2 tablespoons sugar

Melt butter in a small pot over medium heat. Set aside.

Blitz cookies in a food processor until finely ground and transfer to a medium bowl.

Add 5 tablespoons of the butter and a nice pinch of salt to the bowl with the cookie crumbs and mix until thoroughly combined. Transfer to a 9-inch pie dish and press evenly into the bottom and up the side using the bottom and side of a measuring cup to really pack it down. Put in the fridge to chill for 20 minutes.

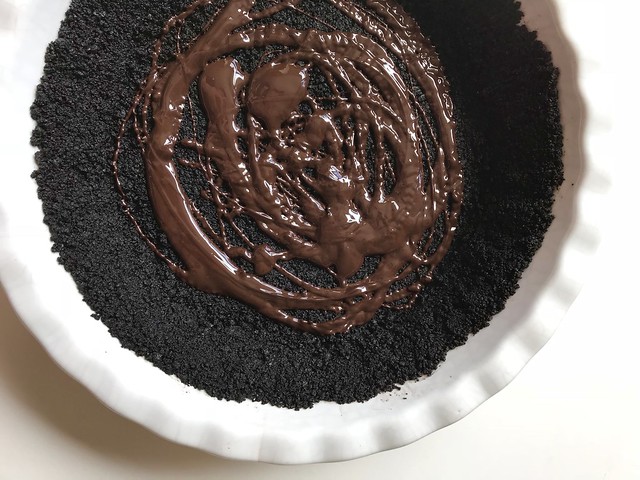
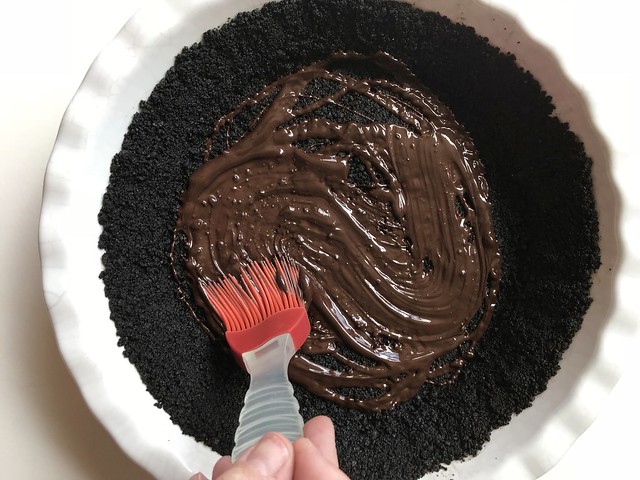
Brush the bottom of the crust with 2 ounces of the melted chocolate and put the pie dish back in the fridge.

Whisk cream and cocoa powder in a medium saucepan until there are no lumps, then mix in the milk and sweetened condensed milk. Over medium-low heat, warm until the cream mixture just reaches 180F. While it’s heating, whisk the egg yolks and corn starch in a medium bowl.

Scoop up about 1/4 cup of the heated cream mixture and dribble a little bit at a time into the egg yolks while constantly whisking. This is where you need to go slowly because this keeps the eggs from scrambling! Once that’s all mixed in, repeat with another 1/4 cup of the cream. Repeat until you’ve added about half of the cream mixture to the yolks.

Pour the yolk mixture into the pot on the stove. Whisk, whisk, whisk as the entire mixture heats up. This will initially take what feels like a while, but then it will fairly suddenly thicken up to a pudding-like texture. Once it has a pudding consistency, remove the pot from the heat, add the remaining melted chocolate and the rest of the melted butter and whisk until completely combined.

Scrape into the pie crust and chill until the chocolate custard is cold and set — at least two hours.

Just before serving, make the whipped cream. In a bowl (chilled, if possible, as this makes it faster to whip the cream), beat the remaining 1 cup of cream with 1 tablespoon of sugar until fluffy. (I like mine to slump a little bit, so it’s a bit softer than a really stiff whipped cream.) Taste partway through the beating process to see if it’s sweet enough for your liking. Add the rest of the sugar as you see fit.

Scoop over the pie and serve.

Continue Reading

Peanut Butter, Sambal, Lime, Cilantro Toast

For the better part of a year, I’ve been nattering on about how I’ve become addicted to a Bon Appetit recipe for toast.

Yes, toast. Though, also yes, Bon Appetit.

I’ve tweeted about it, told friends they have to try it and posted it (more than once) on Instagram.

Peanut Butter-Cilantro-Sambel Olek Toast I

I think Bon Appetit just posted a photo and description to their Twitter account and at the time I sort of thought, huh, and then carried on. I guess it stuck with me? Because at some point after that, I realized I had all the ingredients to make it: good bread, peanut butter, cilantro, lime and sriracha. (Actually, I now make it with sambal oelek, which I prefer to sriracha as it has a more well-rounded spicy kick than sriracha. The only real downside to this is you can’t squiggle sambal the way you can with sriracha. A minor disappointment.) So, I made it. I toasted a thick slice of Sidewalk Citizen sourdough, slathered on peanut butter (not even a fancy one), squeezed over some lime and then spread out a blob of sambal oelek and sprinkled roughly chopped cilantro on top.

Oh. My. God.

Peanut Butter-Cilantro-Sambel Olek Toast II

This is definitely one of those things that is far greater than the sum of its parts. And yet, it’s really good because each ingredient shines through, that tangy lime, rich peanut butter, hit of chile heat and brightness from cilantro – which also adds requisite colour.

After a year of making it, I’ve learned a few things.

This is not the place for wimpy white bread. You need something with heft, with significant crisp, crunch and chew to stand up to the flavours. I’ve tried it with all sorts of bread and find that a good loaf of sourdough, or its equivalent, is best. Trust me. A basic loaf of white bread just leads to sadness in this case.

Don’t underestimate the amount of lime to make it right. A quarter wedge is about right.

Also, it’s just not the same without cilantro. (I used to hate the stuff. I am completely baffled as to how I’ve come around on this herb. I understand I’m an anomaly on this front. For those who find it tastes like soap, I’m sorry, I haven’t yet experimented with other herbs. Maybe Thai basil would work?)

Peanut Butter-Cilantro-Sambel Olek Toast III

I’ve tried with both crunchy and smooth peanut butter and admittedly prefer smooth. But it’s worth experimenting.

So, this has been added to my toast rotation, along with tomatoes (few things are finer than a really good toasted tomato sandwich, I would suggest) and avocado (trend be damned).

That’s saying a lot because, frankly, I’ve been eating a lot of toast lately.

Toast is delicious, so that’s not necessarily a bad thing. Except it’s not really a sustainable way of eating.

The truth is, I’ve lost some of my passion for cooking. I know it’ll come back eventually, but for now it’s a lot of salads and toast and charcuterie plates. (I know, it’s sometimes really awesome to live alone so you can have any of those, or cereal, for dinner.)

So, forgive me for talking about toast for a minute?

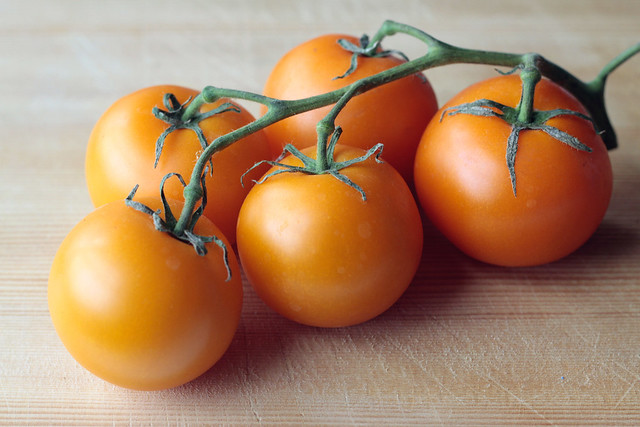
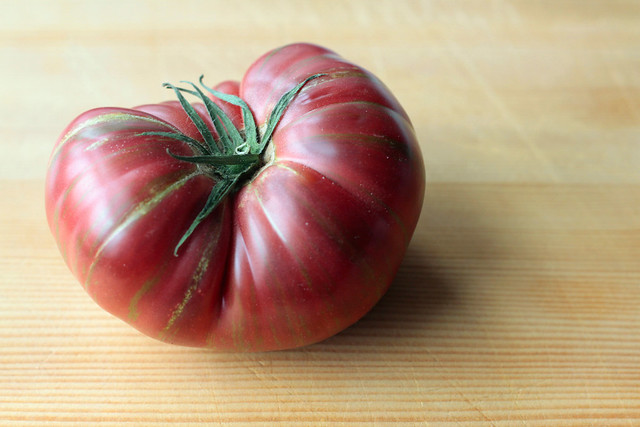
Summer is the best time for toasted tomato sandwiches as tomatoes actually have flavour and come in some many lovely shapes and colours and sizes. I sometimes like to slice up a variety to put on my buttered toast as it looks so beautiful and because each of the varieties does have a variation in flavour.

Orange tomatoes

Heirloom tomato

For a full sandwich, I like a nice homestyle white bread, toasted – even though my family would argue I actually like “warm bread” – to a deep gold. But for open-face sandwiches, it’s sourdough all the way. Sidewalk Citizen bread is an excellent vehicle for open-faced tomato sandwiches. Sturdy enough to not let a little tomato juice wilt it and with lots of nooks and crannies for melted butter to seep. That is, of course, if you have enough of a loaf left after getting it home from the bakery. I am surprised at how often I manage to resist just tearing into the loaf with bare hands and slathering on some nicely salted butter. Ahem.

Tomato Toast I

Tomato Toast II

As for avocado toast, I don’t think the Internet needs any more words spent on it, so I’ll only add a few.

No, I don’t make it into roses. Yes, sometimes I kind of mash it into the toast. But most of the time I like it just in slices overtop.

Avocado Toast II

I’ve experimented with squeezing over a bit of lime and a dusting of cilantro, if I have it. That’s quite nice, though not entirely necessary. Salt and pepper, though, are required. I found some lemon-infused salt once and that’s absolutely fantastic on avocado – though I would never suggest buying a salt just for this. (I have a weirdly large salt collection; most of them I bought on travels – I do love a food souvenir.)

Speaking of salt, if you ever come across a bottle of Jane’s Krazy Mixed-up Salt (known in my family simply as Crazy Jane’s), snap it up. It is the best on tomatoes and avocados.

Krazy Jane's

Tomatoes and avocados have been my toast go-tos for some time. And now I’ve added this peanut butter one.

Just on Saturday, I woke up and realized that I had some cilantro hanging out in my fridge.

(Aside: Did you know the best way to keep it? Put it in a glass filled with water, like a bouquet, with the fringed leaves poking out the top, and then cover loosely with a plastic bag. Boom. That cilantro has lasted without browning or wilting for more than a week.)

I cannot quite explain how delighted I was when I made that realization and knew some peanut butter-lime-sambal-cilantro toast was in my future.

Continue Reading

A Night at the Juniper in Banff

We have been encouraged to be boisterous.

And how can we not be, now that we’ve finished our cocktails and mingled outside, casting looks over the jagged Rockies and Vermilion Lakes from The Juniper Hotel’s perch just off the road up to Mount Norquay, and then be led in to sit at two long tables stretching the width of the Bistro dining room in anticipation of a five-course dinner featuring one of Vancouver’s top chefs?

JuniperViewPatio
A view from my room over to the The Juniper Bistro and beyond.

This is the third collaboration dinner in the Juniper Bistro’s dining series and the restaurant’s manager, Chris Irving, and his staff are sharing the kitchen with Angus An, a Vancouver-based chef well known for his restaurants Longtail Kitchen (which made my list of best eats last year) and Maenam, among others.

(For more about the dining series, upcoming chefs and why Irving started it, I’ve got the scoop on The YYScene.)

There is one focal point for the dinner.

“Life is short, prawns are seasonal,” An announced at the beginning to cheers and laughs.

Spot prawns, the coveted shellfish, has a short, six-week season of availability so they remain a sustainable fishery. They are considered Oceanwise because of this and the opening of spot prawn season on Canada’s West Coast is greeted with a lot of joy.

Fifty pounds of them were brought in fresh and turned into a series of dishes that played to An’s strengths, featuring the Thai flavours he is known for. Maenam serves up modern Thai dining, while Longtail Kitchen has a more street-food focus.

Bold flavours – sweet and sour, salty, spicy – were showcased throughout the night. Punches of heat from chili jam, citrus notes from galangal and even smoky notes, for a Tom Yum soup, that came from grilling the prawns.

The mood was jovial as we nestled in our seats, next to friends and strangers. Since the appetizers –kaffir and lemongrass roasted cashews, pad thai spring rolls and Thai green curry fish cakes – were set out family style, it was a good way to break the ice.

We were able to nibble and chat while occasionally peeking into the open kitchen to see the flurry of cooking happening there.

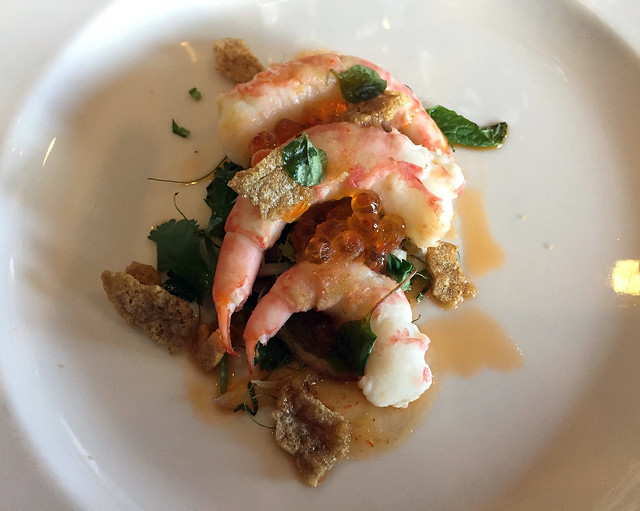
The first plates to come out were of a spot prawn ceviche, aromatically spiked with lime leaves, lemongrass and some crisp spot prawn crackers to add crunch. Conversations lulled as we took the first bites and then roared back up again as people talked about the dish.

Spot Prawn Ceviche from the Maenam-Juniper collaboration dinner at The Juniper in Banff.
Spot Prawn Ceviche

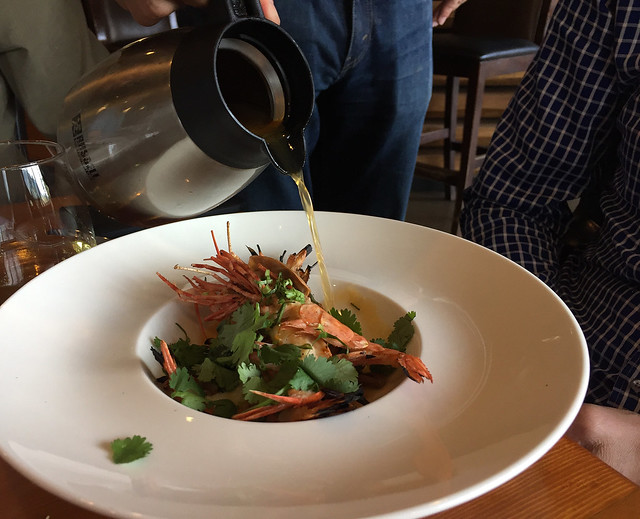
An, Irving and the rest of the kitchen staff spent the day making every course from scratch, weaving a culinary journey around Thailand. Between courses, An would explain some of the techniques and ingredients used in the dishes. Like that the deep earthy flavour that underpinned that soup came from using every part of the prawn, including the head and innards in the stock.

The soup, poured tableside, was aromatic and deeply flavoured.

Maenam-TomYum
Tom Yum Goong with galangal-infused broth

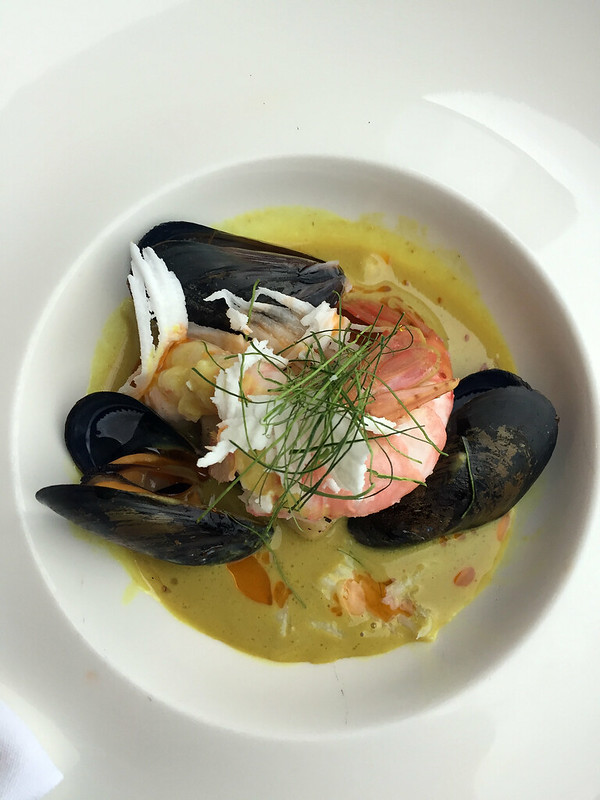
But it was the seafood curry with roasted sablefish, mussels and spot prawns, coloured and perfumed with turmeric, that made me wish for a second helping. The fish was perfectly cooked, the curry warming and full-bodied.

It’s likely to make my list for the best things I ate in 2017.

Maenam-curry
Turmeric Seafood Curry

We lingered over dessert. Irving’s goal of creating these dinners in part to serve as a catalyst for conversation and potentially to spark new friendships succeeded as those of us sitting at one end of the table exchanged phone numbers with suggestions we connect again soon.

And after it all, I was able to tumble into the king-size bed in my hotel room, only a few steps from the Bistro. The perfect commute.

In fact, I was a few minutes late to the cocktail portion of the dinner as I couldn’t stop myself from throwing open the outside door of my room to look out at the view over the Banff townsite and sharp-tipped slope of Mount Rundle.

Set outside the main town of Banff, across the Trans-Canada Highway, The Juniper enjoys a totally different perspective on the area (especially for a non-skier like me who hasn’t been up to Norquay).

JuniperRoom
A room…

JuniperView
…with a view

In the morning, I am loathe to leave, lying in bed with the curtains open to enjoy the view for as long as I can.

When it comes time to check out, I load up my car but find I’m still not ready to abandon the calm beauty of Banff for Calgary’s bustle, so I head into town to grab a pastry and tea from Wild Flour Bakery on Bear Street and then drove along the road that winds next to the Vermilion Lakes, stopping by one of the docks that juts out from the shore. Tea warming my hands, I sat on the dock, bobbing in the slight waves kicked up from the strong winds.

VermillionLakes

Thank you to Chris Irving for inviting me to come to the Maenam collaboration dinner and The Juniper for hosting me.

Future dining series events include a night with Chef Ned Bell in October and Top Chef Canada alum Todd Perrin in November. Dates to be determined. Find more information about upcoming events and book your own night at The Juniper at thejuniper.com.

Continue Reading

Nanaimo Bars

I was lying in bed last night watching Netflix around 10:30 p.m. when I was hit with a strong craving for Nanaimo Bars.

None of this is unusual; I am hit with such cravings with alarming regularity.

I also wasn’t surprised that when I tweeted it out, I sparked cravings in others. (Sorry, guys!) It seems this Canadian classic is something we all find infinitely craveable. For me, it’s been this way since I was a kid.

This post has been sitting in my drafts for some time — I have no idea why. My procrastination/follow-through issues are serious business, apparently. But it seems incredibly timely to get it up. And then go to the store to get what I need to answer the call for Nanaimo Bars. (And take more photos because one is most certainly not enough.)

IMG_0470

While I am sometimes struck by sudden, overwhelming snack cravings, these mostly boil down to two items: Rice Krispie Treats and Nanaimo Bars. Maybe it’s for the taste of nostalgia, since both of these bars were regular treats when I was growing up. Maybe it’s that they offer just the right level of sweetness. Or maybe it’s that I just love dessert bars.

Normally, I wait and let the craving pass without succumbing. Partly this is because I am missing some key ingredient and the craving isn’t strong enough to warrant a trip to the grocery store. And partly, it’s because I know I’ll eat one slice of what I’ve made and then I’ll completely lose interest.

This weekend, though, a very different thing happened. One, a craving for Nanaimo Bars struck. And two, I actually had everything I needed to make them – even the custard powder that adds a bit of flavour and signature yellow tint to the middle layer, which I had impulsively bought one day, just in case I had an urge to make them.

Am I bad Canadian if I admit this is the first time I’ve ever made this quintessentially Canuck dessert?

I grew up on Nanaimo Bars, thanks to my stepdad’s sudden – and never denied – cravings for the three-layer dessert named after the Vancouver Island city. He would make huge pans of them that would last only a day or two in our house. Since they were often in ready supply, I never learned how to make them, leading to some startling discoveries when I found out just went into them. “There are graham cracker crumbs in the base layer?” I actually said out loud when I finally decided the time had come to answer the craving.

The other discovery: they are ridiculously easy to make. A dangerous and delicious realization. It’s mostly just melting and layering, though a little patience is required as each step is followed with time to chill in the refrigerator. Conveniently, this also allows for tidying between steps, so there’s not even a mountain of dishes to do at the end.

I was wrong about one thing, though: I didn’t eat one slice and lose all interest. I ate four. Hopefully, that will be enough to keep the cravings at bay for a little while.

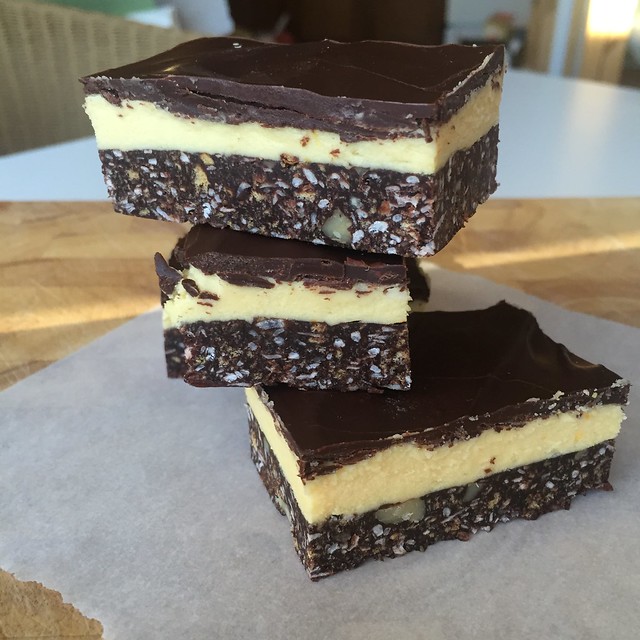
Nanaimo Bars

This Canadian standard doesn’t see much variation between recipes, but I upped the cocoa a bit in the base layer for an extra bit of chocolate flavour. Adapted from several sources.

Base layer:

  • 1/2 cup (125 mL) butter
  • 1/4 cup (60 mL) white sugar
  • 1/4 cup (60 mL) cocoa
  • 1 egg, lightly beaten
  • 2 tsp (10 mL) vanilla
  • 1 3/4 cups (430 mL) graham cracker crumbs
  • 1 cup (250 mL) sweetened shredded coconut
  • 1/2 cup (125 mL) chopped walnuts, pecans or almonds

Middle layer:

  • 1/2 cup (125 mL) butter, softened
  • 3 tbsp (45 mL) milk
  • 2 tbsp (15 mL) custard powder
  • 2 cups (500 mL) icing sugar

Top layer:

  • 5 oz (150 g) semi-sweet chocolate, chopped
  • 2 tbsp (30 mL) butter

Lightly butter an 8-inch (20-cm) square pan and line with parchment paper, letting a few inches hang over each side, like a sling. (This will make it easier to remove the bars for cutting.)

In a double boiler, set over medium heat, melt the butter and add the sugar and cocoa, whisking until smooth. Slowly drizzle in the beaten egg, while still whisking and continue stirring until the chocolate mixture has thickened. Remove from the heat and stir in the vanilla, graham cracker crumbs, coconut and nuts. Add to the prepared pan and press into an even layer. Chill for 40 minutes.

Prepare the middle layer by beating together the butter, milk and custard powder. Once wellmixed, add the icing sugar and beat until smooth and creamy. Spread evenly over the chocolate base and let the bars chill again for another 30 minutes.

In a double boiler set over medium heat, melt together the chocolate and butter until smooth. Let cool slightly, then pour over the bars. Chill until the chocolate has set.

Remove from the pan and slice.

Makes 36 bars (depending on how large you cut them).


Continue Reading

Touring to Torrington’s Gopher Museum with #GoFurther150

I love a road trip.

Likely because I’ve always loved driving.

(Barring that one time when my stepdad was teaching me standard and I rolled a fraction of an inch and then stalled at a tiny slope in Vancover and the woman behind me honked and I said, “Nope,” got out of the car as traffic grew behind me, switching seats with my stepdad who easily, and quickly, navigated us out of the situation. Funnily, I later taught myself how to handle a stick shift and now it’s my preferred way to drive.)

This really translates into a love of a quick escape.

I once drove from five hours from a small town in the B.C. interior to Jasper just to swim in a lake (worth it) and did a round trip from Victoria to Tofino – 9 hours of driving – because I wanted to see the pounding surf.

All the aspects of a road trip appeal to me. Snacks! Good music playlists! Podcasts (definitely wished those were a thing in those early days of day-long road trips)!

I’ve poked around Southern Alberta quite a bit on such quick escapes. Over to Drumheller to see the museum and hoodoos, west to Banff or Canmore to poke around the mountains, south to the Crowsnest Pass and many, many trips to Turner Valley for a burger at the Chuckwagon – often looping down and over to Nanton for some antiquing before turning the car home.

(All road trips in my life need a stop at some tasty/interesting/unexpected/intriguing place to eat, obviously.)

But I haven’t done much exploring north of the city. And one thing has been on my list for a while: the Gopher Hole Museum and Gift Shop in Torrington.

 
DSCN0182

When Ford Canada offered to loan me a new Fusion Sport and send me to the museum as part of their #GoFurther150 campaign, I was game. Road trip? Nice car? Stuffed gophers in display cases? Let’s do this.

Across the country, in celebration of Canada’s 150th anniversary of Confederation, Ford has been sending people on trips in their vehicles to see local landmarks as part of their #GoFurther150 campaign.

[Disclosure: I was given a gas card to offset travel costs, plus Ford paid the $2 admission fee at the museum for myself and a friend.]

Iphone synced, music filling the car, we slipped north on the highway and then east over to Torrington, testing out the sport mode, which makes the car more responsive and adjusts torque and engine sound. (Confession: I also totally tried out the seat warmers/air conditioners – cooling! – heated steering wheel and the lane assist, which, after a few tests, prompted the car to suggest I pull over because I might be tired.)

Version 2

For 21 years, the gopher museum has attracted visitors from around the world – and more than its fair share of controversy when PETA inevitably protested its opening, to which the museum responded with a note that they could “get stuffed” – to view the dioramas of daily life in the community featuring taxidermied gophers.

Volunteer fire gophers, Silver Willows Seniors’ Club gophers, gophers visiting the local Pizza n’ More Eh and gophers on dates. All the background art for each of the dioramas was done by local artist Shelley Barkman, while a retired carpenter built the cabinets and local women dressed the gophers in their little outfits, right down to an RCMP gopher in red serge.

Untitled

Dale Heinz, a taxidermist in nearby Didsbury, had the task of getting the gophers display ready.

(OK, they’re actually Richardson Ground Squirrels, if you want to get technical – and there was a copy editor at the Herald who always wanted to get technical on that front – but for the sake of consistency, I’m going with gophers here. After all, that’s what the museum calls them.)

The one-time village opened the museum, capitalizing on the numerous gophers in the area, as a way of drawing in tourists. Judging from the pins on the map that visitors have used to mark their homes, it has attracted people from all over.

IMG_1377

The museum is open for four months a year – June 1 to the end of September, though they will open outside of those dates for visitors who call or email – and sees about 6,000 visitors each season.

(We were a couple of days early, but they opened for us and a couple who had initially been disappointed to learn it was closed.)

The whole hamlet of Torrington has embraced the gopher. Fire hydrants are painted like the small creatures in outfits and there’s a statue along the highway denoting the community mascot.

Untitled

Untitled

And so, with the museum finally checked off my list of things to see in Alberta, it was time to seek something to eat.

Never one to skip a chance to take secondary highways, we took the long way around to Bowden, circling up to Innisfail along ribbons of road undulating over the foothills and then down the QEII to the Starlite Diner Car – another landmark that’s long been on my list.

IMG_1414

The diner was bustling for a Thursday afternoon, parking lot full of tourists and truckers who wanted to stop for a chance to eat at the retro-styled diner just off the highway.

While mostly typical diner fare, the menu has an extra-terrestrial theme (as does some of the décor) with Romulan or Crop Circle salads, among other options.

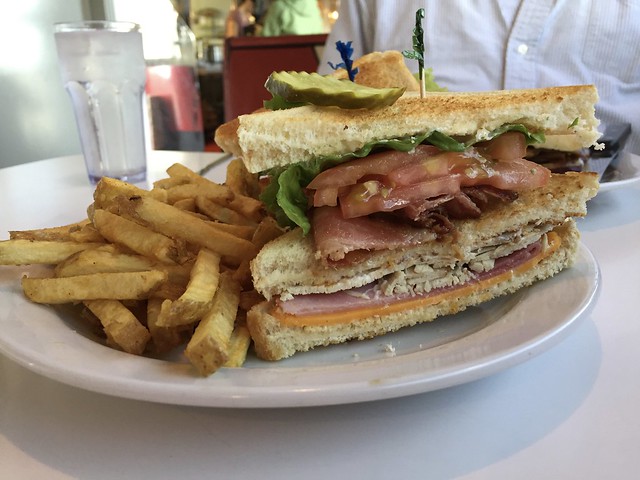
It was all about the clubhouse sandwich for me and this one didn’t disappoint. Slices of real turkey, ham, cheese, a thick layer of bacon. Perfection. Also? Inordinately good fries.

IMG_1421

We took the long way back to Calgary, heading west and then down Highway 22 through to Cochrane. (One of my road trip preferences, when possible, is to never take the same road back.) Everything was lush and green and we were able to watch the edge of a summer storm push toward the city.

Another great day of exploring.

IMG_1411

If you go: the Torrington Gopher Museum charges $2 admission for adults, 50 cents for children under the age of 14. It’s open daily from June to September, 10 a.m. to 5 p.m.


Continue Reading

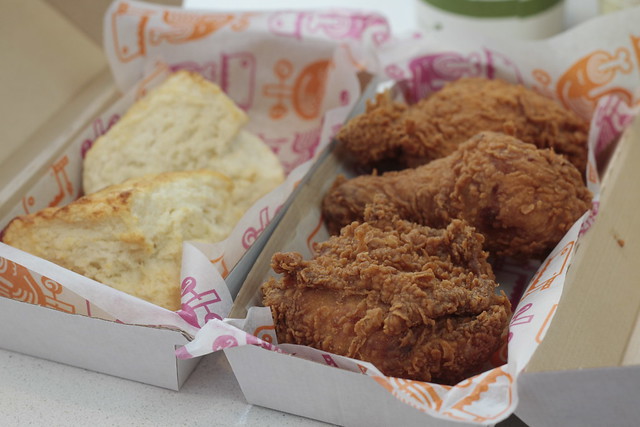
Fried Chicken Dine-Around

I don’t remember how the idea even first formed, what the precipitating discussion had been, only that at some point the idea was arrived upon that a group of us should have a night eating fried chicken from a variety of spots around Calgary.

A fried chicken tour – or dine-around as we later called it – seemed like one of those ridiculous ideas that is so decadent that you kind of can’t not do it.

So we did.

Saying yes was a no brainer. After all, fried chicken is one of those dishes that inspire made cravings. That juicy meat, crackle-crisp breading, spices and herbs, all check the boxes for a dish worth yearning for.

_MG_4078
A selection from Chicken On the Way

The harder task was trying to narrow down the field from all the restaurants dishing up their versions of fried chicken around the city. Especially since – out of fear of heartburn or coronaries – we limited ourselves to four spots. Even that is not really for the faint of heart.

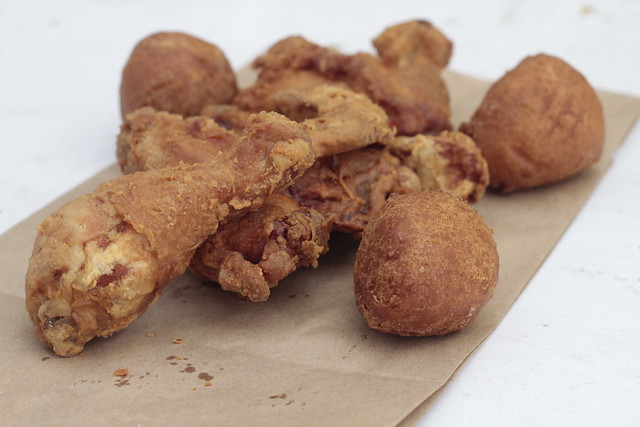
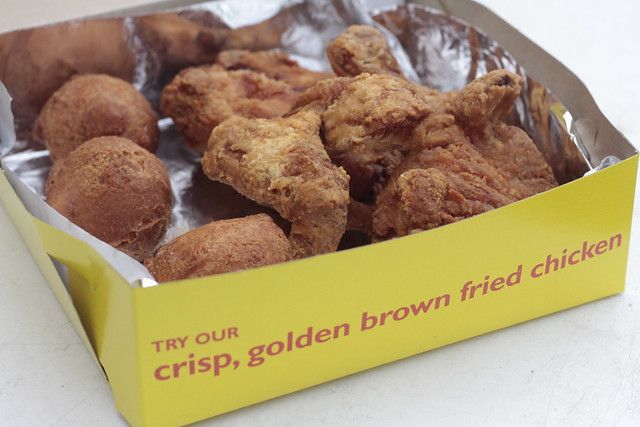
Chicken on the Way was a given, since it’s a Calgary institution and, well, the fritters are deadly good.
Cluck n’ Cleaver was added to the list as the newest on the scene.

And to cover off a variety of price points, we also wanted to include some sit-down restaurants, which meant Model Milk – which has been serving up fried chicken in some combination or another since it opened, including numerous iterations of southern classic combination chicken and waffles – and Anju which, while known maybe more for its yearn-worthy wings and sliders does offer large-format plates of fried chicken.

The original plan also included Olive Chicken, though I also love Ogam Chicken, which is down on Macleod Trail across from Chinook Centre.

In the end, we put those on the list for the inevitable round two of the Fried Chicken Tour.

I’ve dabbled in making fried chicken for a couple of dinner parties – where someone else was responsible for the waffles – and had a lot of success with recipes by Tyler Florence and J. Kenji Lopez-Alt – whose version I heartily endorse, as do my fellow dinner party diners.

Fried chicken looking so fine. Thanks @kenjilopezalt for the recipe! Not pictured: the waffles alongside.

A post shared by gwendolyn (@gwendolynmr) on

Dinner! Homemade chicken and waffles with bourbon syrup. Eff yes.

A post shared by gwendolyn (@gwendolynmr) on

I was mostly willing to tackle it because, well, I do love fried chicken and because the party hosts have one of those deep-fat fryers that’s all enclosed and maintains temperature and means no one is carefully watching a pot of boiling oil on a stove and dealing with splatter. Also, they cleaned up, so….

Because, as much as I love eating fried foods, I kind of hate cooking them. Though that may also be due to lack of experience (a chicken-and-egg situation, to be sure) and never quite getting the knack of keeping the temperature steady and so on.

Eating someone else’s fried chicken is so much easier.

With a date picked and an order selected, we set forth.

It started with Chicken on the Way.

After all, one should start at the beginning.

_MG_4081

A few people questioned why we would include this spot, but for me there was no doubt it had to be part of the tour. They’ve been frying up chicken and fritters and fries for nearly 60 years; they’re a Calgary institution.

Although the goal was to not fill up on side dishes, we couldn’t resist the corn fritters which are satisfyingly crusty on the outside with soft, corn-studded interiors.

The chicken itself has a rather thin coating when compared to Korean fried chicken or even the robust crust on Cluck n’ Cleaver. But it’s nice and crisp and the chicken underneath is juicy enough.

This is straightforward, know-what-you’re-going-to-get fried chicken – which is likely why it has remained a part of Calgary’s dining scene for so long. (And has expanded to other Calgary locations and other communities, like Airdrie, Brooks and Edmonton.)

The tour was off to a good start.

A straight shot south on 14th Street lands you at the front door of Cluck n’ Cleaver, the fried and rotisserie chicken spot opened by Nicole Gomes, of Nicole Gourmet Catering (who is currently competing on Food Network Canada’s Top Chef Canada: All Stars) and her sister Francine.

Like Chicken on the Way, you can stop and enjoy your food in the space, but mostly it’s to-go orders. (And, perhaps dangerously, they do delivery.)

The “avoid ordering sides” decision went straight out the window here, as we tried three salads (coleslaw, black bean and corn, and a stick-to-your-ribs potato salad) along with biscuits and gravy. And a milkshake. Because why not?

_MG_4083
The camera eats first. At Cluck n’ Cleaver.

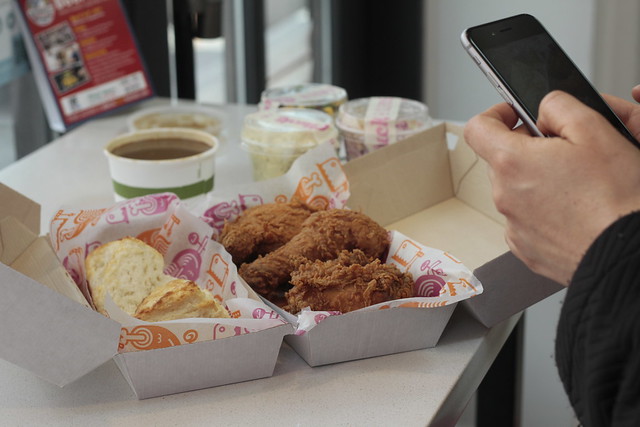
Where Chicken on the Way has a thin coating, Cluck’s is all thick and craggy with plenty of seasoning. Hiding beneath, deeply juicy chicken that counterbalances that crispy coating.

It’s excellent on its own but I wouldn’t stand in the way of anyone considering dipping some of that chicken into the gravy served on the side, which is also fantastic on the biscuits.

_MG_4089

For an entirely different take on fried chicken – at least in terms of seasonings and spices – we then headed down 17th Avenue to Anju, home of some of the city’s most crave-able hot wings.

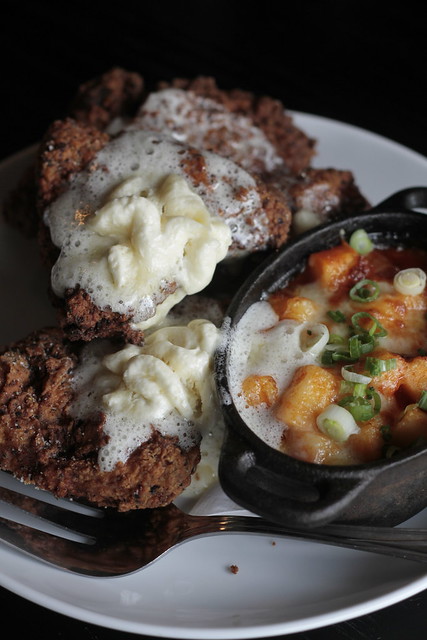
While a go-to order for me when stopping in, we forewent the gochujang wings for chef Roy Oh’s latest fried chicken creation, which he frequently changes to keep things interesting. There were only a few days left for the version then still on the menu, which was a spicy chicken topped with airy light honey-butter that melted into the crooks and crannies of the crispy skin. Alongside, a playful take on macaroni and cheese, but instead of pasta, Oh used rice stick.

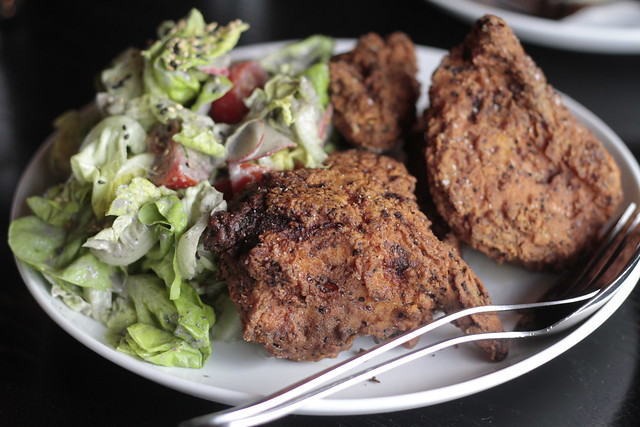
Since the menu change was imminent, Oh also served up the newest iteration that is now on the menu: sriracha-brined fried chicken served with a black sesame-dressed salad. The cooling salad was a nice counterpoint to the hot chicken that, while spicy, didn’t blow out my tastebuds. (I’m, admittedly, a total spice wimp.)

_MG_4097

_MG_4102

No lie. We had to pause here for a bit before continuing.

Also no lie? I wasn’t sad because it meant time for one more Lock, Stock & Two Smoking Barrels – one of my favourite cocktails in the city. Into a smoked glass with a massive ice cube is a mixture of bourbon (yay!), ginger liqueur, sugar and bitters. So, it’s kind of like a super jazzed up Old-fashioned. (Also yay!)

I may enjoy trying all sorts of menu items while at Anju, but when it comes to the cocktail list, it’s Lock, Stock every time.

From Anju, it was a quick (much-needed) walk down to the other end of the block to hit up Model Milk.

Fried chicken has been on their menu almost since the beginning, but how it’s prepared and what it’s served with is constantly evolving. First, it came with grits, then waffles entered the picture. At one point, those waffles were deep-fried to be, essentially, donuts. (This was my favourite iteration of them all.)

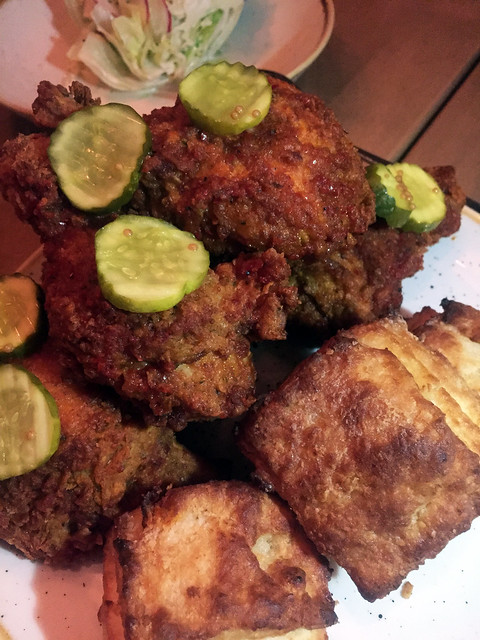
The latest edition comes with fluffy, flaky biscuits, a wedge of iceberg salad and dill pickle coins whose acidic tang play nicely against the chicken.

This chicken had some kick, to be sure. The salad was soothing, though and I couldn’t get enough of those light biscuits.
Sorry. Not the best photo. Trust me, it looks so much better than this.

IMG_0523

And so, some five hours later, the chicken dine-around came to a close. Amazingly – frighteningly – we were already discussing the next one as the plates were cleared.

Continue Reading

Wolf in the Fog

We’re in for a treat, we’re told shortly after being led to our table.

I feel that, even before we’ve opened the menus or heard the specials.

Because we are here, at one of the top restaurants in the country, in one of my favourite spots in the world.

Since 2014, when Wolf in the Fog landed a coveted spot on enRoute Magazine’s list of the 10 best new restaurants in Canada, its reputation has only grown. Tucked into the cosy community of Tofino, it defies the common belief that stellar dining is limited to major metropolises. Instead, here, on the western brink of the country, where craggy rocks, long stretches of sand and wind-beaten trees edge the Pacific, Wolf has found firm footing as a destination restaurant.

The inevitably seasonal menu reflects the rugged landscape and coastal abundance with dishes that feature fresh seafood – pulled from the ocean that can be seen from the restaurant – and ingredients foraged from the rainforest, as well as vegetables and meats from local farmers and producers.

Wolf had been on my list of restaurants to try since it opened – and even more so as the accolades poured in – so a stop here was inevitable during a trip the Tofino area as part of a month-long visit to the coast last year.

(Calgary connection: Chef-owner Nicholas Nutting trained at SAIT and worked under Michael Noble for three years at Catch when it first opened. He would later run the kitchen for The Pointe at the Wickaninnish Inn – another restaurant with a reputation for impeccable food.)

The treat the server was referring to, however, turned out to be a specific one: the last order of gooseneck barnacles that had come in that morning and quickly sold out.

The prehistoric-looking crustaceans, with their armoured tips and meaty trunks, are a prized delicacy because they’re difficult and dangerous to harvest from below the high-tide line of rocks pounded by surf.

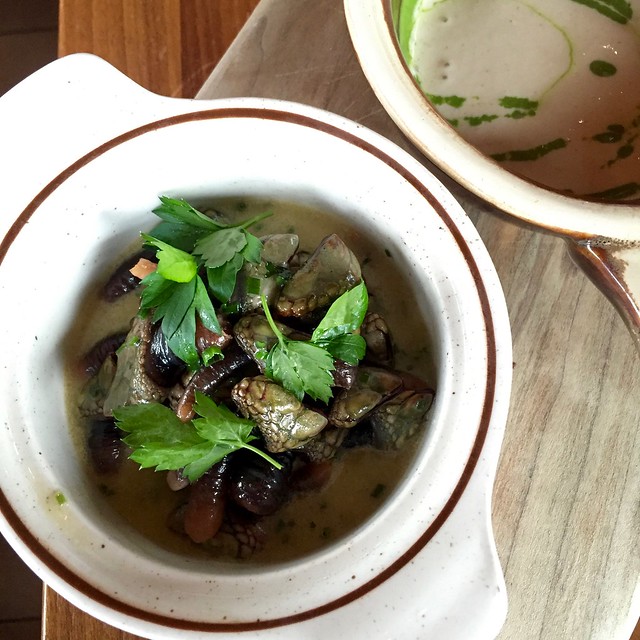
As a special of the day, Wolf was offering them in a sherry cream with a verdant green oil made from tarragon, dill, parsley and chives – with bread for swiping through the sauce. The tender and slightly sweet shellfish may not be pretty to look at, but a few bites in and it was clear why this is such a coveted ingredient.

IMG_1665

The barnacles would turn out to be one plate in a series of well-crafted, creative and robustly flavoured dishes that landed on our table. We were in for a treat indeed.

But the experience started as we reached the top of the stairs and were greeted by the warm and welcoming space, with soaring windows, long wood tables and sculptural light fixtures dangling from the steepled ceiling. It continued from cocktails to the pair of desserts that would cap off the night.

_MG_1108

Although many entries on the cocktail list were tempting, there was no way I was going to have a meal at Wolf in the Fog and not try the famed Cedar sour, which I had seen numerous times on various forms of social media. (And lord knows, I do love a good sour.)

That distinctive woodsy aroma of west coast cedar was infused into the well-balanced cocktail that put it well into the top of the list of sours I’ve enjoyed.

IMG_1664

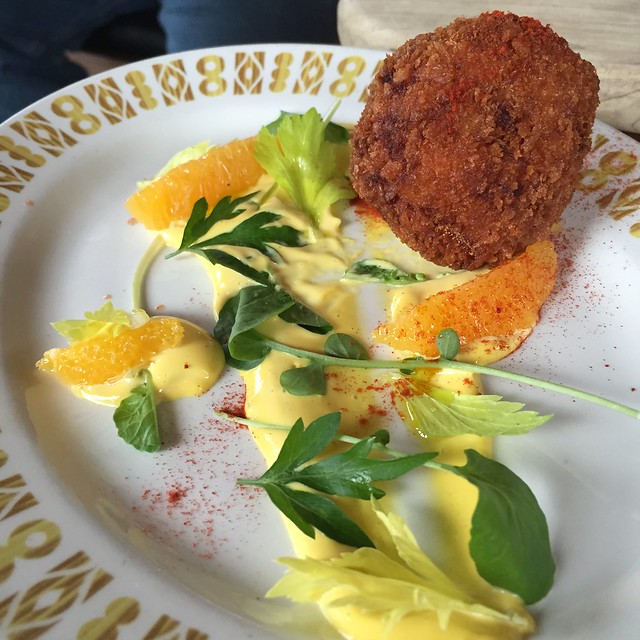
Besides the barnacles, we enjoyed a plate of smoked cod fritters with a bright saffron aioli, like a dollop of sunshine on the plate, and fresh chunks of orange that played nicely against the rich, crisply crusted fritters.

IMG_1662

There was a local halibut with sesame-nori croquette and sautéed bok choy, as well as a zatar-spiced game hen with farro, earthy from the spices and grains but brightened from the addition of a pickled veg salad.

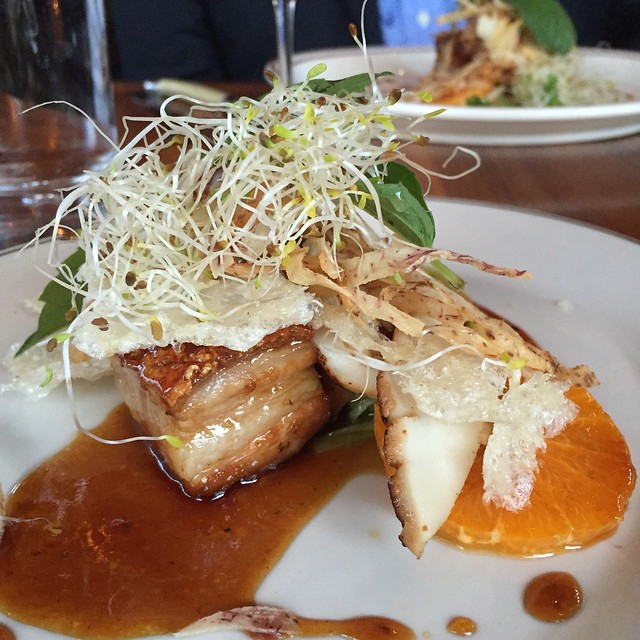
The highlight, for me at least, though was the crispy pork belly with Humboldt squid and charred daikon in a Szechuan glaze. I’m not a particular fan of squid as a general rule (and yes, I do keep trying), but this put any other one I’ve had to shame. Expertly prepared and cooked, it was a joy to eat, especially with the fatty, meaty belly that had been fried to a gorgeous amber colour. The play of the pork and squid worked perfectly and we basically scraped that plate clean with the edges of our forks to get any last drippings of glaze.

IMG_1669

That dish would be one of the best I ate in 2016 and I still think back on it.

On Tuesday night, Canada’s 100 Best Restaurants unveiled their list of the best establishments in the country, from coast to coast. Unsurprisingly, Wolf made the cut (sitting nicely at no. 41).

All the more reason, I think, to make sure I get out again to Tofino this spring.


Continue Reading

Pickled Ginger

Contrary to what some may believe, dinners around here are mostly decidedly unfancy.
A few nights ago, it amounted to Japanese fried rice (made from this packaged seasoning mix I became immediately addicted to while living there and now happily buy from nearby Arirang – an amazing resource for Korean and Japanese ingredients in the Beltline), some quick pickles I made from shaved slices of cucumber and, inevitably, a fistful of pickled ginger. Yes, somewhat shamefully, that nearly electric pink, aspartame-sweetened kind.

Gari, the Japanese word for pickled ginger, is part of the family of tsukemono (pickles) that pretty much only appears when served up alongside a plate of sushi. The slightly spicy, tangy thin slices of ginger are supposed to be eaten between the different types of nigiri or sashimi as a plate cleanser. (Not on a piece of sushi, please and thank you.)
IMG_9244

The odd thing is that, for years, I hated pickled ginger. I’d ignore the lump of it sitting next to my sushi rolls when I’d go out with my friend Michelle. This actually worked out well for her because she loved the stuff and then would get to eat both of our portions.

And then, at some point, I must have tried it again. And discovered I loved it. And starting to find myself asking people if they are planning on eating any of the thin slices of puckery, hot, palate-cleansing gari. I take whatever they don’t want.

It has now become a full-fledged addiction.

While traditionally served with sushi to cleanse the palate, I basically now consider it a condiment when eating various things with rice.

When I make those Szechuan Green Beans, I add pickled ginger. That teriyaki trout with quick pickles? Yup, I add a nice pile of gari to that. When I get sushi takeout, I order extra. (Though, blissfully, Zipang believes in a healthy heap of it for their takeout orders; when I ordered extra from there once, it was too much even for me, though I stored the rest in the fridge and it was gone within a few days.)

_MG_3721

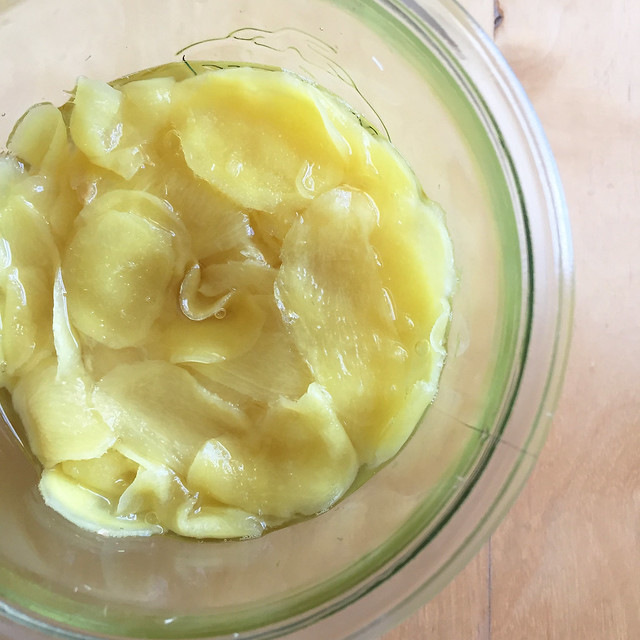
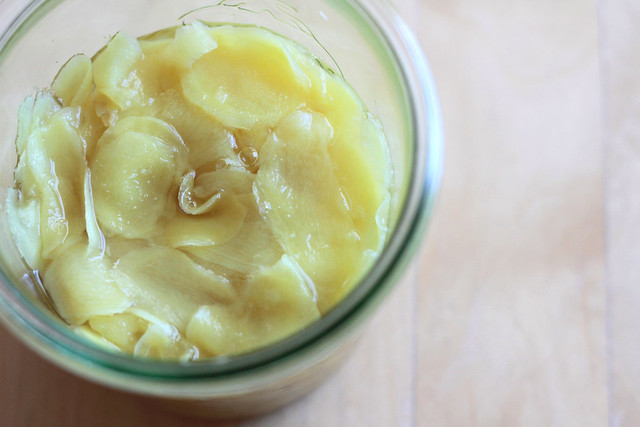
Ideally, gari is made with new ginger, which is milder in flavour, has a thinner, paler skin and is tipped with pink, giving it a blush tinge when pickled. (That’s what the dyes in the store-bought versions are trying to mimic.) The season for young ginger is short, though, so most of us have to make do with older ginger, which is spicier and makes for a yellow colour when pickled. If desired – I was too lazy and not all that bothered by the colour this time – throwing a sliced radish or a tiny bit of beet to the pickling liquid will lend it all a nice pink hue.

I looked over a number of recipes to try to find one that sounded like it would get me the right combination of slight heat and tang and sweetness, and was surprised to find so much variety in the methods and ingredients. Some called for salting and/or boiling the ginger to cut the vivid heat of older roots, others just suggested slicing and brining. Some had very low quantities of sugar, which would make the ginger much more acidicly pickled, others had so much it almost sounded like candy.

In the end, I cobbled together a couple of versions.

I’ve eaten half the jar already, so I think it’s safe to say I’m pretty happy with it.

_MG_3683

_MG_3688

_MG_3696

_MG_3716

_MG_3733

Pickled Ginger

  • 10 oz ginger
  • 2 teaspoons salt, divided
  • ¾ cup vinegar
  • ½ cup sugar

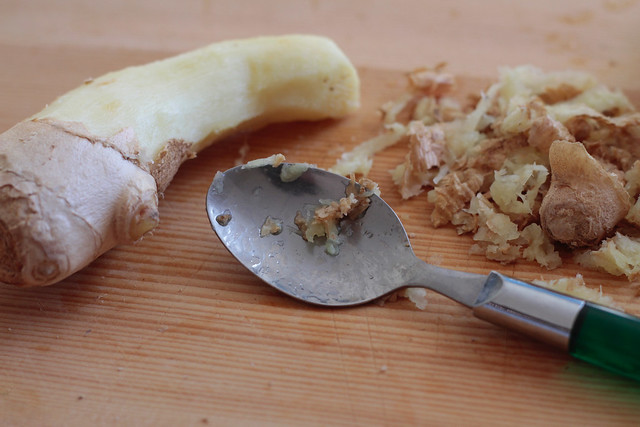
Using a spoon, scrape the skin off the ginger. A knife can be used to cut off any knots.
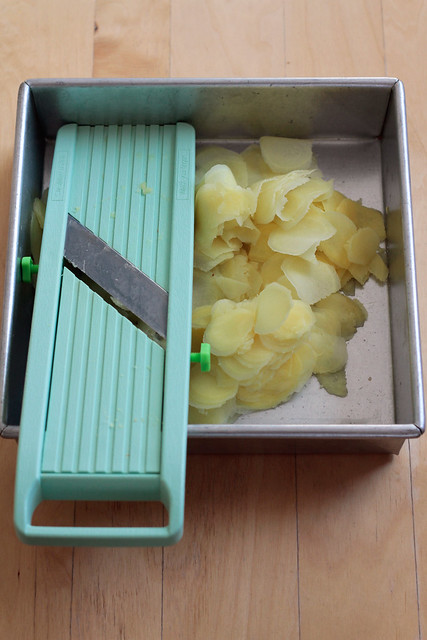
Set a mandolin on the thinnest setting – testing with a couple of slices of ginger to make sure you still actually get a slice of the root – and then position it in a baking pan or dish. This keeps the mandolin from moving around (safety first!) and also keeps all your ginger slices in one place.
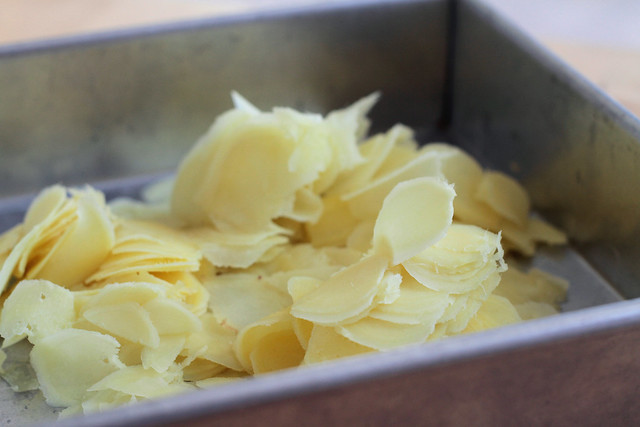
Slice all the ginger as thinly as possible.
Spread it around the pan or baking dish so it’s mostly in one layer. Sprinkle over 1 teaspoon of the salt and give it all a bit of a toss so it’s fully mixed. Set aside for about 10 minutes.
While the ginger is curing in the salt, set a medium pot of water over the stove and bring to a boil.
Once the water is boiling, add the ginger slices to it and let them cook for a few minutes. This cuts down the spiciness of the ginger, so the cook time will depend on how spicy you want it. (I did 3 minutes and probably could have gone for 4.)
Drain the ginger slices through a fine-mesh sieve and spread them out, letting them drain completely.
In a small pot, add the vinegar, sugar and the remaining salt. Bring it all to a boil and let it cook for a few minutes until it has lost some of the really astringent vinegar smell.
While it cooks, add the ginger to a clean jar with a lid.
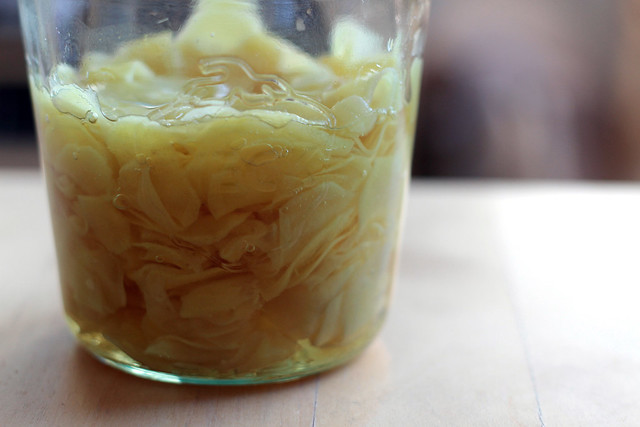
Pour over the brine, tamping down the ginger to make sure it is submerged in the liquid. Place the lid on the jar and let cool for a little while before storing in the fridge.
Now the hard part: wait about 48 hours before cracking the jar open to enjoy the ginger. (You can eat it sooner than that, but the extra time will really infuse the ginger with the brine.)
As a pickle, it should last a while in the fridge without danger of going bad. That is, if it even lasts long.
Mine was half gone in just a couple of days.

Continue Reading

Szechuan Green Beans

I get into food ruts sometimes.

It’s like I get into a culinary funk and lose all my imagination, rotating through the same few dishes until something breaks the cycle.

Other times, I get into food obsessions.

During those periods, I make the same thing over and over – not because I’ve seemingly run out of culinary creativity, but because I just want to keep eating the same great dish.

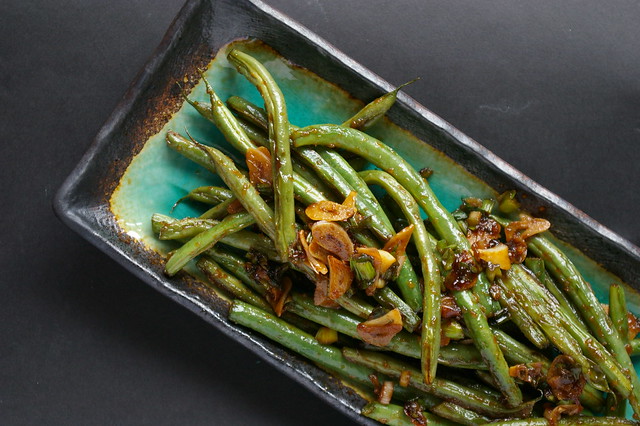
One of those obsessions is Szechuan Green Beans – a recipe I got from Julie Van Rosendaal.

IMGP3435

I had swung by her house one afternoon a few years ago where she had just been nibbling on some of these green beans sauteed with garlic, ginger and a squeeze of chili paste. She pushed the plate toward me; I took a bean and never looked back.

That first bite of slightly softened bean with the hit of spicy heat, the pungent garlic and green onions, now sauce soaked, hit all the right notes. So, I reached for another. And then another. When all the beans were gone, I found myself picking up the thin slices of garlic and stray bits of onions until the plate was picked completely clean.

I made them for the first time two days later. And the next night after that.

Since then, every few weeks I find myself grabbing fistfuls of green beans at the market, dreaming of eating the spicy, hot, slightly wrinkled beans over some rice with chopsticks.

This addiction runs so deep that I now typically double the recipe just to ensure I will have plenty to take to work the next day for lunch. This most recent batch was only a single – I didn’t have enough garlic at the time to make more – and when the beans were gone, I felt suitably bereft.

IMGP3458

I ate them all with rice and a side of pickled ginger – another bizarre food obsession that has manifested in the last year or so.

And, as there are still beans in the fridge, I’m pretty sure I know what will be for dinner tomorrow night.

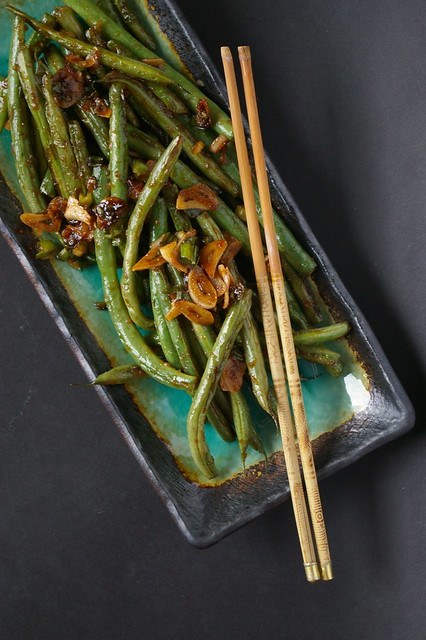
And here is a more accurate photo of what it looks like when I’m eating it. Since, really, I’m not fancy enough for that kind of plating when I’m eating on my couch.

But picture a whole bunch of pickled ginger with it.


Szechuan Green Beans

This is virtually the same recipe as posted on Van Rosendaal’s blog, though I recommend going to the higher end of the garlic and I upped the green onions, as well. Instead of Sriracha, I’ve also used Sambal Olek to good effect.

  • 1 tbsp (15 mL) canola oil
  • 1 tsp (5 mL) sesame oil, optional
  • 1/2 lb (250 g) green beans, stem ends trimmed
  • 2 tsp (10 mL) grated fresh ginger
  • 3-5 garlic cloves, thinly sliced
  • 3 green onions, chopped
  • 1 tbsp (15 mL) soy sauce
  • 1 tsp (5 mL) sugar
  • 1 small spoonful of Sambel Olek (or a squirt of Sriracha)
  • Toasted sesame seeds, optional

Heat a heavy pan over medium-high heat and add the canola and sesame oils. Add the beans and cook, stirring occasionally until they start to turn golden. Add the ginger, garlic, green onions, soy sauce, sugar and Sriracha and cook a few minutes more, stirring often, until the garlic is golden, the beans are deeper golden and the sticky sauce has coated them all.

Sprinkle with toasted sesame seeds, if desired.

Serves 4.

A version of this article originally appeared in the Calgary Herald.

Continue Reading

The Best Eats of 2016 – Part I

I’m not going to go on ad nauseum about the annus horribilis that was 2016.

Bad stuff happened. To a lot of us.

Thankfully, good stuff happened too.

Unsurprisingly, for me, that was mostly around eating and traveling and eating while traveling – which, when combined with pretty dresses and patent shoes makes for a very happy Gwendolyn.

There was a month-long trip to the West Coast to visit Tofino and check out good eats there (more on that in an upcoming post), time in Victoria with my best friend and my family, a junket to Cranbrook and Fernie where I ate some amazing Indian food in a very unexpected place, a special trip to San Francisco to celebrate a milestone birthday for a friend, and, of course, an epic return to Japan to see the country I fell in love with when I lived there oh-so-many years ago.

Along the way I ate untold bowls of ramen, found new restaurants to love and dishes that have caused severe cravings for repeat visits.

The year had its tough moments, no doubt, but it was often damn tasty.

Here, in no order, are the best things I ate in 2016. (Part I because, wow, apparently there was more than I initially remembered.)

I can’t wait to see what 2017 brings.

So, Part I:

The main benefit of what I jokingly called ‘funemployment’ was that it made it easy to take off from Calgary. There is some delight in not having to clear vacation days with a boss or trying to manage making 15 days off last across an entire year. I had two weddings out on the coast, about three weeks apart, in the spring and decided to do a road trip out, seeing old friends, exploring some favourite spots and eating lots of delicious things.

Tofino is one of my favourite places in the entire world. (Kyoto is too, and what a blessed year to be able to go to both of these spots.)

There were two nights at the famed Wickaninnish Inn that sits on my favourite beach at the western edge of Canada. The days were spent exploring tide pools and walking the long expanse of sand on Chesterman Beach, grabbing lunch at Tacofino (oh those tacos, so damn good) and generally poking around.

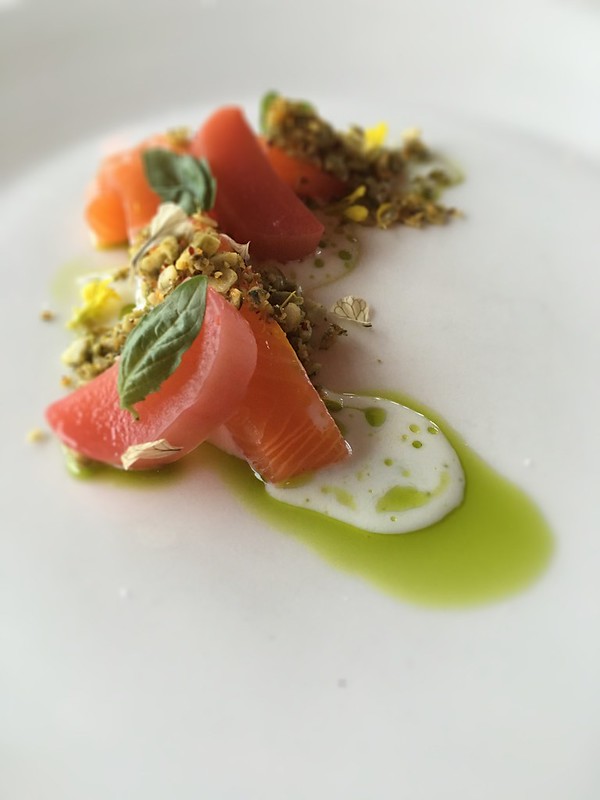
On one of the nights, we were hosted by the hotel to dine at The Pointe restaurant, sampling some of the incredible dishes created by executive chef Warren Barr. Among them, a delicate dish of cured steelhead trout with vanilla-poached rhubarb. The rich fish was neatly balanced by the tangy rhubarb.

Cured steelhead trout with vanilla-poached rhubarb from The Pointe at the Wickanninis Inn at Long Beach.

It was like dinner and a show as eagles swooped past the stretch of windows looking for their own meal and the grey surf broke into white spray against the rocks.

Slightly south, on Cox Bay sits Long Beach Lodge.

When not poking around that beach and the rocky outcropping that borders it to the north, a delicious afternoon was spent in the Great Room, the lodge’s restaurant-lounge hybrid. Cosy and welcoming, guests are invited to grab a board game and settle in for cocktails and snacks, which we happily did, spending a couple of hours battling over Scrabble while eating the lodge’s hot wings (which executive chef Ian Riddick was kind enough to share the recipe for, so those will be happening in my kitchen this year) and sipping Gin & Basil Caesars. When the calendar flipped to 2016, I had only had one Caesar in my life. Now I seem obsessed. And with these ones, it’s no wonder; the basil gives it a nice freshness and the lemon brightens it all up. I couldn’t get enough.

IMG_1721

Victoria will always feel like home to me. I did my undergrad at UVic and make it back at least twice a year to see my best friend, Kirsten. Now that my parents have moved to a quiet spot on the ocean about an hour outside of the city, there’s even more reason to make trips to the coast.

Kirsten and I have our rituals; there is always a lunch at Blue Fox for their Moroccan Chicken Sandwich (with a side of their green apple barbecue sauce for dipping fries in for me), there are pedicures at Sapphire Day Spa, there is a stop at Red Fish, Blue Fish if I’m there in the months when it’s open, a visit to Stage Wine Bar (where the gnocchi is a must-order) and there is shopping.

Since we are always racing against a limited amount of time, we rarely stray from the favourites.

When I was there in the spring, though, we decided to take a chance on somewhere we hadn’t been before but that had been highly recommended: Mo:Le.

Untitled

It was a drizzly morning and there was a bit of a wait, so we started with lattes at Mo:Le’s sister coffee shop next door. The great part is then you can take your drink with you when your table is ready.

The menu is a melting pot, with Mexican influences married with flavours from neighbouring Chinatown. It’s an unexpected mix. And it works perfectly.

I couldn’t initially decide on what to order, but, with a helpful server offering her opinion when asked, I went with the Chinatown Ciabatta, a breakfast sandwich with eggs scrambled with cream cheese, that sweet Chinese sausage usually reserved for dim sum-type dishes and a spicy chilli bean sauce.

Untitled

On my next visit, I was insistent the itinerary include a stop at Mo:Le. It’s now just become part of the ritual.

Also? Order the Caesar.

IMG_4500

During that same road trip, I met my former mentor for lunch at Longtail Kitchen in Westminster Quay. This spot had been featured on You Gotta Eat Here, so I was already curious about it. I let Shelley handle the ordering; there wouldn’t have been a way for me to narrow down the choices. Pad thai, curry, wings (clearly, I have some things I must always order) and a flatbread-pancake hybrid with peanut sauce. There were no bad choices on that menu.

IMG_2202

No list of my best eats would be complete without a burger, as any of you know me could guess. The one from ‘Camp Upstairs’ – a little bar with an incredibly limited menu that sits above Vancouver’s Campagnolo – may initially seem not that noteworthy.

It’s no frills, for sure, but no frills are needed when something is so expertly made. And these are somewhat cult-like as the bar only makes a limited number per night.

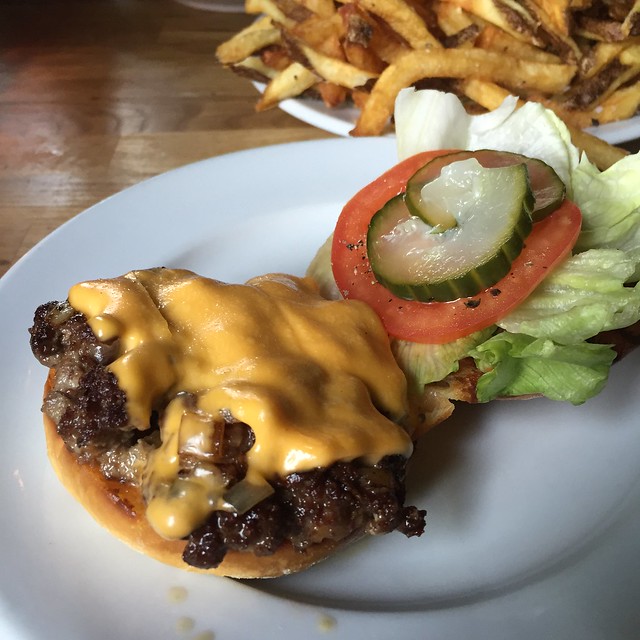
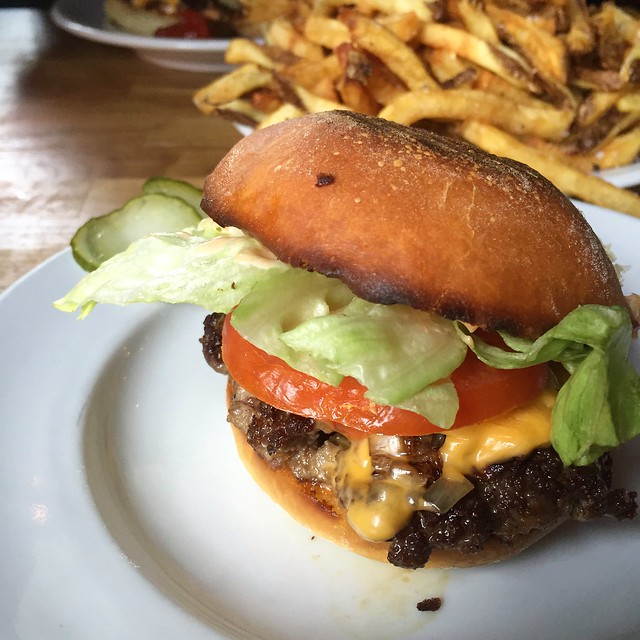
The standard version of the so-called Dirty Burger comes with a beef patty, melted American cheese, lettuce tomato and a couple of pickle coins.

Mine also had fried onions, deeply dark at the edges with that slight sweetness from caramelization.

IMG_2021

This burger is sincerely beefy and juicy with a requisite crust on the patty that adds a gorgeous flavour.

My friend and I split a colossal plate of fries and paired the meal with a perfect Boulevardier, sipping and sharing fries while swapping stories.

A perfect night.

IMG_2026

Stay tuned for Part II, coming later this week, when I cover some Calgary favourites and the best ramen I’ve ever had. Spoiler alert: I had it in Japan.


Continue Reading

A day at SAIT’s culinary bootcamp

We are 10 minutes from lunch service when chef informs us the rabbit legs currently roasting in the oven will need 10 more minutes to finish, on top of the additional 10 we will need to pan fry them to get the bacon they are wrapped in crispy, as well as the time we need slice them and carefully plate them next to Pont Neuf potatoes, caramelized Brussels sprouts and thin, sweet carrots.

We are officially in the weeds.

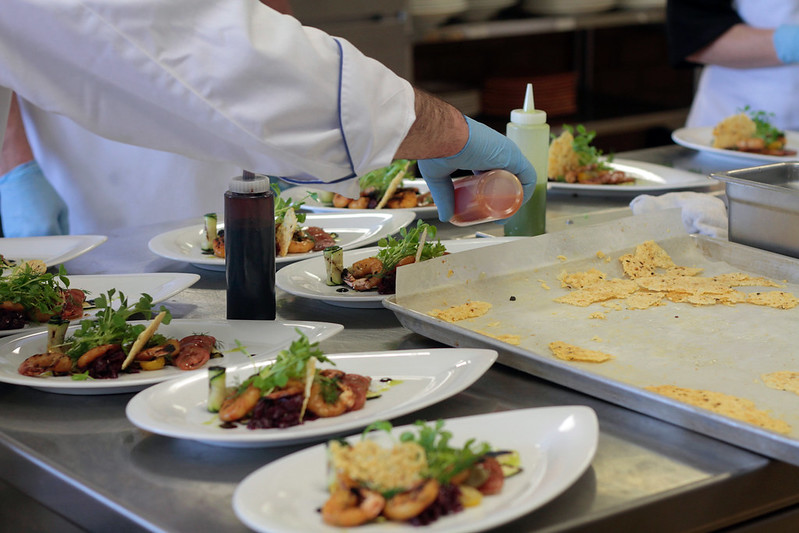
Rewind three hours and we are a group of seven people sitting in one of the classrooms just off the massive kitchen that serves as the training ground for many of SAIT’s culinary programs. School is out for the semester, but the kitchen is open to us, the students of a four-day, intensive culinary bootcamp set to put us through the paces of working in a restaurant kitchen. For eight meals, those who have signed up for the course will rotate through appetizers, main dishes and desserts, preparing two dishes per day to chef’s standards. We will then dine on the three-course meal we have prepared in the oddly empty Highwood Dining room.

Ladles

At the invitation of SAIT, I am here to try out the program for one day. In the morning, dressed in my chef’s jacket and hat and oddly appropriate shoes — how very un-gwendolyn — I am excited and eager to get into the kitchen. By the end of the day, I am exhausted and have renewed my appreciation for the hard work chefs put in. I also leave, though, knowing some new skills — even if it’s unlikely I will never again butcher a rabbit. (Not that I was very good at it in the course either.)

Chef Jacket Selfie

A new program for SAIT, the culinary bootcamp is aimed at those with a solid base of cooking skills, those who have taken other continuing education-type courses on campus and are looking for something a little more challenging. The seven of us are treated similarly to the professional cooking students; we’re shown where things, are told our menu and given recipes, but are then mostly left to our own devices under the watchful eye of Michael Mandato, the chef instructor who oversaw the bootcamp.

One of the chefs on SAIT’s enviable team of cooking instructors, Michael came to Calgary after working in hotels all over North America. His New York accent, though, makes it clear where he was raised. He makes no bones about what his expectations are from us and it becomes clear early on that those are high.

This, I think at one point, is why I am likely not cut out to be a chef.

But that’s the point of the boot camp. This is not an easy-going, lunch-and-learn type of class. This is getting put through the paces of what it’s like to work in a restaurant (though thankfully not for any paying customers), with all the prep and scramble and cooking and trying to nail down timing, working backward from when your plate is supposed to hit the table. This is home ec on steriods.

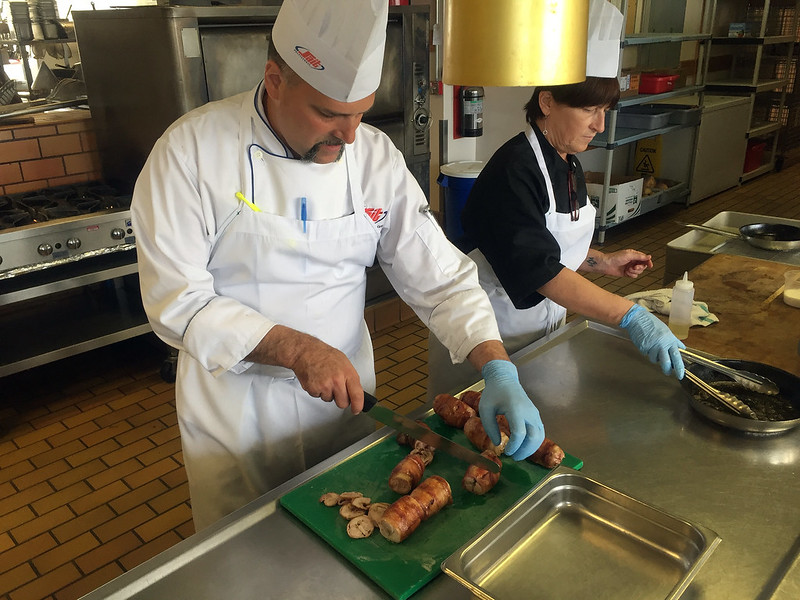
I ask to join the entree team since I figure — correctly — it will be the most challenging part of the meal. Along with two other women, we are tasked with butchering rabbits and preparing the legs to be wrapped in bacon, roasted and then pan-fried, making a madeira sauce and Pont Neuf potatoes (fat, squat french fries, essentially). That’s just for lunch. For dinner, we will need to make a root vegetable gratin, a tamarind duck breast and some spiced fruit chutney for the side. And, because this is restaurant-type situation, we also need to do prep for the team taking over entrees the next day — that means searing off short ribs and wrapping and labelling them for a chill overnight in the cooler.

The rabbits — one of the first tasks — are my undoing. As in, I have no idea what I’m doing and have to repeatedly ask for help from a patient Mandato and one of my teammates, a home economics teacher well versed in skills that have escaped me.

This, I have no doubt, is partly why we are in the weeds, still waiting for our dish to come out of the oven to pan fry, to slice, to serve when the clock has technically already run out.

Slicing the rabbit leg

In a flurry, with the three of us — and a chef who I suspect would definitely be marking us down if we were in his class — working together quickly, the dish gets plated and we head into the Highwood Dining Room for a luxurious three-course lunch prepared by the bootcamp teams. A scallop ceviche starts the meal that is then capped off with a chocolate mousse.

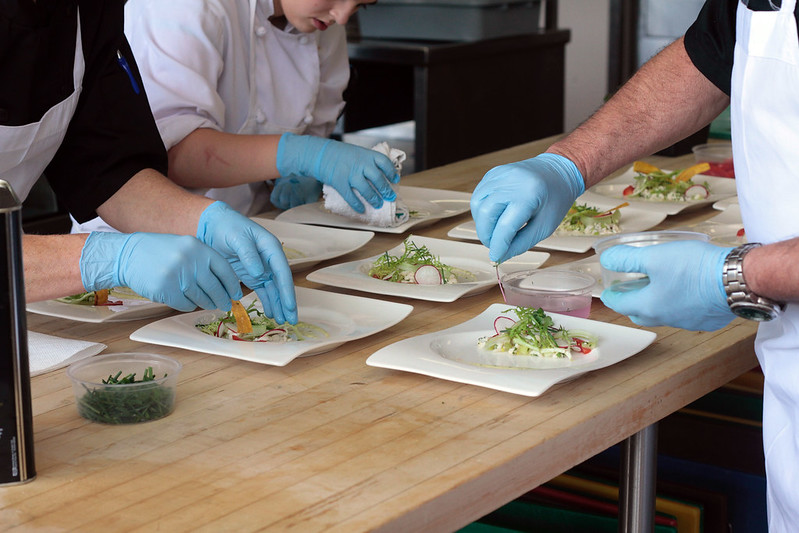
Plating II

Ceviche appetizer

Rabbit with carrots and Pont Neuf Potatoes

It feels indulgent to sit down after racing around and I’m impressed with what we’ve all managed to pull together. Mandato praises and offers critiques on the dishes so we can learn where we can make improvements and it isn’t long before we’re back in the kitchen for round 2.

This time, at least, we are getting the hang of things. We know where the ingredients are, where the utensils and pots are located. There is now a rhythm to our team and we are quicker to jump in and offer to do things or help when it looks like one of us needs some assistance. The duck entree with its tamarind sauce, chutney and (ridiculously decadent and delicious) root vegetable gratin (can you decipher that this was the piece I worked on?) come together much more smoothly. (Though, as I am about to add all the different vegetables to the pot of boiling water at once, Mandato with a knowing nod and slightly cheeky smile asks if I am making sure only one type of root vegetable is going in at a time. “Yes, chef!” I say, though we both know he’s caught me from making an error that would lead to a mushy gratin.)

Plating

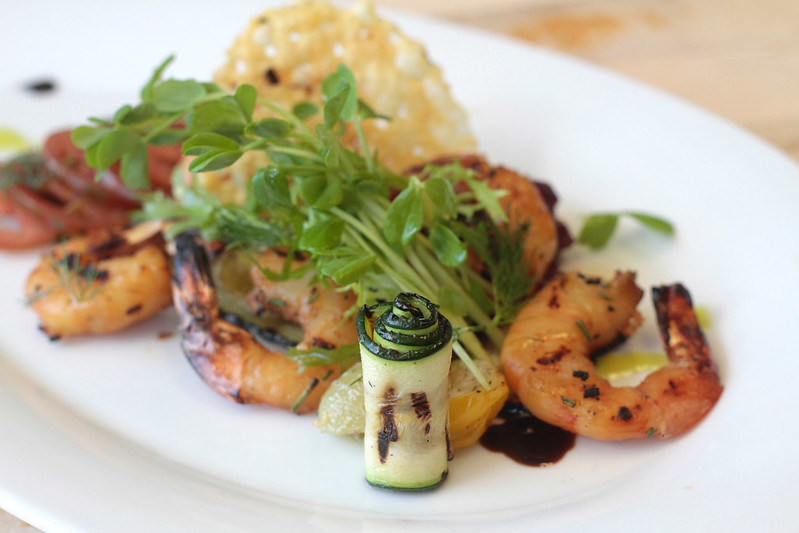
Grilled shrimp appetizer

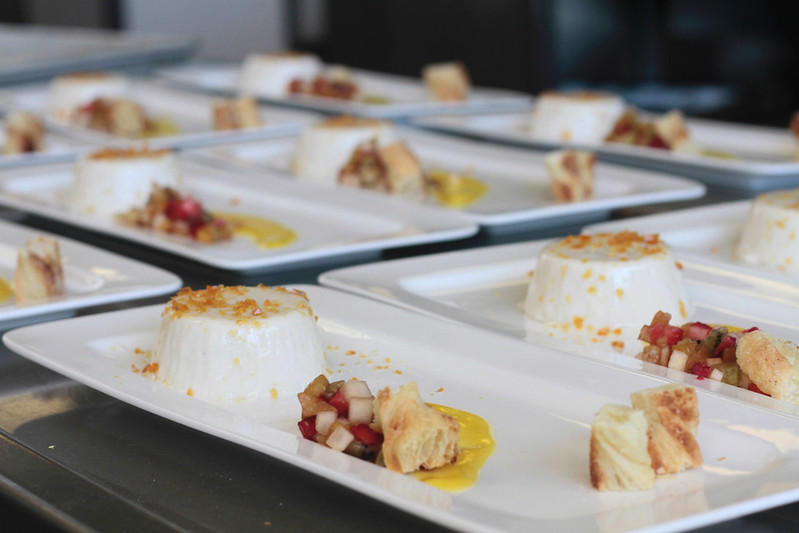
Plated coconut panna cotta

And as we sit down for dinner, I survey the dish, pleased that I contributed to this plate, this meal that we are all enjoying with a glass of wine.

My feet ache, my bangs are aswirl from the heat of the kitchen and being trapped under the chef’s hat and I fear someone will need to roll me to my car I’m so tired, but I have a sense of accomplishment that wipes that all away. It’s been a long time since I was a student — and I’m not likely to sign up for the two-year program — but this taste of professional cooking, this challenge of being in a massive kitchen and needing to worry about timing and plating and helping my fellow cooks, that was delicious.

For more information about the SAIT bootcamps (there’s a pastry one!), visit SAIT. The next round will run May 30 to June 2, 2017.

Thank you to SAIT for allowing me to join the class.

Continue Reading

Grilled Zucchini with Feta and Lemon, and Grilled Panzanella

It’s been summer for all of one day this year – and by that I mean that we’ve had, cumulatively, about one full day of hot, sunny, bright, lovely weather.

The next storm is rolling in as I type, grey clouds muting the sky.

I can smell the dampness in the air, that fresh greenness that announces the rain about to fall.

No matter, I ate summer for dinner, even if the weather wasn’t cooperating.

Despite the near-daily storms, hail and thunder, the markets and grocery stores are at least full of seasonal bounty: corn, zucchini, basil and a medley of tomatoes.

Tomatoes

Judging from Instagram, people are also having a banner year for zucchini, which always prompts questions of what to do with it all.

Sure, you can make chocolate zucchini loaf, but I like to celebrate them in all their natural – un-cake-like – glory. I had been bandying around grilled zucchini ideas the other day and came up with a plan to play off that flavour with some salty feta and oh-so-summery mint.

Grilled Zucchini

I actually can’t even quite bring myself to call this a recipe; it’s more like a suggestion of things that go well together. Want more feta on top? Go for it. Think some pine nuts might be nice? You’re probably right; try that too.

Grilled Zucchini with lemon and feta I

Grilled Zucchini with lemon and feta II

And since I was going to be grilling, and I have oodles of tomatoes because I just can’t resist buying so many when they’re finally in season, I thought I’d do a riff off a traditional Panzanella salad.

I’ve been joking a lot that this has been the summer of salad and toast. Well, this is basically the combination of those two things.

Though, instead of actual toast, I brushed slices of really good sourdough with some olive oil and then grilled them so they had those delicious char marks, which adds just a hint of summery smokiness.

Bread slices

Panzanella is one of those dishes that is really best in the summer months when tomatoes are in all their glory and you want to eat as many as possible because they actually taste like they’re supposed to and they arrive in stores in a rainbow of colours.

Traditionally, this salad is made with stale bread, but I’ve found I’ve preferred to roast roughly ripped up bits of bread in the oven or, now, this method. The roasting and grilling helps the bread retain a slight crunch and chewiness, even when soaking up the tomato juices and simple dressing.

Panzenella I

Panzenella II

(Don’t have a grill? No problem. Grill pans will mimic this quite well, just set one over medium-high heat and then follow either of these recipes the same way. Except, with the bread, weighting down the slices with something – I have used a can of cranberries wrapped in aluminum foil, so, really, anything goes – helps get those grill marks just right.)

With any luck, we’ll get an actual summer in the next few weeks – and hopefully into September. However, even if we have to stick indoors in the evenings, at least the eating can be seasonal.

Grilled Zucchini with Lemon and Feta

Think of this more as guidelines for a great side dish; you may find you want more lemon or cheese – or less, though I’m not sure how that would be possible. Don’t fret about making the zucchini slices perfectly the same thickness, just watch them on the grill and turn when they’ve got nice grill marks.

  • 1.5 pounds of small zucchini, about four or so
  • Olive oil
  • Salt
  • Freshly ground pepper
  • 3 to 4 tablespoons feta, crumbled
  • Juice of 1/2 a lemon
  • 3 tablespoons fresh mint
  • Good extra-virgin olive oil for drizzling, optional

Preheat the grill to medium-high.

Remove the ends and then slice the zucchini lengthwise as thinly as possible.

Brush one side with olive oil and sprinkle over a scant amount of salt and then freshly ground pepper. (The feta is also salty, so you don’t want to add too much to the zucchini.)

When the grill is hot, place the zucchini strips on the grate, oil side down, and then brush the tops with a little more oil and sprinkle with salt and pepper. Grill until they have nice char marks have gone soft. Remove to a serving dish or platter.

Scatter over the crumbled feta. Squeeze the 1/2 lemon overtop, cut side up to keep the seeds from ending up on the plate.

Stack the mint leaves on top of each other and then roll into a cigar. Thinly slice them into ribbons and then scatter over the zucchini and feta.

If desired, use some good extra-virgin olive oil to do a very light drizzle over top.

Serve immediately.

Panzanella

Traditionally, stale bread is used for this, but I love grilling the bread (or roasting it in the oven when it’s not summer). You can use all the same types of tomatoes, but I love to grab all sorts of colours to make this really stand out.

For the grilled bread:

  • 1/2 lb (250 g) ciabatta, sourdough or hearty bread, sliced 1/2-inch thick
  • Olive oil
  • Salt
  • Freshly ground pepper

For the salad:

  • 1/2 small red onion, thinly sliced
  • 3 tbsp (45 mL) red wine vinegar
  • 2 lb (1 kg) tomatoes
  • 1 garlic clove, peeled and minced
  • Salt
  • Freshly ground pepper
  • Pinch or two of sugar
  • 1/4 to 1/3 cup (60 to 80 mL) extra-virgin olive oil
  • 1/2 cup fresh basil leaves

Turn on the grill to medium-high heat.

In a small bowl, pour the red wine vinegar over the onion slices and let sit, stirring occasionally, while you prepare the rest of the recipe.

Brush the sliced bread with the olive oil and then sprinkle with some salt and pepper. When the grill is hot, place the slices, oil side down, on the grates. Grill until the bread has nice char lines. Remove from the grill and set aside.

Core and slice or dice large tomatoes – smaller ones can be halved or quartered – and add to a large bowl. Strain the onion slices, reserving the vinegar for the dressing, and add them to the tomatoes. In a jar or small bowl, combine the vinegar, garlic, salt, pepper and sugar. Shake or whisk until the salt and sugar have dissolved.

Add 1/4 cup (60 mL) of the olive oil and shake or whisk again until the vinaigrette is emulsified. Taste for seasonings, adding more oil if the dressing tastes too acidic.

Pour most of the dressing over the salad and toss until well mixed.

Cut the bread into rough, bite-sized squares.

Add the bread pieces to the tomatoes and toss again, making sure they get saturated with the vinaigrette. Add more dressing as necessary. The bread pieces will soak up some of dressing.

Let sit for about 5 minutes and then toss again.

Tear the basil leaves roughly, add to the salad and mix until combined.

Serve immediately.

Serves 4 to 6.


Continue Reading

Remembering Andrea: A Trip to French Laundry and Keller’s Staff Dressing

I started this post more than two years ago.

I was supposed to be writing a eulogy and I procrastinated first by cleaning my apartment more thoroughly than I had in months. I then avoided it by starting a blog post I couldn’t bring myself to finish.

I didn’t want to write it because it would make things concrete. But now, two years after losing Andrea, her absence is absolutely, achingly, concrete. And not writing something won’t change that.

And I want to celebrate her at the same time that my heart is cracked open in her absence.

There is motivation beyond that too. For many reasons, not the least of which is that she was always one to knuckle down and get things done and it seems like she’d be sweetly exasperated with me for putting it off. Of course, she was often lovingly exasperated with me. “I can’t” was not a phrase in her vocabulary; she didn’t believe it should be in anyone else’s either. My pessimism, my jokes about eternal spinsterhood were received with her saying my name in an authoritative, yet almost gentle, tone.

Her mission in her last year was to get me to stop apologizing for things that required no apology — a bad habit. One I haven’t quite broken. She’d be exasperated about that too.

GandAinCR

Andrea ran full charge at life: marrying her high school sweetheart despite family opposition (and wearing red cowboy boots under her wedding dress to do so), finding jobs in traditionally male-oriented energy industries, getting her MBA from Royal Roads and using her skills, education and experience to become the first female vice-president at an oil and gas company. She was determined, smart and knew what she wanted. She always went after it.

Her positive nature created an amusing oil-and-water friendship between the two of us.

But it was an unshakeable one. Formed in writing classes at UVic when we were all young and away from home for the first time and dreaming of a career built on words. A mutual friend, Julie, drew several of us together and we became a quintet known collectively as the Writer Girls. After graduation, we still met up for girls’ weekends, and caught up over emails and phone calls when our lives couldn’t allow us to be together in the same room.

Girls’ weekends had a few things in common: wine, more wine, spa treatments, giggling like teenagers and talking and sharing problems, solutions, jokes, sad stories, sex stories and more than one game of ‘I never’ — though that was often at my insistence and the other four humoured me occasionally.

There were trips to Tigh-Na-Mara for giggle-punctuated pedicures and a fridge stocked with almost nothing but wine in our cabin. There were visits to Julie’s family cabin on Keats Island. And we met up for five spectacular days in New York City, where Andrea rallied in the muggy heat despite being quite pregnant with her second daughter.

While we were still in university, Andrea had been diagnosed with Hodgkin’s lymphoma and was treated successfully. Went into remission. And none of us thought about it again, really.

Until a few years ago when a startling email arrived outlining that a new form of cancer was invading her body and she and her doctor were moving ahead with an aggressive plan for treatment.

Girls’ weekends became more frequent. Not because we were concerned she would leave a ragged hole in our group with her departure, but because it was a sharp reminder not to take anything for granted.

Email updates were marked by Andrea’s unbridled positive attitude — even when they were about new courses of action to replace those that weren’t working. There was always a way to spin it into good news.

And when there wasn’t, even then, she made light of things. Given a cruel timeline of only a few months to live, she made a joke about how she would never eat cauliflower again.

But she lied about that.

Because I made her eat some.

And that’s the story I really want to tell.

I don’t really have a bucket list. And if I did, I’m not even sure if dining at French Laundry would have made the cut; it seemed too far fetched that I would find a way to sit down at one of the tables in the little farmhouse in Napa Valley known around the world for its impeccable cuisine.

French Laundry

It was, then, incredibly unexpected to find myself on the receiving end of a phone call from a friend who said her banker had managed to secure a reservation three weeks from then and did I want to go. Oh, and also, could I think of anyone else who wanted to because it was a table for six and we only had five guests?

Admittedly, my mind didn’t go to Andrea right away. She was going through chemo at the time and the idea of inviting her to California for three days just for dinner seemed a bit silly and likely to garner a no. But Kirsten, another Writer Girl, aptly said there was no harm in trying.

She was right.

The dinner was two days after a round of chemo, but the doctor gave Andrea permission to go. And planning began. And so did the magic.

We needed to rent a convertible, I told her. She booked one. We should try to meet at the airport, if possible. She got a flight that landed 30 minutes after mine.

Our car was a brand new mustang with only eight miles on it. She had programmed her personal GPS with the address of our hotel in Napa Valley, but it couldn’t get a signal in the parking garage and it kept trying to ask if we wanted to take a ferry, thinking it was still in Victoria. At a T-intersection right out of the airport, it still didn’t know where we were, so Andrea told me to just pick a direction. I chose wrong.

But that meant we ended up driving over the Golden Gate Bridge with the top down, gazing up at the orange steel beams soaring above. The grin split Andrea’s face as she just kept repeating, “I’ve always wanted to go over the Golden Gate.”

And the next night, we sat beside each other in the dining room at French Laundry, poking each other under the table at how lucky we were.

Outside French Laundry

The meal is a bit of a blur now; it feels like forever ago.

A parade of impeccable dishes served by stellar, but unobtrusive staff. Non stop wine. And more magic: a woman at a nearby table sporting a giant hat sitting with two gentlemen — one of whom had a pinkie ring with a diamond the size of a golf ball on it — sending me a glass of champagne for reasons that still aren’t clear.

Server: The woman at that table has sent you a glass of champagne.

Me: Um. OK. Why?

Server: I don’t know, but I would just take it, if I were you.

When a dish arrived containing the most microscopic cauliflower floret, I went into a fit of giggles. “Andrea,” I leaned over and whispered, “you’re going to have to break your vow never to eat this vegetable again.”

“If I’m going to eat cauliflower anywhere,” she replied, with the tiny white stalk speared on her fork, “it may as well be at French Laundry.”

I snapped a photo of her with the offending vegetable just before she ate it.

She left two days later, back home for more medications and chemotherapy. That would be the last flight she ever took.

She did not return empty handed, though. She bought Keller’s cookbooks for her husband, Steve — the chef of the family and one who enjoys a cooking challenge — who promptly began to cook his way through the daunting tome.

A few months later I was in Victoria for a visit, and to have Andrea co-sign my Pucker contract. Steve made dinner for us and Kirsten and her husband. Veal parmesan and a salad made from lettuce leaves picked that afternoon from their garden, served with a simple emulsified dressing that Thomas Keller uses for staff meals at the French Laundry.
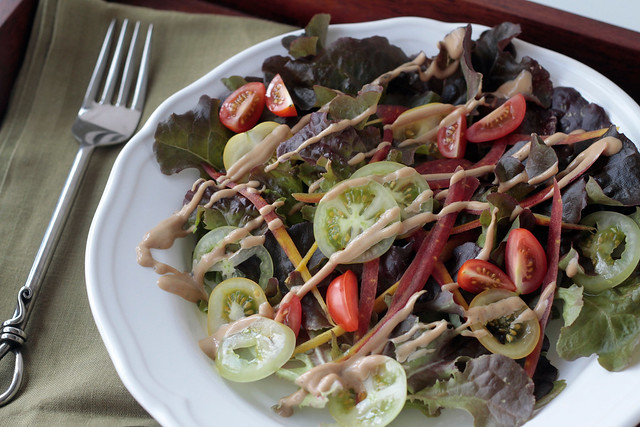
Salad with Thomas Keller's Staff Dressing

By the end of the night, and after several glasses of wine, we all had a ferocious case of the giggles — one of us had fallen out of her chair from laughing so hard — and I had co-opted the bowl of fresh lettuce and was using the squeeze bottle of dressing to squiggle it onto individual leaves like ketchup on a hot dog before eating them like a wood chipper.

As soon as I was home in Calgary, I made it again.

And then I meant to post about it, as an ode to this magical dinner and an equally magical friendship.

But I didn’t. There would be time later.

Andrea passed away less than a year after that dinner. Thankfully after several more girls’ weekends, more wine, more stories, more laughs and a few tears. Even more thankfully, well after when the doctors said she would.

Nothing was left unsaid. More magic.

I made this dressing again tonight. Laughed for a moment at how much better I am at food styling my photos now and how Andrea would think that was so great.

She’d be less impressed with the pity party I’ve had over losing my job, how I haven’t pitched another book and, in a nutshell, set goals and pursued them. But I know her exasperation would be at its most gentle. And she’d say my name firmly but kindly and tell me about five things I needed to get going on. I would say sorry.

And then she’d tell me not to apologize.
Shallot and knife

Emulsified

Squeeze bottle

Tomatoes

Salad with Thomas Keller's Staff Dressing III

Thomas Keller’s Staff Dressing

  • 1 tablespoon chopped garlic
  • 1 1/2 teaspoons chopped shallots
  • 2 tablespoons plus 1 teaspoon Dijon mustard
  • 1/4 cup balsamic vinegar
  • 1 large egg yolk
  • 1 1/2 cups to 2 cups canola oil
  • Kosher salt and freshly ground pepper, about 1/2 teaspoon each

Place the garlic, shallots, mustard and vinegar in a blender and blend until well combined. Add the egg yolk and blend again. With the machine running, slowly drizzle in the oil until the dressing is thick and emulsified. (A note here: I stopped at about 1 1/2 cups of oil because it was thick, completely emulsified — you’ll hear the sound in the blender change — and because, well, I like my dressing to be a little more acidic.) Season to taste with salt and pepper. You can refrigerate it in a covered container for 1 week.
I completely recommend using a squeeze bottle.

Makes about 2 cups.

Continue Reading

S’mores Brownies

It could have been summer a week or so ago, even if the last couple of days have felt more like the spring we should be in. Still, I’ll take it. Everything is already green and lush; even the lilacs are already blooming — something I’m not sure has ever happened this early in the year since I moved here.

Inevitably that means gathering around backyard fire pits and camping . And those things mean s’mores.
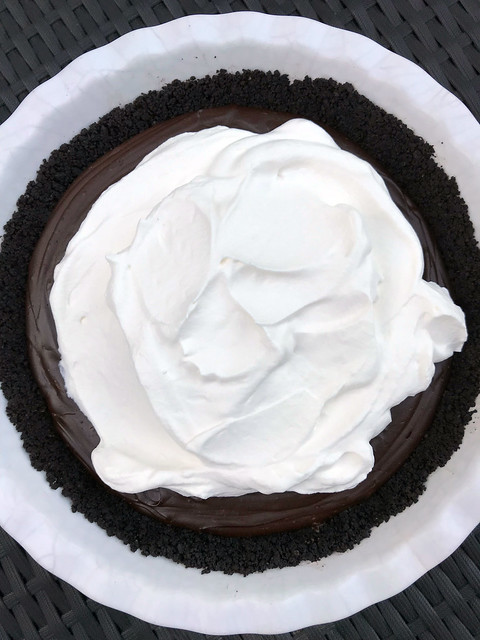
S'Mores Brownies ingredients

Except when there’s a fire ban on.

Or, if you’re unlucky enough to not have a yard. <Raises hand.> Or perhaps don’t love camping. <Raises other hand.>

Marshmallow top I

There’s a simple way around this, provided the weather isn’t so hot you’re left wilted over a piece of furniture: put some marshmallows on a baking sheet lined with parchment paper and broil them for a minute or two, until golden and melty — or your preferred level of roasted-ness (I like a dark shade of golden myself, which can be tricky over a crackling fire but easy to monitor under the steady heat of a broiler.) — before squishing them between two graham crackers and a slab of chocolate.

However, there’s a more portable and far more decadent way of eating something evocative of a s’more. Behold the S’mores Brownies.
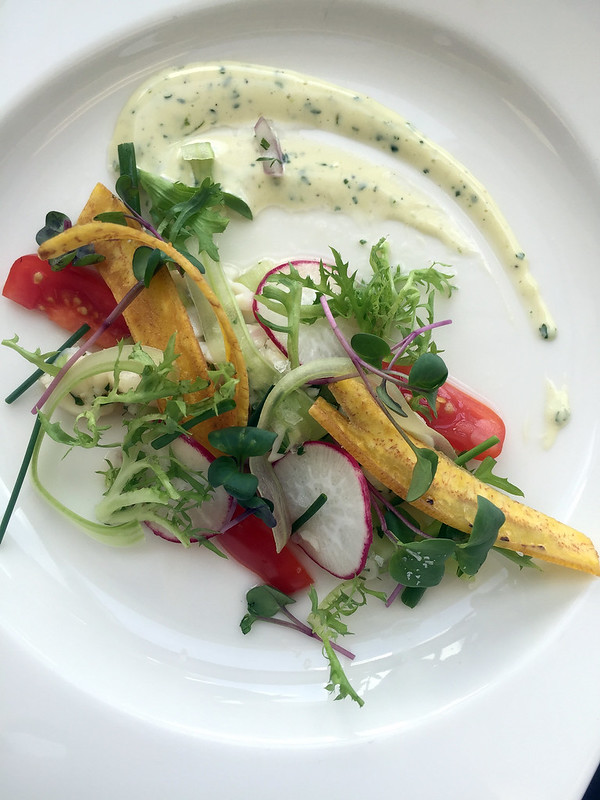
S'Mores Brownies I

The backbone is the same, of course. Combining graham crackers, chocolate and marshmallows into a tasty sweet. In this form, however, the graham crackers are amped up by being turned into a graham cracker crust (enriched with butter and sugar, naturally), the chocolate becomes a thick layer of fudgy brownie and the marshmallows, well, they stay pretty much the same other than you get at least two of them per brownie instead of one lonely one per s’more.
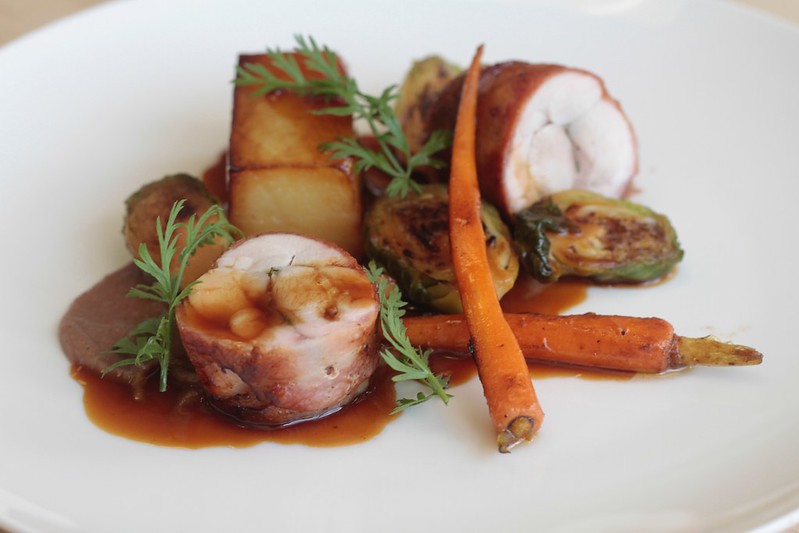
Just like the originals, these are gooey and sticky as all get out, so prepare accordingly.

Sticky

Of course, this version of a s’more does require washing dishes after, so that may be a point in favour of their original counterparts.

Then again, you can still easily make and eat them when the weather isn’t cooperating.

 
Marshmallow top II

Marshmallow top III

S'mores Brownies II


S’mores Brownies

Adapted from The Kitchn. And by that I mean that I made the method a little more streamlined (read: lazier).

For the crust:

  • 6 tablespoons butter, melted and cooled
  • 1 1/2 cups graham cracker crumbs (about 10 full crackers)
  • 2 tablespoons sugar
  • 1/4 teaspoon salt

For the brownies:

  • 1/2 cup butter
  • 7 ounces bittersweet chocolate
  • 1/4 teaspoon salt
  • 2 large eggs
  • 1/2 cup sugar
  • 1/2 cup brown sugar
  • 1 teaspoon vanilla
  • 1 cup flour
  • 10 ounces large marshmallows (most of a large bag)

Preheat the oven to 325°F.

Butter an 8×8-inch pan and line with parchment with a slight overhang, like a sling, then butter the parchment that’s inside the pan.

In a bowl, mix together the graham cracker crumbs, sugar and salt. Pour over the melted butter and then stir until well combined. Pour into the prepared pan and press firmly along the bottom. (You really want to tamp it down here; I used the bottom of a small metal measuring cup.) Bake the crumb mixture for 20 minutes, until the edges are starting to get golden. Remove from the oven.

While it bakes, start preparing the brownie layer. In a medium saucepan set over low heat, slowly melt the butter and chocolate together, stirring often. Stir in the salt. Remove from the heat and let cool completely.

Once the crust is baked and out of the oven, raise the oven temperature to 350°F.

In a large bowl, whisk the eggs until slightly paler in colour. Add the two sugars and whisk again for several minutes, until the mixture is well incorporated. Whisk in the vanilla. Pour in the chocolate mixture and stir gently until just combined. Add the flour and use a spatula to fold it together, mixing gently and only until no white flour can be seen.

Pour the brownie batter over the cooked graham cracker crust and return the pan to the oven. Let it bake for 22 to 25 minutes, until no longer raw-looking in the centre when check with a toothpick. (It will still look fudgy and not come out entirely clean, but it will look cooked.)

In a stand mixer fitted with a paddle attachment, beat the eggs and sugars until fluffy, 2 to 3 minutes. Beat in the vanilla extract. Gently mix in the melted chocolate. Fold in the flour.

Evenly pour the brownie batter over the cooked graham cracker crust. Transfer the pan to the oven and cook for 23 to 25 minutes. Remove the pan from the oven.

Set the oven to broil and arrange the marshmallows over the cooked brownie layer. Cover the brownies well, but don’t pack them in too tightly. They will spread a bit in the oven. Set the pan back into the oven under the broiler and watch carefully to make sure they roast to your preferred level of doneness. Turn the pan frequently to ensure even broiling. This can take anywhere from 1 1/2 to 2 minutes for golden, a minute or two longer for a brown, bruleed topping.

Remove when the marshmallows are golden (or darker, depending on your preference) and let cool completely. Use the parchment sling to remove the brownies from the pan and slice. The marshmallows will be incredibly gooey, so keep a glass of hot water and a cloth at hand to wipe down the knife between slices.

Makes 8 to 16 brownies, depending on how they’re sliced.

Continue Reading

Asparagus Salad with Parmesan and Lemon-Dijon Dressing

It is thisclose to spring.

Sure, we’re in the middle of that weird part of the changing seasons when the weather flip-flops between sun and beers on patios, followed closely by fat flakes of snow coating the landscape. But even in these confused days of shifting temperatures and growing impatience for that first flush of green, I want to at least taste like spring has arrived.

I’m eager to shrug off the winter comfort foods — braises and creamy pastas — for the fresh flavours that come with the changing season. I want to nibble on green shoots and tender vegetables that are harbingers of longer, warmer days to come.

So, forgive me, because I’m about to cheat.
Asparagus

Here, it is not yet asparagus season — that’s still a good six weeks or so away — but I just need that first taste of it.

If you are more patient than me, feel free to bookmark this for later. But I won’t tell if you reach out for a bunch of asparagus at the grocery store because you’re also looking for something light and green to cleanse the winter palate.

Lemon, with its inherent brightness (which I argue makes it good for any season), matches well here and also seems to herald the changing of the seasonal guard.

It’s a perfect match with asparagus. Even in the colder months, when I crack and buy some to roast in a hot oven with a drizzle of olive oil and some salt and pepper, I will squeeze over a wedge of lemon or two to add some zing and cut the richness.

For spring, though, I want asparagus in salad form.

While we often think of steaming, roasting or grilling the green spears, it’s perfectly tasty without any heat being added to the mix. Sometimes I make salads by peeling off thin layers of the stalks to create ribbons. Other times, I make this salad, where I slice them into coins and add a bit of crunch with some walnuts and salty richness from some Parmesan cheese.

I came up with this recipe for Asparagus Salad with Parmesan and Lemon-Dijon Dressing when I was writing Pucker, which, it’s hard to believe, has now been out for about 16 months. At turns it feels like years and year ago, while in others it feels like I was just working on it, just seeing the designs, just holding my own copy for the first time.

I still find it a little hard to believe that I wrote a book, even more so when I stumble upon it in stores or get tweets from people about what they’ve made or how they’ve made some recipes their own. (Thank you to all who have tweeted or Instagrammed their dishes; it is so rewarding and I’m so grateful.)

So, maybe this is weird, but sometimes I crack my own copy to make something (why reinvent the wheel, right?). And right now, that’s this salad. I apologize in advance if making it — and talking about how it’s pretty much spring now — brings on the next great snowstorm. In that case, take the asparagus and roast it off instead. Just don’t forget the squeeze of lemon at the end.

Asparagus II

Asparagus Salad with Parmsan and Lemon-Dijon Dressing

Asparagus Salad with Parmesan and Lemon-Dijon Dressing

As published in Pucker: A Cookbook for Citrus Lovers, Whitecap Books (2014)

  • 1 bunch asparagus (about 1 pound/500 g)
  • 4 to 5 green onions, sliced
  • 1 cup grated Parmesan
  • 1/2 cup walnuts, toasted and coarsely chopped

Dressing:

  • 2 tablespoons lemon juice
  • 2 teaspoons Dijon mustard
  • 1 teaspoon honey
  • 1/2 teaspoon salt
  • 1/2 teaspoon freshly ground pepper
  • 2 tablespoons extra virgin olive oil

Chop off the rough ends of the asparagus and then slice crosswise into 1/4-inch coins, leaving the tips intact. In a large bowl, combine the chopped asparagus, green onions, Parmesan and walnuts.

In a jar with a lid or in a small bowl, combine the lemon juice, Dijon, honey, salt and pepper. Shake or whisk to mix thoroughly, then add the oil and shake or whisk again until the dressing has emulsified. Pour most of the dressing over the salad and toss. Add more dressing as needed. Serve immediately.

Serves 4.

Continue Reading