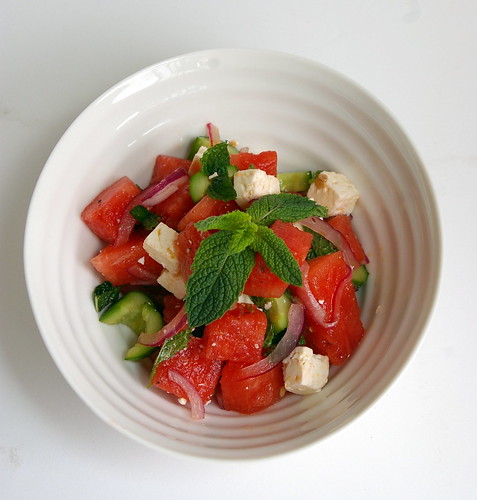
Feta-Watermelon Salad

Fruit and cheese is a natural combination. I like a nice wedge of brie with pear, have enjoyed dried apricots and a little Gouda and, of course, apple and cheddar are a classic pairing for a reason.

Over the years I’ve seen the combination of feta and watermelon crop up in cookbooks, on blogs and in menus. For a long time I just could not wrap my head around the idea of matching the sharp, salty tang of feta with a sweet and luscious watermelon.

Feta-Watermelon Salad II

It seemed an incongruous match. A slightly chalky cheese with a juicy fruit? I could not be tempted. But I finally broke down and ordered a salad with feta and watermelon at a local restaurant a few months ago. Curiosity got the best of me, I guess. And then I mentally kicked myself for waiting so long.

Where I had expected incompatibility, I found harmony. A harmony that almost tempted me to lick my plate. Decorum reigned, but the salad has remained at the back of my mind for the last few months.

I was never a big watermelon eater. Sure, we’d eat wedges of it during summer as kids, coating our faces in the fruit’s juices as we sat on the back porch. It was a cool and refreshing treat and a nice way to pause between runs through the sprinkler on the lawn. I never did get the hang of spitting seeds, though.

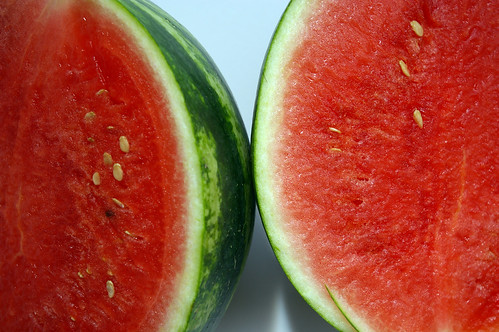
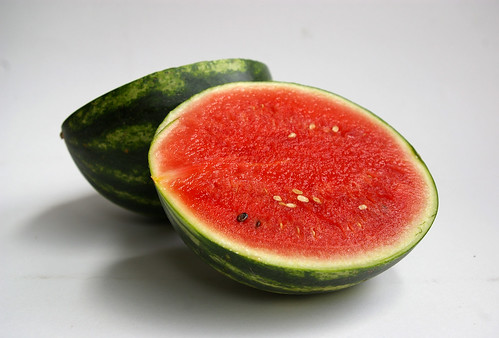
Watermelon II

As I grew older, watermelon dropped off my radar. I never bought it for myself, ate it only when it was part of some fruit salad. Until this dinner out, when I realized this giant fruit could be just as sophisticated as the combination of brie and pear, while still holding that faint taste of childhood summers.

A baby watermelon I found at the farmer’s market sealed the deal. It was time to make this salad my own.

There are myriad variations of feta-watermelon salad on the Internet, and even one or two in my rather large cookbook collection. But each one had some ingredient that held no appeal for me or they appeared to be missing something I believed was crucial. In the end, I simply took from each what I thought was right: watermelon for the sweet; feta for the salt; cucumber for crunch; lime juice for tang; red onion for some sharpness; olive oil for that fruity, grassy flavour; and, of course, mint.

The mint certainly kicked it over the edge for me. That small addition transformed the simple salt-sweet combination into something spectacular.

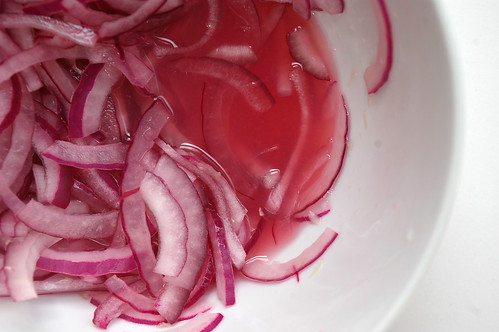
I used a Nigella Lawson trick of marinating the sliced onions in acid — in this case lime juice — which she uses in several recipes, including her own version of feta-watermelon salad. The lime juice takes some of the bite away from the red onions while not robbing their flavour, and also creates a lovely pink colour for the dressing.

I don’t want to get too romantic about this salad, but it did taste a lot like I was eating a summer afternoon. Refreshing like a cold drink, but with the punch of feta and soothing mint. I probably could have eaten the entire bowl.

Which would have been for the best, because this salad really doesn’t keep. Only make as much as you’re going to need, because the watermelon does break down relatively quickly. Not that it didn’t still taste as good — it just lost some of its visual appeal.

Lastly, don’t be afraid to make adjustments as you see fit. Want more feta? Go for it. Think the watermelon cubes should be bigger? Smaller? Not cubed at all? Be my guest. This is a salad, after all, so tailor it to your own tastes. As long as the core ingredients remain the same, it will be tasty.

Mint

Watermelon I

Onions

Feta-Watermelon Salad I

Feta-Watermelon Salad with Mint

  • ½ cup (125 mL) lime juice, from 3 to 4 limes
  • ½ red onion (or one small one), peeled and sliced thinly into half-moons
  • 8 cups (2L) watermelon, cut into ½ inch (2 cm) cubes, one tiny watermelon or ¼ of a large one
  • ½ English cucumber or 3 baby cucumbers, seeded and sliced
  • 1 cup (250 mL) feta, cut into small cubes
  • 2 tbsp (25 mL) extra virgin olive oil
  • ½ cup (125 mL) mint, chiffonade

Juice the limes into a bowl. Slice the red onion and add to the lime juice to marinate while you prepare the rest of the salad.

Cut watermelon into slices, remove rind and chop into chunks. Dump them in a large salad bowl and top with cucumber slices and feta cubes. Add olive oil to red onion-lime juice mixture, stir and then pour over salad.

Roll mint leaves into a cigar and slice thinly into strands. Sprinkle over salad, toss and serve.

This story first appeared in the Real Life section in the Calgary Herald. For more delicious recipes, visit CalgaryHerald.com/life.

Continue Reading

Summer Travels

Kids, this has been a busy summer. And I mean that in the best possible way.

First there was Chicago in June, then NYC for a week in July, followed by two back-to-back wedding weekends in Panorama, B.C. and Ottawa.

Consequently, there has been very little cooking or baking in the Patent and the Pantry kitchen. Luckily, there has been some amazing eating in all these great cities. And I thought I would share some of the highlights.

I’m going to be honest here, there aren’t photos of every meal because I kind of just enjoyed having a few meals with no camera in tow, savouring bites without worrying about natural light and flash and angles. Don’t get me wrong, I’m pretty sure we can all agree that I do love to photograph food, but, occasionally, I just want to be in the moment of a fine meal.

Chicago

This was never a city high on my list of places to go, but when a friend moved there I was happy to have a chance to travel to a new town. And then I fell in love with the Windy City, owing, I’m sure, in no small part to the oh-so-good eating I had there during my first trip in February. When the chance came to head there again in June, I jumped at it.

I was eager to have another dinner at Avec. And I was equally eager to try out a few new places. Luckily, my friend Suzi always has good suggestions, including a trip to Franks n’ Dawgs, a neat little joint that takes the humble hot dog to a brand new level. Think bratwurst with sauteed morels, a beef and curry sausage with orange marmalade and raisin slaw, and andouille with gumbo sauce. And, people, they do truffle waffle fries. Seriously. *Drool*

We had the Lamb Keema, a “Middle Eastern lamb sausage with English peas, cucumber salad, caramelized pearl onions and Socca strips.”

Lamb Keema hot dog

It was fantastic; my favourite of the hot dog trio we sampled.

Still, the others were pretty good too.

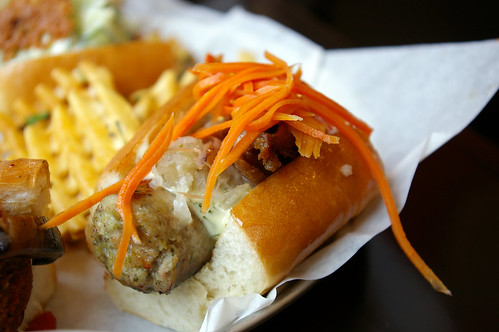
This was the Turdoggen: a turkey and date sausage with crispy duck confit, herb garlic aioli, house pickled onion relish and pickled carrots.

Frank n' Dawgs hot dog

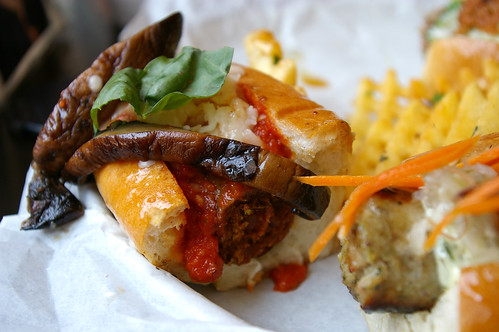
and this was a Kobe beef Italian sausage topped with the restaurant’s marinara sauce, mozzarella cheese, caramelized portabella mushrooms and basil.

Pizza dog

But, did I mention the truffle waffle fries? Yeah. Seriously.

On another sunny afternoon, we headed to The Purple Pig, another small plates establishment, this one on the Magnificent Mile. They basically had me when I saw we could have pork fried almonds with rosemary and garlic. With a glass of rose (which I drank pretty much exclusively while in Chicago; such a perfect wine for hot summer afternoons!), I also chowed down on salt-roasted beets with whipped goat cheese and a pistachio vinaigrette, a dish of asparagus and snap peas, as well as a cheese plate.

For dinner one night we had pizza from Great Lake, a very odd little restaurant with almost no seating and a somewhat perplexing service system. When we went to order from the limited list of ingredients (owing to them using only local and fresh ingredients, which I can’t really criticize), each ingredient we asked for was “sold out.” That said, the pizza was fantastic. We ate it sitting at a park bench outside in the dark with some cans of pop purchased from the corner store. I don’t think we spoke for a full 10 minutes except to exchange “mmmmmms.”

Ok, it wasn’t all eating. We did take an architectural boat tour one hot afternoon, taking in the stunning buildings along Chicago’s river. The architecture in this city is stunning and well worth a boat tour if anyone is heading there in the summer months.

Chicago skyline

Chicago architecture

On the last day, just a few hours before flying out, we went to the Art Insititute of Chicago to wander around in the modern art wing. But first, a little more eating. This time at the Terzo Piano, the institute’s restaurant also in the modern wing. It’s a lovely, bright, airy room with a fairly impressive menu. But, well, I just couldn’t stay away from the idea of the burger trio: one shrimp, one beef, one lamb. They weren’t fabulous, but they weren’t terrible.

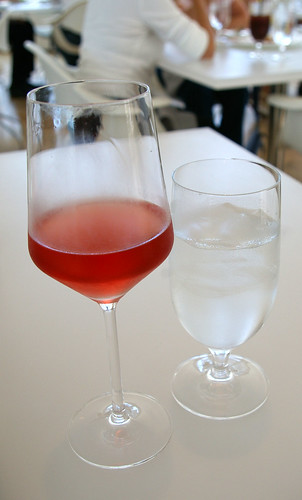
On the other hand, the bread that came before lunch was fantastic. And I loved the presentation of serving it with unsalted butter, flaked salt and parmesan crisps. That, with another glass of rose, was my favourite part.

Bread, butter, salt

Rose in the afternoon

New York City

Owing to some very good luck, I was able to head to NYC for a week to stay with my friend Julie in a Soho apartment. It was hotter than all get-out and the humidity meant I had to finally give up on wearing my bangs down, but it was an excellent trip. Due, in no small part, to the fact that Julie was willing to try out a lot of the restaurants I had on my list.

Like Shake Shack.

What? Please, everyone who reads this blog by now knows I have an undying love of burgers. As if I was going to go to New York and not go to this famous burger joint. Pshaw.

I spent the morning in Central Park, checking out Bethesda Fountain, the Ramble and then lying in the grass at the edge of the great lawn to read under a blue sky. And then it was off to meet up at Shake Shack for a cheeseburger, krinkle-cut fries and a lemonade, all eaten sitting on a bench across the street.
Shake Shack burger

We went to Momofuku twice, though only the Noodle Bar owing to the fact that I really wanted to try a few dishes and, hey, when is the next time I’m going to have a chance to go there? The first night we had the scallion-ginger noodles, sauteed corn with potatoes and the dreamiest, mouth watering-est pork buns. Slabs of rich pork belly stuffed into a pillowy soft steamed bun with scallions and hoisin sauce. If I wasn’t so full at the end of that meal, I would have ordered more of those. They were definitely the best part of that dinner, though the noodles were a close second.

The next time I had the ramen, which was also delicious. Though I have to say that I had some fantastic ramen when I lived in Japan. This time we tried the chicken buns and they weren’t bad but the pork buns remain my favourite. In fact, my mouth is watering a little bit right now just remember them.

New York was a lot about the desserts too.

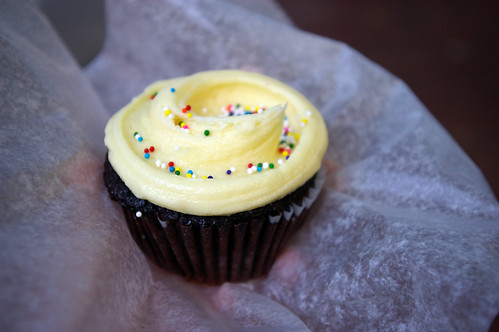
We had Magnolia cupcakes.

My cupcake

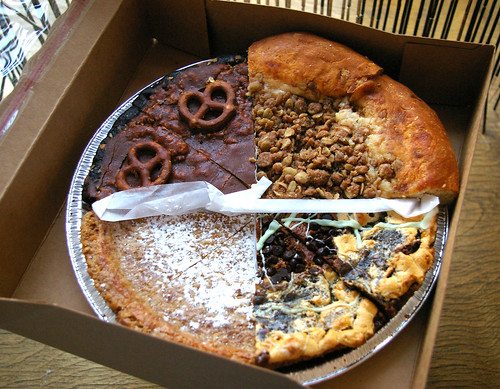
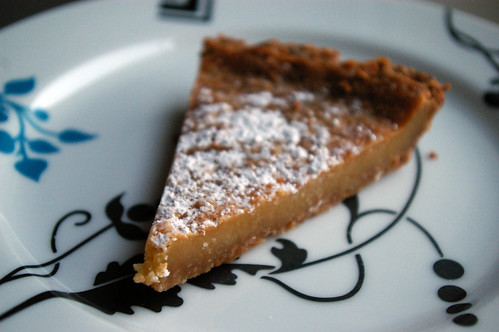
And made a trip to the Momofuku milk bar where Julie agreed that we needed to buy the Franken Pie. That’s two pieces of each of their four types of pie, clockwise from the top: cinnamon bun pie with a cheesecake filling; grasshopper pie with mint cheesecake and brownie filling; Momofuku’s signature Crack Pie ®, kind of like butter tart but none of those pesky raisins; and the candy bar pie that has a chocolate crust, caramel, peanut butter nougat and a pretzel.
Momofuku Franken Pie

Crack Pie

I know Crack Pie is what Momofuku is known for, but I was completely won over by the candy bar pie, which was the perfect combination of salty and sweet and oh-so rich.

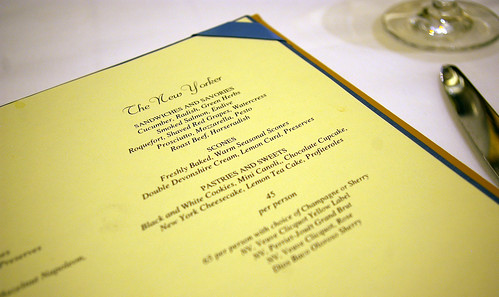
To cap off the week, we had a decadent afternoon tea at the Plaza. This was absolutely luxurious. The setting was stunning, the service lovely and the food delicious.

Menu

Ceiling in Knife I

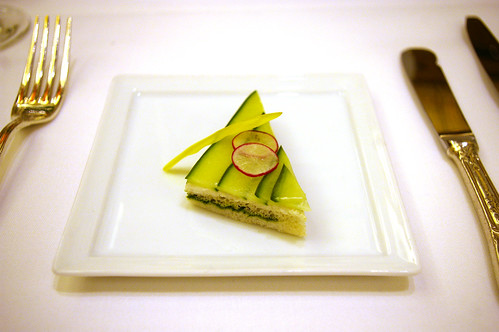
Cucumber Sandwich I

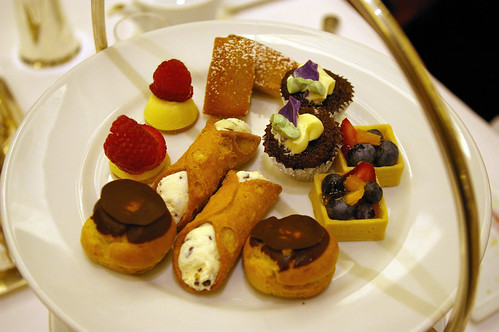
Pastries

Of course, it wasn’t all eating… there were shoes that needed to be bought!

So, I’ll share two pairs that are my faves from the trip.

Some Betsey Johnson satin, leopard-print platform peeps:

IMGP3757

And these beauties from Kate Spade that were
a) red platform peeps
b) 50 per cent off
and, perhaps most importantly, c) their style name was Gwen.
That, my friends, is what I call shoe fate.

Kate Spade shoes

Anyone interested in checking out more photos from either of the trips can feel free to check out my flickr.

Continue Reading

Basil Vinaigrette

If you’ve been reading this for awhile, you may remember when I mentioned that I once bought a cookbook simply for a salad dressing recipe. Subsequently, I’ve learned to love Rebar’s lime sugar cookies and have tried numerous other recipes in the book. But it’s the basil vinaigrette that keeps me coming back to this book every single time.

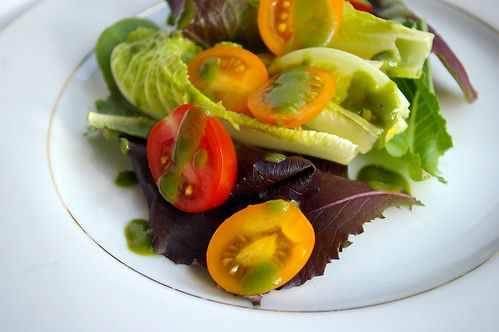
Salad close-up

I first tried the basil dressing when I had a salad at Rebar one afternoon. It was a fantastic meal. (I have this theory about salads, that they are always best when someone else makes them. In this case, it’s not all that surprising when you look at what they include in their giant salads: grated beets, grated carrots, lettuce, tomatoes, sunflower seeds, cheese . . . . The list goes on.) And I’ve barely tried anything else when I’ve gone there again because the salad is so good.

And they don’t blink when I ask for a little extra dressing on the side.

People, this is good stuff.

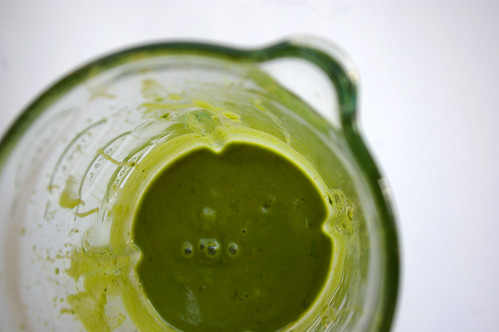
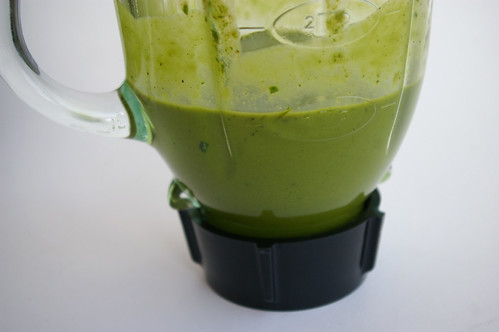
And no doubt, there is A LOT of basil in here. Once blended with vinegars, dijon and a few other ingredients, then emulsified with olive oil, this comes out very thick, very green and very fantastic.

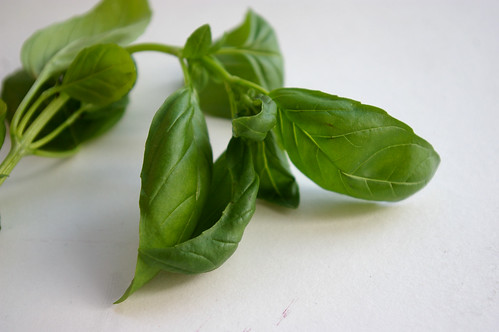
Basil

As soon as basil starts to show up at the farmer’s market each summer, I buy a couple of huge bunches, make a batch or two of pesto and then this dressing, which I devour on salads all week.

(Um, may I suggest checking your basil before blending?)
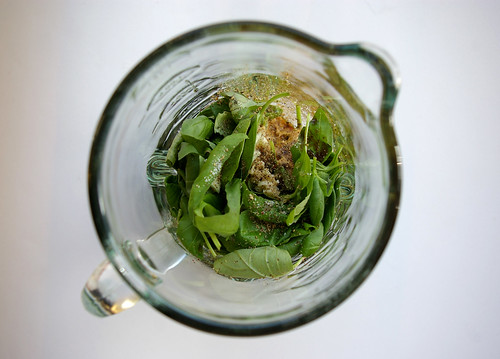
Extra passenger

The measurement for basil (1 1/2 ounces) doesn’t sound like a lot, but it’s a few cups, so make sure to buy enough. Otherwise, cut the recipe in half if you don’t have enough.

All in the blender

Basil Vinaigrette

Basil Vinaigrette II

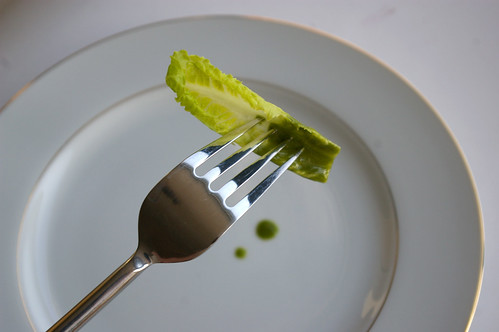
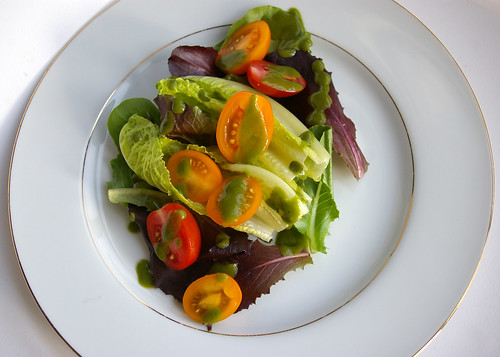
Dressing on lettuce

Simple salad with Basil Vinaigrette

Basil Vinaigrette

from the Rebar Modern Food Cookbook

  • 2 garlic cloves
  • 1 1/2 tablespoons Dijon mustard
  • 2 tablespoons honey
  • 1/4 cup red wine vinegar
  • 1 tablespoon balsamic vinegar
  • 1 1/2 ounces fresh basil leaves
  • 1/2 teaspoon salt
  • 1 1/2 teaspoons cracked pepper
  • 1 cup olive oil

Combine all of the ingredients, except the olive oil, in a food processor (I use a blender and that works just as well, I’ve found.) and blend. Slowly add olive oil in a slow, thin stream until thick and creamy.

Season to taste and serve. Can be refrigerated up to three days.

Continue Reading

Shaved Asparagus Pizza

I have a confession: I am incapable of kneading. I don’t know if it’s a character defect, a lack of practice or sheer laziness, but I cannot seem to take a mix of flour and water and yeast and make it into a smooth mass that balloons into a beautiful ball of dough. I end up with something shaggy and ragged and, well, downright ugly.

When it comes to pizza crusts, I have tried to persevere. There have been a few successes (and one colossal failure where I essentially made a giant, pizza-sized cracker), but I was typically undone by my less-than-stellar kneading skills.

And then, a revelation: no-knead pizza dough.

It was a circuitous route that brought me to a place where I realized I too could easily make homemade pizza dough.

It started with shaved asparagus pizza.

Shaved aspargus pizza IV

I stumbled onto the idea on Smitten Kitchen — a popular food blog written by the charming Deb Perelman — and was immediately enchanted. Warm chewy crust, melted cheese and thin shavings of asparagus that would roast on top? Yes, please.

But, as Perelman pointed out, she was not the only one to think this would be a fantastic combination. Indeed, Jim Lahey, who revolutionized bread baking with his no-knead concept, serves a high-end version at his restaurant.

Surely, Lahey must have a pizza dough recipe.

Yes, yes he does. And it doesn’t involve kneading.

Sold!

This time, the dough is intentionally shaggy and ugly. And, after a few stirs and some squishing together of the ingredients (I can’t even bring myself to call it kneading), it only wants to be left alone for two hours.

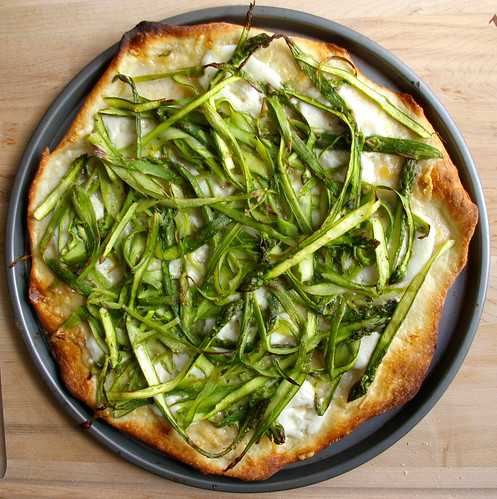
When finally baked, it has a pleasing crispness with just an appropriate amount of chew. Topped with a tangle of shaved asparagus that had roasted and intensified in flavour, along with the richness and slight salt of the cheese, this is something I could eat over and over.

Shaved aspargus pizza II

My first taste of asparagus came in Grade 10 when my boyfriend made me dinner one night and steamed some to go with steaks. I don’t remember much about that meal other than feeling overwhelmingly shy and excited to have a boy I liked cook for me.

Since then, I’ve grown to love the green-stalked vegetable and I’ll take it just about any way it can be prepared. Roasting, though, is my favourite because I like how it slightly caramelizes the tops and intensifies the flavour.

This pizza takes advantage of that, particularly because you shave the asparagus. None of the stalks shave perfectly, so you end up with varying thicknesses of asparagus strips, each of which cook slightly differently. Some will caramelize, while others will still retain a slight bite to them.

The beauty of pizza is that it is infinitely adaptable and this recipe is no exception.

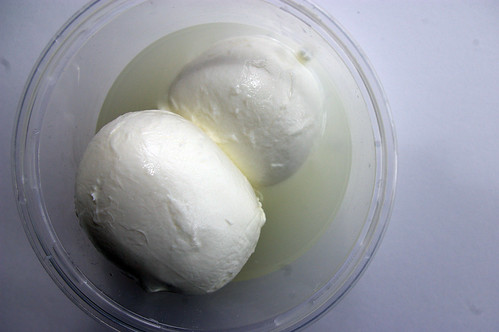
While I used buffalo mozzarella cut into rounds and a sprinkle of Parmesan, I was tempted to throw on some bits of goat cheese as well and will probably try that next time. A squeeze of lemon would have been nice at the very end. Like it spicy? Toss on some red pepper flakes.

Lahey’s version uses some rather fancy cheese, quail eggs and shaved black truffles.

But even with slightly less-glamorous ingredients, this dish is delicious.

P.S. This crust was so good that I made another batch about four days later. Yes, I have a pizza problem.

Buffalo Mozzarella

Asparagus bunch

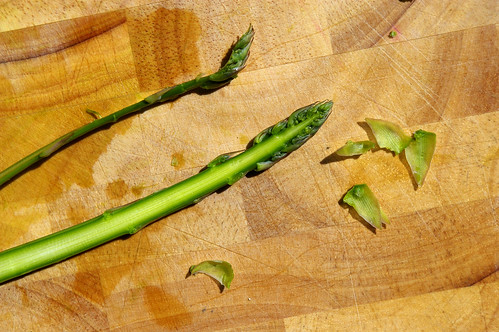
Shaved Asparagus

Asparagus shavings

Shaved aspargus pizza I

Shaved aspargus pizza III

Shaved Asparagus Pizza
Crust, from Jim Lahey’s My Bread

  • 3 ¾ cups (925 mL) bread flour
  • 2 ½ teaspoons (12 mL) instant yeast
  • ¾ teaspoon (3 mL) table salt
  • ¾ teaspoon (3 mL) plus a pinch sugar
  • 1 1/3 cups (325 mL) room temperature water (about 72F or 23C)
  • 1 to 2 teaspoons (5 to 10 mL) olive oil for pans

In a medium bowl, stir together the flour, yeast, salt and sugar. Add the water and, using a wooden spoon or your hand, mix until blended, at least 30 seconds. Cover the bowl and let sit at room temperature until the dough has more than doubled in volume, about two hours.
Using a bowl scraper or rubber spatula, remove the dough from the bowl onto a floured work surface. Gently form into a rough ball. Then divide the dough into two halves (to make his two 13×18 – 33×45 cm – pizzas or, do as I did, and divide into three parts for round pizzas) spacing them 4 inches (10 cm) apart, and cover with a moistened kitchen towel for 30 minutes.

Pizza, from Smitten Kitchen:

  • ½ pound (250 g) asparagus
  • ¼ cup (50 mL) grated Parmesan
  • ½ pound )250 g) mozzarella, cut into rounds, shredded or cubed
  • 2 teaspoons (10 mL) olive oil
  • ½ (2 mL) teaspoon coarse salt
  • black pepper to taste

Preheat oven to 500F (260C).
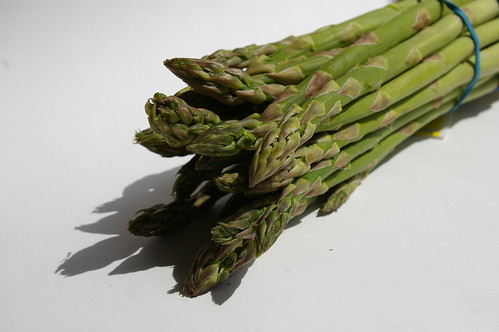
Using the rough end as a handle, hold the asparagus against a cutting board and use a vegetable peeler to make long strips. (I got anywhere between two to five shavings from each stalk depending on how thick they were or how easily the peeler went through the asparagus. They were also of varying thicknesses, which is fine.) After shaving, you should just be left holding the rough end, which can be discarded. Repeat with all of the asparagus.
In a bowl, toss together asparagus, olive oil, salt and pepper.

Roll out or stretch dough to create 12” (30 cm) round. (Lahey calls for it to be stretched by hand, but I used a rolling pin and did only a bit of hand stretching after getting the dough on the pan.) Brush olive oil on pan and transfer dough.
Sprinkle on Parmesan, then add mozzarella. Top with asparagus strands.
Bake for 10 to 15 minutes until crust is golden, cheese is melted and asparagus is roasted.

This story first appeared in the Real Life section in the Calgary Herald. For more delicious recipes, visit CalgaryHerald.com/life.
Continue Reading

French Silk Pie

I love Jason Segel.

He meets most of my criteria for ideal man: tall, not overly thin nor athletic and oh-so-funny. (Or, as my friend once described as “tall, broad, goofy guy.”) You can have your pretty boys, girls. Give me a man who can make me laugh and I’m a smitten kitten.

I know this isn’t really the place for romantic confessions, you know, being a food blog and all. But, sigh. And, I swear, it’s relevant.

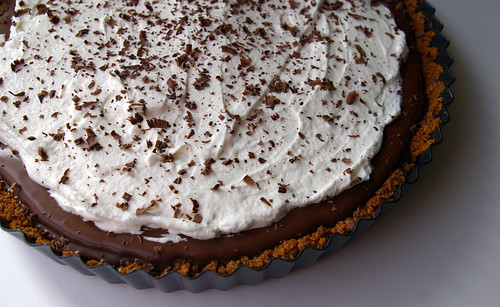
Chilled and ready

I missed the first season of How I Met Your Mother because I couldn’t figure out when the program was on. Some kind friends lent me it and season 2 on DVD. I’m not admitting anything but I may have watched them both in just a handful of days. That started a lovely tradition of discussing each episode on Tuesdays over email and getting together for season finales.

My crush on Segal started there and has continued through Forgetting Sarah Marshall and then I Love You, Man. (Even though his hair in I Love You, Man was beyond ridiculous and, unfortunately, spilled over into HIMYM because I guess they were filming bits of both at the same time.) (And, may I add, my love of him has absolutely nothing to do with the full-nude scene in Sarah Marshall. Ahem.)

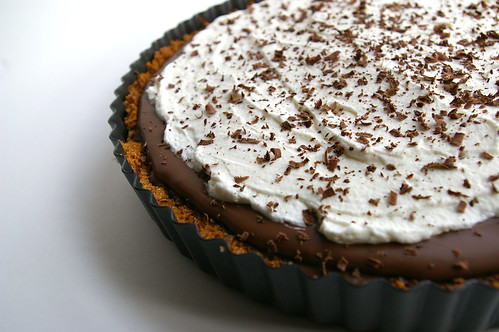
This year, my friends and I set up the date as soon as we knew when the finale was going to air. I, naturally, offered to bring dessert. But, while Dawn and I are fans of anything lemon, Chris is less than interested in citrus desserts. For him, it’s chocolate all the way. I’m not against broadening my horizons away from lemon and I felt like it would be nice to cater to someone else’s tastes for once. Plus, c’mon, chocolate pie? I’m still all over that.

I thought this would be great with a straight-up pie crust and tried that vodka pastry recipe from Cook’s Illustrated that set the baking world on fire. (It’s a wet, easily workable dough that uses part water and part vodka. The vodka evaporates leaving this stunningly flaky crust without all the fuss.) Yes, it was easy to work with and I think it would have been fantastic if I hadn’t rolled it so thin that the bottom got a little too brown. Not burnt, but brown enough that I just couldn’t bring myself to serve it to friends. Yes, I’m a perfectionist.

So, I then went with a graham cracker crust because
a) I had the ingredients
b) It’s a lot harder to screw up.

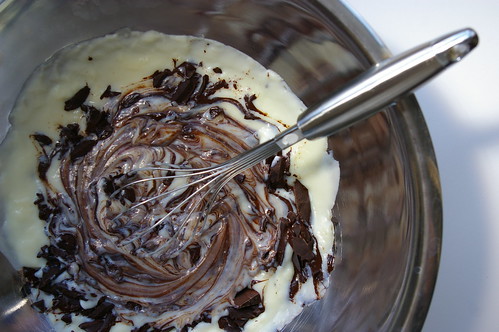
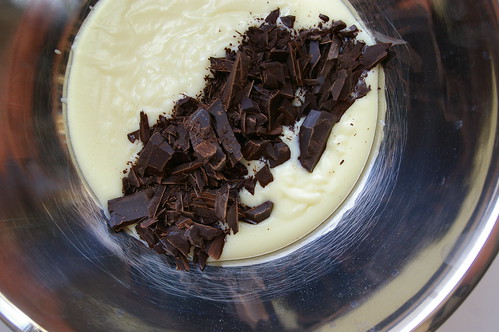
I loved photographing how this came together, especially the part where I got to mix in the chopped chocolate to the custard base, watching the cream and brown swirl together.

Mixing it in

The only hitch in all of it was this thing seriously took forever to set. That’s why there are no photos of slices because it was still setting while I was driving over to my friends’ house. I had set the tart tin on a baking sheet on the floor of my car and was freaking out every time I had to come to a stop as I watched the chocolate goo ripple slightly. We immediately put it in the fridge when I got there and let it chill for another three hours. It was perfect when it came time to cut in, but it was far too late for pictures. And, frankly, we just wanted to eat the damn thing.

It was so good.

Richly chocolate, smooth without being gloppy. It slumped ever-so-slightly in that perfectly decadent way. As if it was so full of goodness that it couldn’t contain itself.

I have it on good authority (OK, he was dimed out by his wife) that another slice or two went down after I left before bed time.

Yeah, it’s that good.

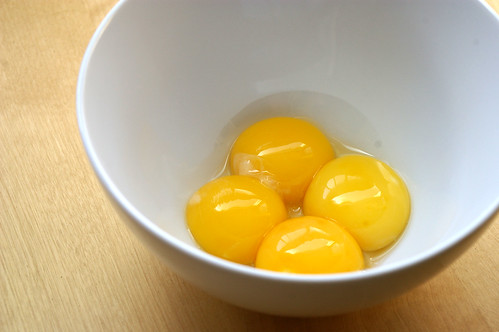
Yolks

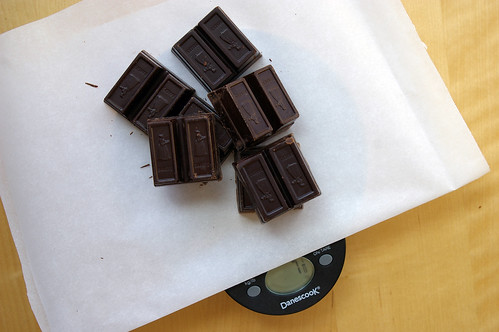
Weighing the chocolate

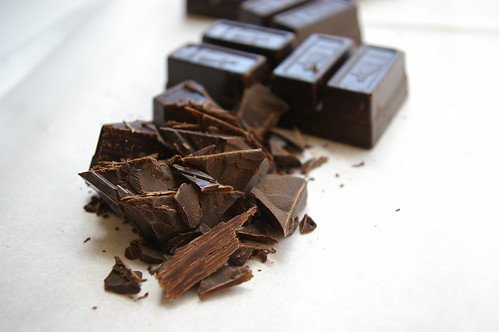
Chopped chocolate

Custard and chocolate

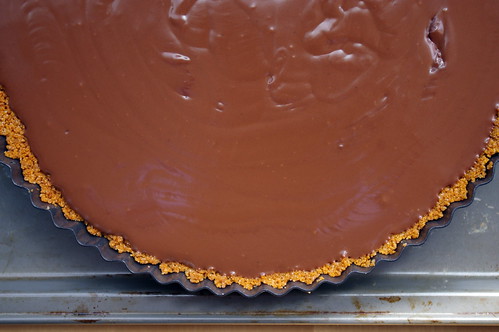
Time to chill

Chilled and ready II

French Silk Pie

For crust:

  • 1 1/3 cups graham cracker crumbs
  • 5 tablespoons unsalted butter, melted
  • 1/4 cup sugar

For filling:

  • 2/3 cup sugar
  • 1/4 cup cornstarch
  • 1/2 teaspoon salt
  • 4 large egg yolks
  • 3 cups whole milk
  • 5 oz fine-quality bittersweet chocolate, finely chopped
  • 2 oz unsweetened chocolate, finely chopped
  • 2 tablespoons unsalted butter, softened
  • 1 teaspoon vanilla

For topping:

  • 3/4 cup chilled heavy cream
  • 1 tablespoon sugar
  • 1 tablespoon cocoa powder, for dusting OR a small chunk of dark chocolate, shaved with a grater or rasp

Crust:
Put oven rack in middle position and preheat oven to 350°F.

Stir together crumbs, butter and sugar and press into 9″ pie plate or tart tin. Bake until slightly golden, about 15 minutes. Let cool on a rack.

Filling:

In a heavy-bottomed pot, whisk yolks, sugar, cornstarch and salt until well combined. Add milk in a stream, while still whisking. Over medium heat, while still whisking, bring to a boil. Reduce heat and simmer, still whisking, for about a minute. The filling will be quite thick.

Sieve the filling into a large bowl. Whisk in chocolates, butter and vanilla and stir until everything is melted together and fully incorporated. Cover with plastic wrap, pressing it against the custard mixture to keep it from forming a skin. Let cool completely, about two hours.

Spoon filling into cooled crust and then chill all together in the fridge for at least six hours. (Mine took more like eight.)

When ready to serve, beat whipping cream with sugar until it hold soft peaks. Cover pie and dust with cocoa powder or chocolate shavings.

Continue Reading

Taste of Chicago

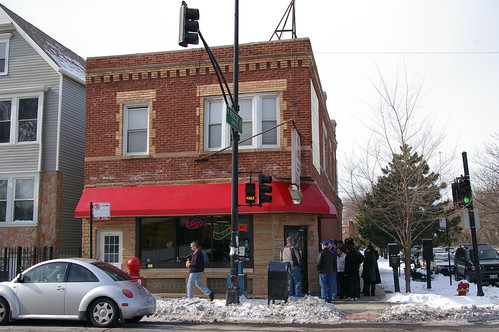
We have arrived for burgers — the kind that people talk about on the Internet long after having wiped the final crumbs from their lips. But we are distracted from the mouth-watering scent of smoke and beef by the hostess, standing with clipboard in hand and pen poised, telling us the wait will be about two hours.

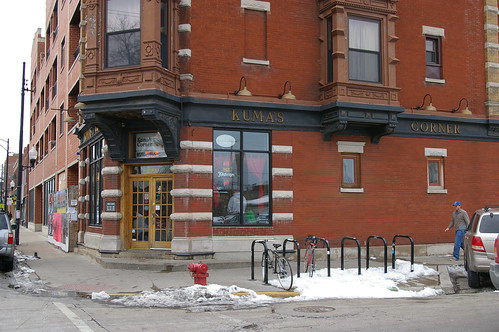
Kuma’s Corner is a popular place. Glimpses at the burgers coming from the coffee-table-sized kitchen are enough to make me pause and then put my name down on the list.

After all, what’s waiting at one more restaurant?

Kuma's Corner - the burger

We’ve already lined up around the block for a hotdog, sipped drinks to pass time while hoping for space at the counter of a trendy hotspot, and waited on a ramp overlooking the dining area of another restaurant, mouths watering as another platter of chicken and waffles was carried by.

Chicagoans, it appears, know what is good, what they like and are willing to wait.

And so will we.

It begins at Hot Doug’s, a hotdog joint well outside of the downtown core, where the faithful begin to line up before the place opens at 10:30 a.m. When my friend, Suzi, and I arrive around 11, the queue snakes out the front door, around the corner of the building and along its brick facade. Inside, every seat is filled.

Hot Doug's

Hot Doug's - waiting

But the delay is productive. The man in front of us, a regular, gives us the low down on what dogs are worth the wait.

For him, the Linguica — a Portuguese pork sausage — will always be the first pick. It’s one of the myriad specials proprietor Doug Sohn has dreamed up for the restaurant featured on TV shows and numerous newspaper and magazine articles, including Bon Appetit and Saveur.

The Linguica is on the menu, along with a curry lamb sausage, a chicken one with cranberry and walnuts and the item I already knew we’d have to try: the foie gras and sauternes duck sausage with truffle aioli, foie gras mousse and fleur de sel.

This is no ordinary hotdog place.

Hot Doug's - menu I
Hot Doug's - menu II

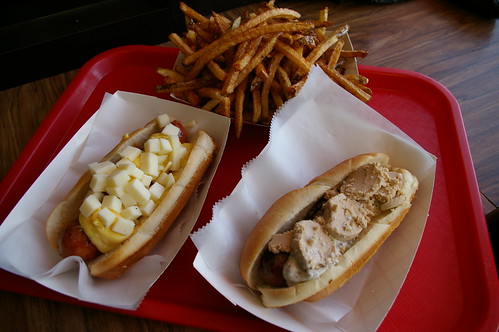
A side of fries cooked in duck fat — Friday and Saturday only — to go alongside and we were ready to go.

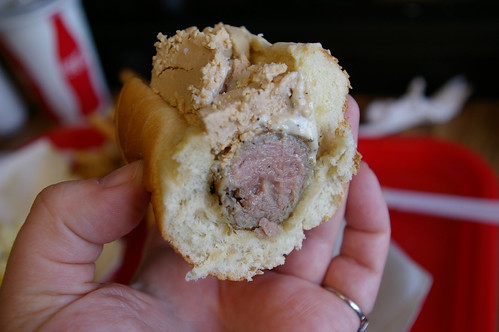
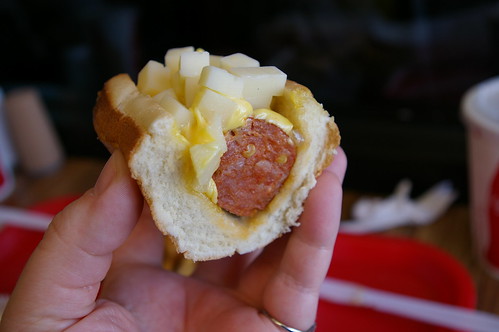
The thick squiggle of saffron aioli and cubed chunks of Iberico cheese played against the spicy sausage flecked with red chili. It was the hands-down winner between the two, although the duck dog with the rich mousse was worth the excursion.

Hot Dogs at Hot Doug's

Sauternes - cross-section

Linguica - cross-section

We would have thanked our lineup buddy for the recommendation, but he vanished after gobbling down his two dogs and disappeared into the sunny afternoon.

Total wait time: 45 minutes

In the daze that often follows a decadent lunch, Suzi and I headed back downtown to wander Millennium Park and admire Cloud Gate — a.k.a. the Bean — the stainless steel sculpture designed by Anish Kapoor that reflects Chicago’s stellar architecture, sunny skies and tourists like a classy funhouse mirror.

The Bean II

The Bean III

The wait for Avec is estimated at an hour, but we’re allowed to give a phone number and we head next door to Meiji, a Japanese influenced restaurant, for a sushi roll appetizer and glass of wine.

Just as we finish up the phone rings and we wander back the 25 steps or so to squeeze into two seats at the counter that runs almost the length of the narrow restaurant.

Avec, a wine bar part of a series of successful restaurants in Paul Kahan’s stable, boasts a menu of homemade charcuterie, flatbreads cooked in the fire-burning oven, tender salads and other items all easily shared.

The decisions are tough, but we settle on the flatbread stuffed with tallegio cheese, a salad comprised mostly of prosciutto and apple, the signature dish of chorizo stuffed dates in a tomato sauce, and another dish or two.

From the counter, we watch the chefs bustle at the two wood-burning ovens and chat with the server who offers up a few nightlife recommendations, while pouring a glass of rose.

The prosciutto salad that mixes the salt of cured ham and sweet apples is a clear winner, but it is the crisp flatbread with its oozing cheese centre that I can’t stop eating.

Total wait time: 60 minutes

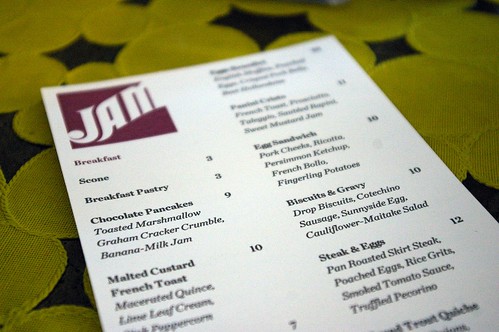
At Jam, we wait only 10 minutes for a free table for brunch. We have to chalk it up to good timing because after we sit down, the queue starts to stretch along the half-wall from cash register to front door.

Jam

The grey walls and concrete tables could feel industrial, but instead the air is cosy. From our table we have a clear view into the open concept kitchen — a tiny space that somehow fits at least three people co-ordinating plates and getting them out to patrons quickly and with style.

Amuse Bouche

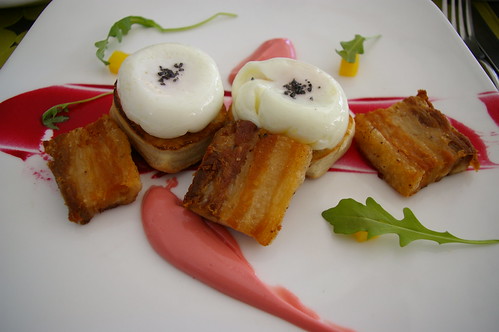
The eggs benny with crisped pork belly and beet hollandaise is almost art with the black-salt-topped eggs and bright pink smear of sauce. The braised pork cheeks are not quite as attractive, but meaty and tender.

Eggs Benny at Jam

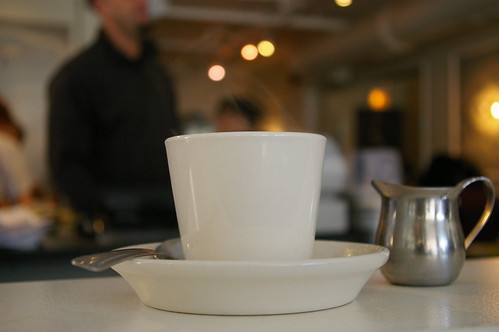
Steaming coffee

Total wait time: 10 minutes

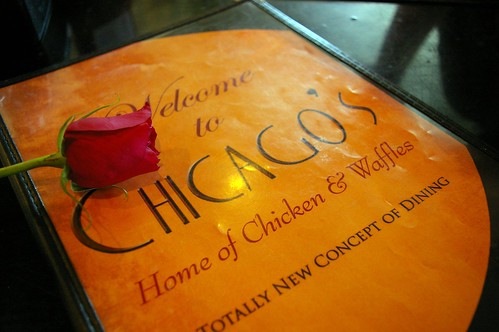
The next morning, the waiting is a little more tedious as we join an almost two-hour line at Chicago’s Home of Chicken and Waffles. It is a Sunday, after church, and the view of gorgeous hats sprinkled among patrons at the tables is beautiful but not enough to take our minds off the time we have to kill.

Chicago's Home of Chicken and Waffles

Trays of hot waffles and crisp-skinned chicken passing almost under our noses seemed to only prolong the wait.

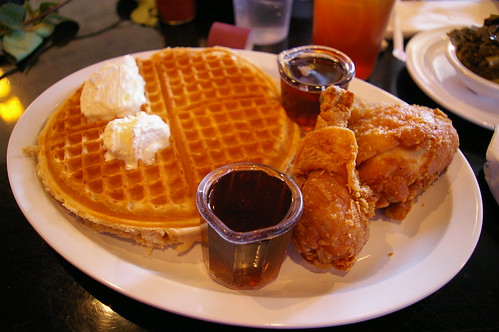
The first bite made it almost seem worthwhile. Apart, the fried chicken and waffles drizzled with maple syrup were good. Together they were a revelation. The hot, crisp chicken and the sweet tender waffles combined to become something better. Salt and sweet and crisp and soft. If I could have polished off the plate, I would have.

Chicken and Waffles

Total wait time: Two hours

We work it off by wandering the Art Institute of Chicago where I gaze, just as they did in Ferris Bueller’s Day Off, at Georges Seurat’s A Sunday on La Grande Jatte. I’m hypnotized by the pointillism, though that could be a soporific side-effect of breakfast.

A Sunday on La Grande Jatte

But by the last day, my patience for waiting has waned.

There is one final stop before the flight home: a burger joint that has received rave reviews online.

Kuma's Corner - Exterior

It’s a takes-no-guff place that has posted rules on its website, including no reservations, no music requests and “We will not ‘put on the game, bro.’ ”

When the hostess tells us the wait could be up to 2 ½ hours, we are prepared. And we’re learning. We put down our names and then head back out to hail a cab to take us to a nearby neighbourhood where we can window shop.

About 90 minutes later we’re back at the restaurant, hungrier than ever and only 20 minutes away from being seated at a tiny table near the equally tiny kitchen where staff are pumping out burgers like a machine.

Kuma's Corner Interior

Next to us, two young men are tackling the macaroni and cheese platter — a behemoth portion of pasta that can be topped with just about anything: prosciutto, caramelized onions, peas, sweet corn.

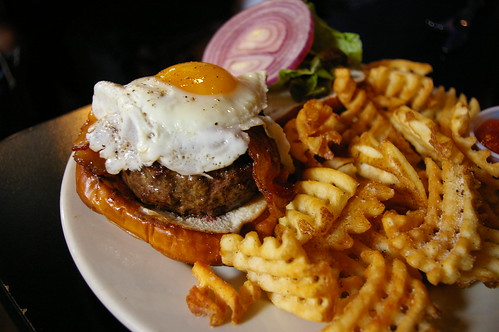
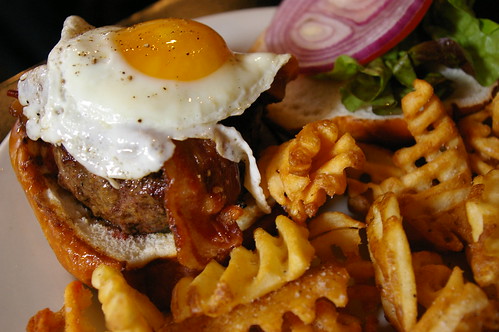
I, however, have eyes only for the burger and the two-hour wait has sharpened that craving, so I’m quick to decide on the “famous Kuma burger,” adorned with bacon, cheese and fried egg.

The patty alone is almost a softball of meat, slightly flattened. With the egg, cheese and bacon atop, this burger is a force to be reckoned with. When I attempt to cut it, the steak knife is buried to the hilt in the centre of the burger.

Kuma's Corner II

That first bite makes the wait dissolve into a distant memory.

The crisp waffle fries push it even further away.

Leftovers in hand — which will serve well as an inflight meal — we push out into the sunny afternoon.

There is nothing left to wait for, except the next trip back.

This article first appeared in the Calgary Herald’s Travel section. For more articles, visit CalgaryHerald.com/travel/index.html.

Continue Reading

Flourless Chocolate-Walnut Cookies

There is often debate among brownie fans on whether it is better to be fudge-y or cake-y. I have mostly stayed away from this because I’m not enough of a brownie enthusiast to really care one way more than the other.

Besides, the only thing that really matters when it comes to the brownie is the slightly crisped edges and the crackled top. For me, that is where the beauty of the brownie lies.

But, let’s face it, unless you have one of those special “all edge” pans with their labyrinthine shape, someone is getting stuck with the middle bits.

And that’s how I thought things would always be, until I tried these flourless chocolate-walnut cookies.

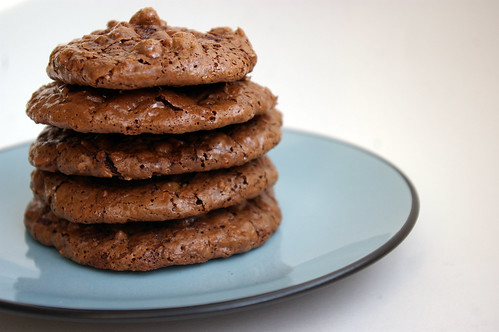
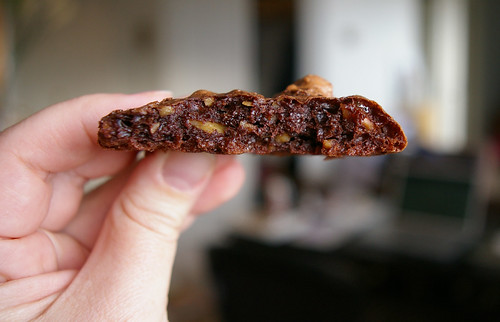
Flourless Chocolate Cookies

OK, they are not brownies. For someone like me, they are even better. They are cookies that taste like the crinkled surface layer of a brownie with its slight chew and crackle goodness, studded with chunks of walnuts.

To be honest, flourless chocolate cookies were not high on my list of things to bake when I stumbled across the recipe. But I came upon it after I had put some egg whites in the freezer, unsure what to do with them after using up the yolks.

I could have saved them for a pavlova, but figured it was worth trying out something new.

The list of ingredients was straightforward, if not a bit puzzling. I’ve never measured out three cups of icing sugar for a cookie recipe before.

Nor was I actually convinced that the airy ingredients would transform in the oven to some sort of cookie delight.

However, it did have a few things going for it: I already had egg whites ready to go and the recipe reminded me of a package of cookies I bought from a chain store grocery store once.

I served them to friends with a dollop of vanilla ice cream sandwiched between: a gourmet version of the childhood treat. It seemed worthwhile to see if these could compare. Or, as the case ended up being, improve on the store bakery version. The chocolate chew and nuts in a tender cookie package were so right. And they were light and not overly sweet. (Though, that was dangerous too, as it was easy to eat more than one or two and feel I still had room for another.) Mine did not get as shiny as I have seen in other people’s photos of the same type of cookies.

Normally I’d get a bit worried. Or envious.

Why do mine look different?

But after sampling one — OK, several — of the cookies, I realized I didn’t care what they looked like. They were fantastic.

I have since found myself trying to find recipes that use up only yolks so that I can take advantage of this cookie recipe again.

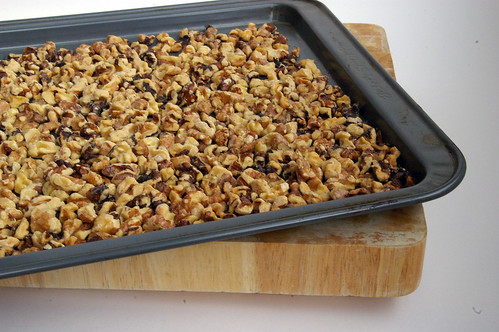
Toasted walnuts

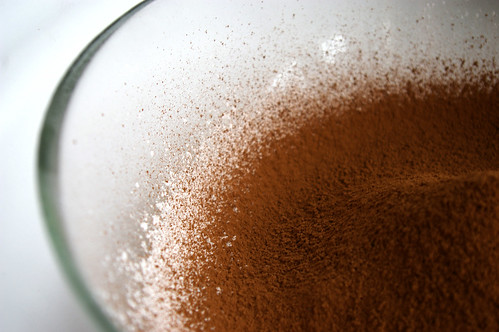
Cocoa and Icing Sugar

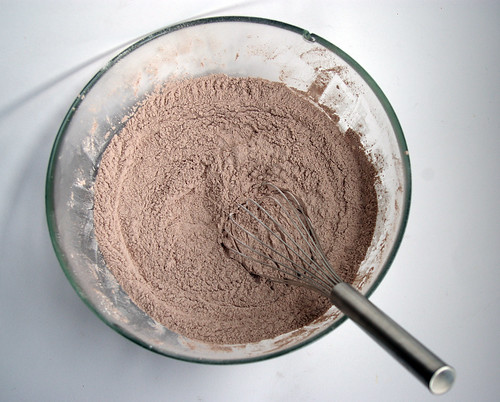
Cocoa Sugar mix

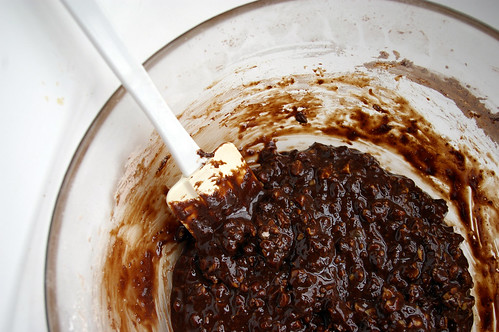
Flourless chocolate cookie batter

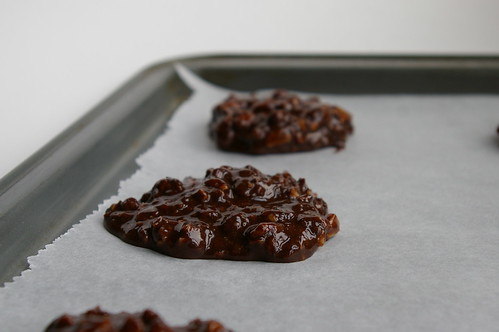
Cookie dough puddles

Chewy goodness

Francois Payard’s Flourless Chocolate-Walnut Cookies

from New York magazine

  • 2¾ cups (675 mL) walnut halves
  • 3 cups (750 mL) confectioners/ icing sugar
  • 1/2 cup plus 3 tbsp (170 mL) unsweetened Dutch process cocoa powder
  • 1/4 tsp (1 mL) salt
  • 4 large egg whites, at room temperature
  • 1 tbsp (15 mL) pure vanilla extract

Preheat oven to 350°F (180°C). Spread the walnut halves on a large-rimmed baking sheet and toast in the oven for about 9 minutes, until they are golden and fragrant. Let cool slightly, then move the walnut halves to a work surface and coarsely chop them.

Position two racks in the upper and lower thirds of the oven and lower temperature to 320°F (160°C). Line two large-rimmed baking sheets with parchment paper.

In a large bowl, whisk (or use an electric mixer on low speed) the confectioners’ sugar with the cocoa powder and salt followed by the chopped walnuts. While whisking (or once you change the speed to medium), add the egg whites and vanilla extract and beat just until the batter is moistened. Do not overbeat or it will stiffen.

Spoon the batter onto the baking sheets in 12 evenly spaced mounds, and bake for 14 to 16 minutes, until the tops are glossy and lightly cracked; shift the pans from front to back and top to bottom halfway through to ensure even baking.

Slide the parchment paper (with the cookies) onto 2 wire racks. Let cookies cool completely, and store in an airtight container for up to 3 days.

This story first appeared in the Real Life section in the Calgary Herald. For more delicious recipes, visit CalgaryHerald.com/life.

Continue Reading

Foxy Lady Rhubarb Cocktails

Some of you may have noticed I have a new header. It had long irked me that in the back of the original photo, I could see a chair leg and a box. I’m sure no one else really noticed, but I did. So, when the uber talented Leah Hennel (a friend and photographer with the Herald; check out her website) asked to do a 1940s-style, black and white shoot with me, I asked in return if she would be willing to reshoot my masthead. I’m really pleased with how it turned out. Looks cleaner, neater and the reds pop way more. I’d love to know what everyone thinks!

I’ve included one of her b&w shots of me below the recipe if anyone is curious. Plus, I had her take a new shot for my “What It’s All About” page, which you can see here.

(One last note: the new header has nothing to do with the catty remarks I wrote about in this post. You will note that my “pleasantly plump” calves, red shoes and red bowl are still very much key elements in the masthead. Because that’s the way I like it.)

Last fall, I drove home to the West Coast for three weeks to chill out with family and friends and take a small side trip to Long Beach. As part of that, I stopped over on Galiano Island for a night to hang out with my grandparents, who have lived on the island for almost as long as I can remember. My grandmother is an amazing gardener and cook. And, man, she knows a good cocktail.

In the late afternoon sunshine, we sat out on the back deck, surveying the expanse of grass, the pond and outbuildings while sipping rhubarb-vodka cocktails. It tasted just like summer. The sour-sweet of rhubarb, bite of vodka and soda fizz was perfection. I had two.

Foxy Lady Rhubarb Cocktail II

So, after I left I found myself thinking often of these cocktails and that early fall afternoon. When rhubarb reappeared at the farmer’s market this spring, I knew exactly what I wanted to do.

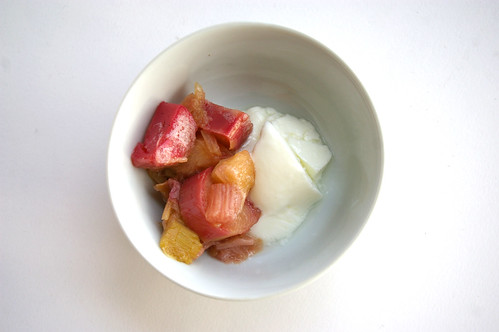
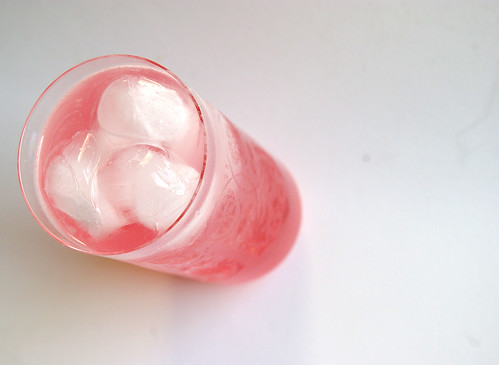
The beauty of making rhubarb syrup is that you get the gorgeous pink syrup for drinks and the stewed fruit left behind is equally delicious. I like it over plain yogurt, but did indulge once or twice in having it with a healthy dollop of whipped cream.

I also made extra syrup for a pregnant friend. Just mixed with soda, it’s a great mocktail for the summer season.

You may wonder about the name of the drink. My grandmother’s nickname (for which I have no explanation) is Foxy Lady. It only seemed right to name the drink after her.

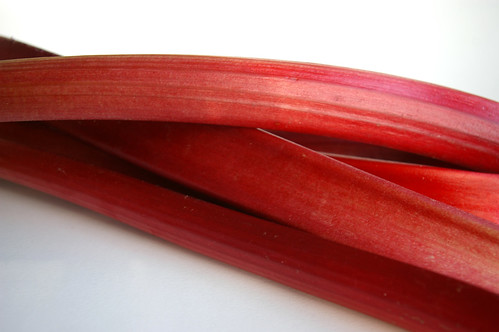
Rhubarb

Sliced Rhubarb

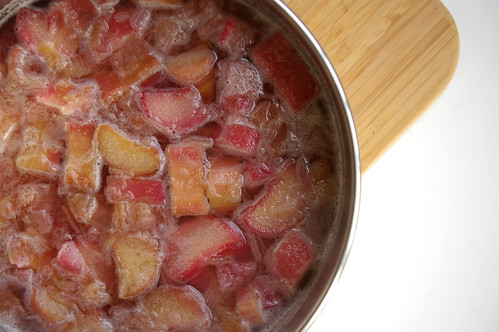
Stewed rhubarb

Draining the rhubarb

Rhubarb Syrup

Rhubarb and yogurt

Foxy Lady Rhubarb Cocktail

Rhubarb Syrup

  • 4 cups chopped rhubarb
  • 1 cup water
  • Sugar to taste (up to 1 cup, depending on how sour the rhubarb is)

In a saucepan, bring rhubarb and water to a boil. Lower the heat to a simmer and cook until the fruit is soft and the liquid is pink and slightly syrup-like. Add sugar and stir. I started with 1/2 cup. Let it dissolve for a minute and then taste the syrup. Add more sugar if desired. I wouldn’t go much more than a cup, though because rhubarb should be a little tart.

Using a fine strainer set over a bowl, separate the solid rhubarb from the syrup. Let sit for 10 minutes or so to fully drain the rhubarb. Pour the syrup into a container and refrigerate. Scoop the stewed fruit into a separate container and refrigerate.

The stewed fruit is fantastic over plain yogurt or ice cream or topped with a dollop or two of sweetened whipped cream.

Foxy Lady Rhubarb Cocktails

  • 1 part vodka
  • 2-3 parts rhubarb syrup
  • 1 part soda water

In a tall glass, mix together the vodka and syrup. Top with soda and a couple of ice cubes. Stir gently. Serve.

This also makes a fantastic mocktail if you just omit the vodka.

B&W shot by Leah Hennel

Continue Reading

Roasted Tomato Tart

(I am so proud of this post because it marks my first food article in the Herald’s revamped Sunday edition. My photo of my little roasted tomato tart was on the cover of the ‘mix’ section. For those that haven’t seen the new Sunday edition, that means the photo was the entire front of the ‘mix’ section. Yay! And a warning, this post is photo heavy! What can I say? I had a hard time paring it down.)

And now, back to the article.

I have an unabashed love of tomatoes. Meaty slices of them wedged between two pieces of buttered toast with a sprinkle of salt and pepper is my idea of comfort food. Roma tomatoes drizzled with a little balsamic vinegar and good olive oil make a simple side dish. And I love that burst of seeds and flavour that comes when biting into a plain cherry tomato.

Tomatoes II

I once bought a perfume called Tomato because it smelled like the aroma given off after brushing up against the green stalks of a tomato plant — that verdant scent of heat and summer. A few spritzes on my wrist could transport me back to being a kid and visiting my grandparents on one of the Gulf Islands where I sometimes helped in the garden.

Enclosed in chicken wire to protect it from ravenous deer, the garden produced sweet tiny carrots I ate straight from the ground after a quick rinse from the hose, grape vines that tangled their way along trellises, and rows of tomato plants.

I would use a plastic watering can to fill the coffee tins with water, from which my grandfather had removed the bottoms, nestled into the earth next to the plants — a trick that allowed the water to get right at the plant’s roots. And I would brush up against the stalks, filling the air with that distinct smell.

If any were ripe, I’d pull them sun-warmed from the dark green plants and eat them unadorned.

There is no taste like a vine-ripened tomato.

Tomatoes

But sometimes I like to roast them to intensify their essence and bring out more of their natural sweetness.

Baking halved Roma tomatoes in the oven with a few unpeeled garlic cloves is an excellent base for a good tomato soup.

Cherry tomatoes, when roasted, shrink and wrinkle to softish pouches of concentrated tomato flavour. I’ve made simple pasta sauces like this, topped only with shaved Parmesan and a sprinkle of basil or parsley if I have them lying around.

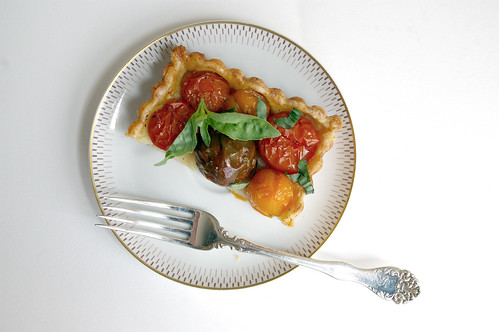
Roasted Tomato Tart-round

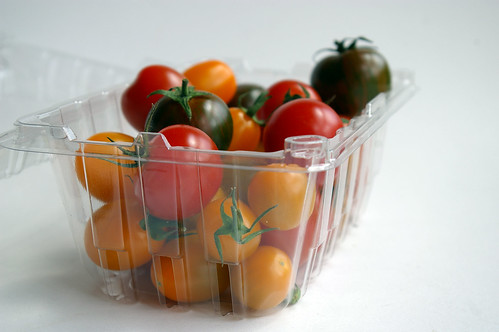
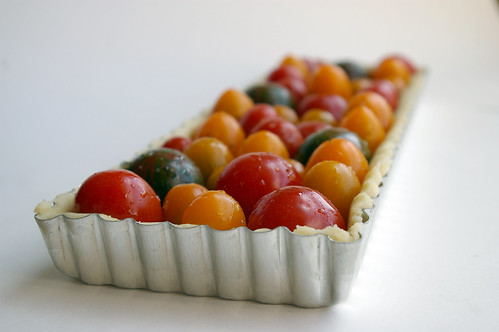
I thought recently — after seeing a clamshell package of multicoloured cherry tomatoes at the farmers market — that they would make a good savoury tart, particularly if paired with a hearty crust.

When I began imagining a roasted cherry tomato tart, I thought there was potential in adding a few handfuls of Parmesan cheese to the dough to bring out a nice nutty, rich taste when baked.

A little research led me to realize I wasn’t the first person to think of this, but I didn’t love any of the recipes I came across. I am by no means a pastry expert, but was willing to give myself a chance to experiment.

Using ideas from several different recipes, I decided to create a hybrid pastry that used cream instead of water and a cup of Parmesan cheese, finely grated and blitzed with the other ingredients in the food processor.

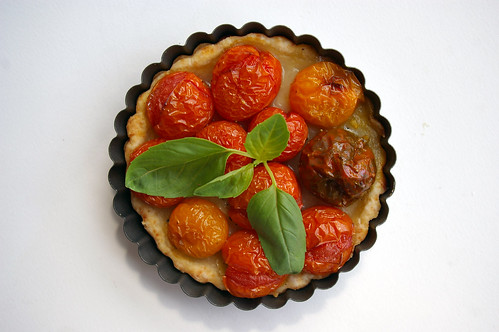
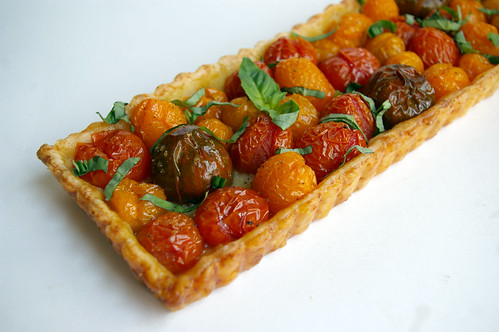
The dough was easy to work with and resulted in a golden crust that played nicely against the sweet, soft tomatoes.

(This would likely work just as well, though, with a regular pastry.)

Because cherry tomatoes are so juicy, there was a lot of liquid bubbling away as the tart was baking. (Truth be told, I was a bit nervous about just how much I could see as I peered through the oven door.) Some of it did cook off in the process, but there was definitely a thin layer of tomato liquor when I pulled the tart out. Some may call it soggy; I prefer to think of it as tomato-infused pastry. Either way, the base of the tart pastry was crisp and I liked the taste of it.

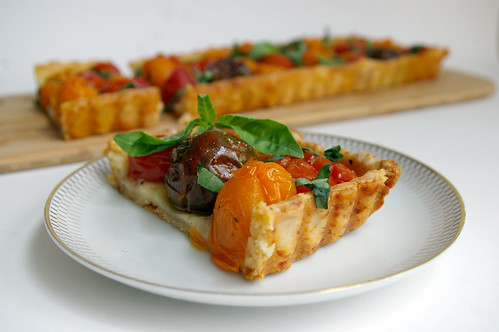
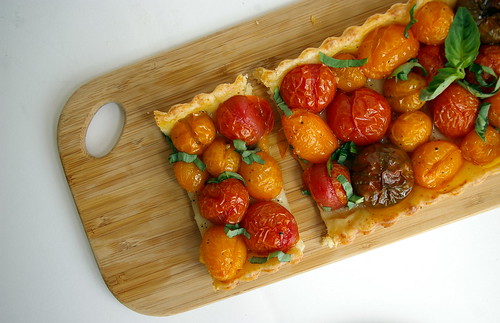
A sprinkle of basil gave it a nice fresh taste when added as the tart cooled slightly. (And yes, you’ll want to let it sit for a few minutes because cutting into the tomatoes will likely cause some to burst. Ouch.)

Chilled parmesan pastry

Pastry in tart dish

Tomatoes III

Tart pre-oven

Roasted Tomato Tart II

Tomato Tart and slice

Sliced Tomato Tart

Roasted Tomato Tart Sliced

Roasted Tomato Tart

  • 1½ cups (375 mL) flour
  • 7 tbsp (115 mL) butter, cold and cut into small cubes
  • ½ cup (125 mL) cream
  • 1 cup (250 mL) finely grated Parmesan
  • pinch salt
  • 1-1¼ lb. (500 to 625 grams) cherry or grape-sized tomatoes
  • 1 tbsp (15 mL) olive oil
  • 1 tsp (5 mL) salt
  • ½ tsp (2 mL) fresh ground pepper
  • 2 tbsp (25 mL) fresh basil, chiffonade (rolled like a cigar and cut into strips)

Add the flour and pinch of salt to the bowl of a food processor, then sprinkle the butter cubes on top. Pulse two or three times until the butter starts to break down, then add the Parmesan. Pulse until the mixture is crumbly and the butter is in pieces no larger than a pea.

Add the cream slowly while pulsing until the dough starts to come together. (It will bunch up and the food processor noise will change.)

Empty the contents onto a lightly floured surface and knead it a few times to pull the dough together.

Wrap in plastic and refrigerate for at least 30 minutes or as long as overnight.

Preheat oven to 325 F (160 C).

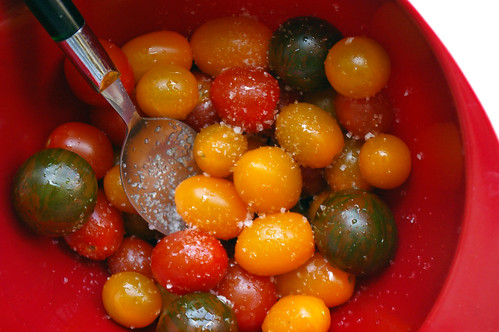
Toss the tomatoes in a bowl with the olive oil, 1 tsp salt and pepper. Set aside.

On a lightly floured surface, roll out the dough until it is about 1/3 inch to 1/4 inch (8 millimetres to 6 mm) thick. Press into tart tin (9 inch/23 cm round tin or a 14-inch/35 cm rectangular tin), stretching it as little as possible, and cut off excess. Arrange tomatoes in the tart tin.

Bake for an hour until tomatoes are soft and pastry is golden brown. Remove and let cool on a rack for 10 minutes. Roll basil leaves like a cigar and then slice them to make herb strips. Sprinkle over tart.

Serve while still warm.

Cook’s note: The amount of tomatoes will vary depending on how tall or fat they are and how well they fit together in the tart tin.

This story first appeared in the Real Life section in the Calgary Herald. For more delicious recipes, visit CalgaryHerald.com/life.
Continue Reading

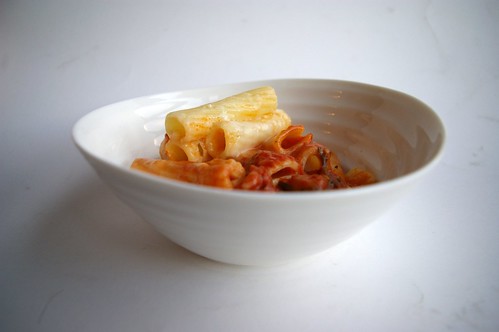
Mac-Raff n’ Cheese

This is one of my favourite all-time childhood meals.

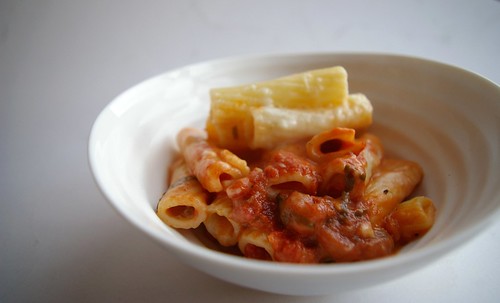
Mac-Raff n' Cheese I

I loved coming home to find a pot of Mac-Raff n’ Cheese bubbling away in the oven. My stepdad, Sean, would make it in our giant Corning Vision Ware pot (Do you guys remember those? The glass pots that came in a couple of colours? Ours was brown.), so if I peered through the oven door I could see the tomato sauce simmering up to mingle with the cheese-coated pasta.

For a long time I thought it was a creation of Sean’s, him being the head chef in our blended family. And what a chef he was! We were well-fed kids because that man knows his way around a kitchen. Lamb and mint sauce, chicken and rice with cream gravy, roast beef with all the fixings. There’s a reason I love to go home, even today. But when I was home a few months ago, my mum revealed that she was actually the mastermind behind the recipe.

She’s a Macdonald; he’s a Rafferty. So we were the Mac-Raff household. Hence the name of this dish.

It is a smart meal from a parent’s perspective. Quick, filling and can be assembled during the day and left at the ready to bake closer to dinner time when everyone is home and getting hungry. As an adult, I’ve also found it to be fantastic as a freezer meal. Since I generally make enough for a family of six (apparently, I am incapable of cooking for one or two like a normal singleton. But it’s OK because I love leftovers.) I have got into the habit of splitting the mac n’ cheese into two casserole dishes and jamming one into my freezer for later.

Mac-Raff n' Cheese III

I made it a couple of months ago when the days were still crisp and cold. Then it warmed up and I wondered if people’s appetites for hearty, homemade macaroni and cheese had waned, so I kind of put it on the back burner (nyuk nyuk). And then we had another, delayed, blast of winter. Oh! I thought, a second chance! And then, uh, well, let’s just say I lost track of time.

But I think this is a good recipe to have on hand. Although there is no official recipe. I, like my parents, kind of make it up as I go along each time depending on what I have lying around. But, fundamentally, it is macaroni and cheese with tomato sauce on the bottom that is all baked together in a casserole dish with a layer of cheese on top.

And it is far greater than the sum of its parts. Tomato sauce = good. Pasta doused in cheese sauce = good. That layer where the two mix = perfection.

I like to take a couple of big spoonfuls and top with some cracked black pepper, then eat it with a spoon.

But the real beauty of this is that it is infinitely adaptable. Don’t like the cheeses suggested? Use what you’ve got or what you like. Don’t have fresh herbs? Use a pinch of dried basil. Use your family’s own secret tomato sauce recipe for that matter. This is about using what you’ve got and experimenting with what you think it will taste good.

Tomato Sauce I

Tomato Sauce II

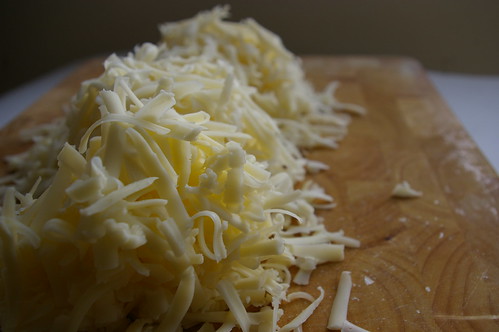
Grated Cheese

Pasta and Cheese

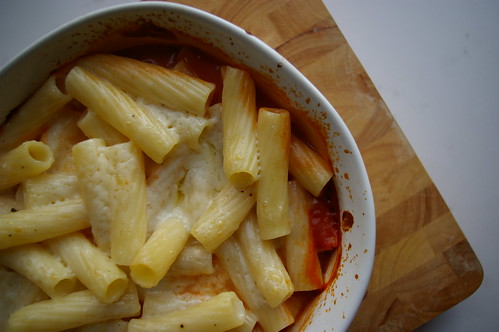
Oven ready

Hot from the oven

Mac-Raff n' Cheese II

Mac-Raff n’ Cheese

Tomato Sauce base:

  • 1 tablespoon olive oil
  • 1 onion, diced
  • 3 cloves garlic, minced
  • 1 28 oz. can whole tomatoes
  • 1 14 oz. can crushed tomatoes
  • 1 tablespoon balsamic vinegar
  • pinch sugar
  • 1/4 cup basil (or combination of mostly basil and some parsley), roughly chopped.
  • salt and pepper to taste

Heat oil in a pot over medium heat. When hot, add onion and saute until transluscent. Add garlic and stir for about a minute until fragrant. Using the can lid, drain the tomato liquid from the can of whole tomatoes into the pot. Let the liquid reduce by half and then add in the tomatoes. I dice them one by one in my palm using a basic dinner knife as I like small chunks of tomato. Another trick is to use kitchen scissors and just cut them up in the can. Add to the pot. Then add the crushed tomatoes. Stir in sugar and balsamic and let simmer until it has reduced and thickened. You don’t want it too thick because it will reduce further in the oven. Add salt and pepper to taste. Stir in herbs.

Macaroni and cheese:

  • 500 grams pasta (penne, macaroni or whatever tubular pasta you have sitting around)
  • 1/4 cup butter
  • 1/4 cup flour
  • 5 cups grated cheese, divided (I like a combination of asiago, cheddar, provolone and a bit of Parmesan; but I’m not afraid to use what’s already in the fridge.)
  • 3 cups milk
  • salt and pepper to taste

Cook pasta according to package directions. As the pasta boils, start on the cheese sauce. Melt butter over medium-low heat in a pot. When frothy and bubbling, add flour and mix with a whisk until well blended. Continue cooking for a couple of  minutes to cook out the raw flour taste. Slowly add milk, whisking constantly to prevent lumps. After it has thickened slightly, add 4 cups of the grated cheese. (I usually switch to a wooden or plastic spoon at this point.) Stir until melted, then add salt and pepper to taste. (If it is too thick, splash in a bit more milk.) Remove from heat.

Drain cooked pasta and return to pot. Top with cheese sauce and mix together.

Assembly:

Preheat oven to 425F.

Put tomato sauce in base of casserole dish. Top with macaroni and cheese and then sprinkle over remaining one cup of cheese. Bake covered for 45 minutes to an hour (depending on the size of your casserole dish). Remove lid and bake another 10 to 20 minutes until cheese is bubbling on top.

This is fantastic with a nice green salad.

Note: To make ahead, assemble the entire dish but stop just before baking it. Wrapped in plastic wrap and aluminum foil, this can be stored in the freezer. To cook later, let thaw and then bake as directed.

Continue Reading

Dolly Bars

I like my blog stats. I’m always interested to see where people are coming from or what search words have led them to my little site. I am usually grateful to anyone and everyone who has linked up to my blog and I am quick to investigate a referrer when I’m getting more than a handful of hits coming in from a particular place.

So, when I saw I was getting visitors from a bulletin board on the America’s Test Kitchen website, I got curious.

I wish I hadn’t.

It was a discussion linking back to my rhubarb crumb cake post (which seemed odd, how did they even find that one particular post) with the subject of: Okay, guys, am I the only one who thinks this photo is great?

At first I thought she was referring to my rhubarb and/or cake photos, but it turned out she was referring to my blog’s header. Me and my red patent shoes and my red mixing bowl.

There were a few nondescript responses. And then the original poster said something that left me feeling like ice. I think it’s a good thing that I don’t have a photographic memory because it’s probably best I don’t remember the comment exactly. Instead, I’ll give you a summary: It looks as if this woman and her “pleasantly plump” calves (because that I do remember) has eaten everything before it could go in the oven and has had to lie down to digest it all.

And then, further down, another comment that struck even deeper.

No (Original Poster), when I opened the link and saw that across the top, I thought “Wa-huh? Did she get murdered while she was stirring her cookie dough? Or did she go into a diabetic coma from too much sugar? Or is she trying to look alluring with that red plastic bowl from Target and the red plastic shoes from Payless?” I couldn’t quite figure out the point of the picture.

It certainly does not make me want to eat….her cooking.

I felt ill to read that.

I have long known the Internet to be a place where meanness spreads easily. After all, I’ve read the comments on some of my articles for the Herald. People are quick to criticize or make mean comments. Anonymity, no doubt, plays a significant role in how people choose to comport themselves online.

And I know there is a valuable lesson in here about paying attention to the 99 people who like you and ignoring the one critic.

But here’s the problem.

These comments from these women confirmed all the things I feared people thought about me.

The original poster later took down her comments, editing the first post to say she had never intended to offend anyone. My initial reaction was to be appreciative that she seemed sorry. But, after a few minutes, I realized that her edited comment was just as strange. How did she not think people would be offended? Did she believe her comments were being made in a vacuum and the object of her criticisms would not find out? Likely, yes. But she was mistaken.

More than 60 people visited my site because of that bulletin board discussion. I have no idea what the others thought, but I can safely say that I’d prefer to get my traffic some other way.

And yes, a small part of me thinks they would probably be less mean if they had a nice slice of cake once in a while.

So, on that note, (she says, clapping her hands together), that is enough time wasted on that. Let’s eat something delicious!

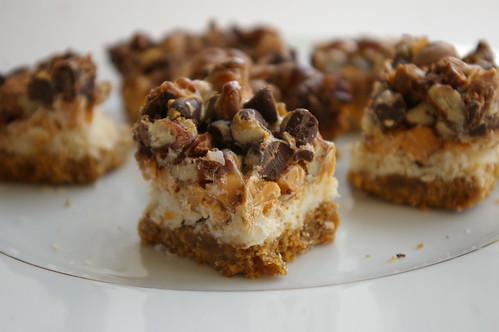
Dolly Bars I

For elective choices in Grade 8 at high school (because there was no junior high in Vancouver and I’ll spare you the woes of being a 12-year-old girl going to school with 18-year-old boys who would never look at a kid like me) one could decide between food/wood/metal and home ec (food and sewing). I had no interest in working around giant saws that would probably take my finger off, so I chose home ec.

I don’t remember many recipes worth saving, except baby cheesecakes that used vanilla wafers for a crust and these things called Dream Bars. I kept the cheesecake recipe but have no idea where the one for the bars went, which is too bad because I think about them pretty often. (As in, more often than really is reasonable to reminisce about a baked good.) They were sort of chewy-gooey with a shortbread type crust and a sweet layer on top. I think there were pecans involved. And chocolate chips. And that’s about all I remember. I’ve googled until the cows come home, but nothing that calls itself a “dream bar” is actually what I remember.

And then I saw Dolly Bars. They seemed a reasonable facsimile and, therefore, worth a try.

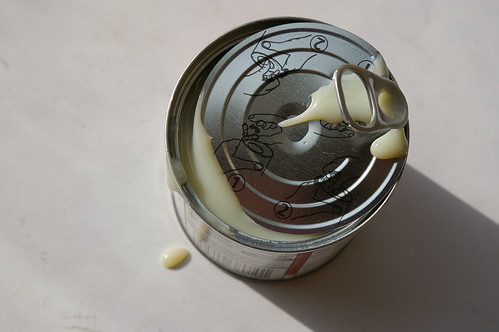
I found this recipe on Smitten Kitchen who adapted it from Homesick Texan. I didn’t notice the discrepancy in the amount of sweetened condensed milk until after it became clear this recipe was a bit of a failure for me. A little more online research showed that almost every recipe calls for an entire can of the stuff, while the one I used called for about 1/3 of a cup. My toppings didn’t really stay stuck to the graham cracker base as a result. Still tasty, but a bit of a failure. So, I’m going to try this again and use the entire can.

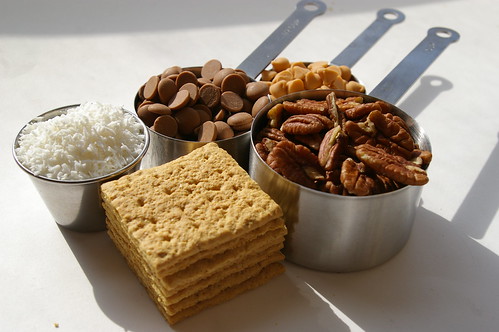
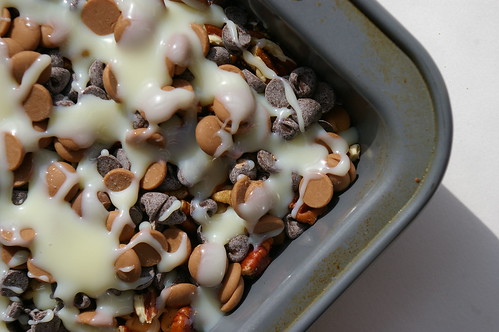
All the toppings

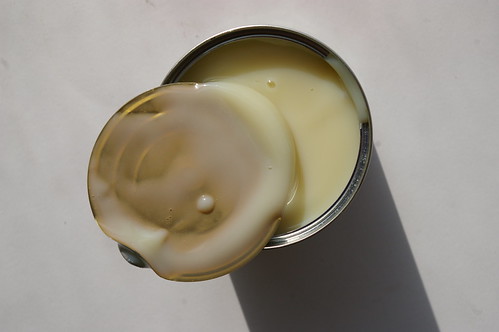
Condensed Milk II

Condensed Milk II

Dolly Bars before baking

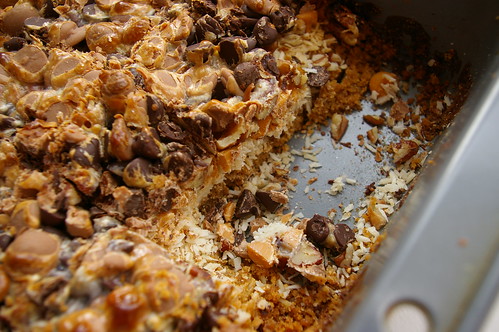
IMGP1327

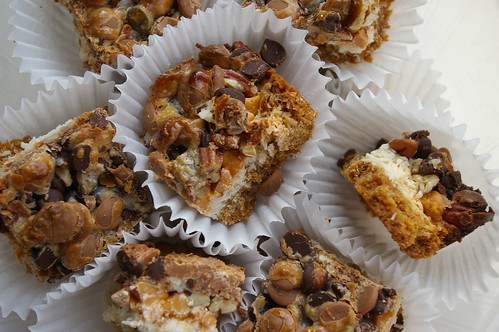
Dolly Bars II

Dolly Bars

  • 1/2 cup (1 stick) salted butter, cut into large pieces
  • 1 1/2 cups graham crackers crumbs (about 8 graham crackers, pulsed in a food processor)
  • 1 1/2 cups chocolate chips
  • 1 cup butterscotch chips
  • 1 cup shredded coconut
  • 1 cup pecans, coarsely chopped
  • 1 14 oz. can sweetened condensed milk

Preheat oven to 350 degrees.

Melt butter in microwave in heatproof bowl until just melted when stirred. Add graham cracker crumbs. Mix and then press evenly into the bottom of 8×8 baking pan.

Layer coconut, pecans, butterscotch and chocolate chips on top of graham cracker base. Pour sweetened condensed milk over whole mixture.

Bake in oven for 25 to 30 minutes, or until the top is light brown.

Continue Reading

Strawberry Shortcakes

I suppose my scone anxiety started about 10 years ago when I was doing a stint teaching English in Japan.

My next-door neighbour invited me to a cooking class being hosted by one of the American wives who lived on a nearby U. S. naval base. Every so often they would run these courses and local housewives in my small town would sign up, looking for a chance to learn some foreign cooking and perhaps practise English.

I’m sure I paid attention. I’m also sure we put in all the ingredients. I’m confident we didn’t overmix.

But pulling our tray from the oven, it was painfully obvious something, somewhere had gone wrong.

The navy wife clucked her tongue and kindly suggested we forgot to add the baking powder.

To say they were hockey pucks would have been polite.

To add to that anxiety was the confusion I suffered when attempting to make scones again: how best to mix the butter with the flour to ensure even incorporation while the butter remains cold.

Pastry blender? Fingertips? Food processor?

It was all a bit much for this would-be perfectionist to handle.

I understood the logic behind it. If the butter stays cold and is perfectly mixed in with the rest of the ingredients, it will melt in the heat of the oven, creating light layers in the scone. But I just didn’t know which method was best.

Still, one can only be afraid of scones for so long.

And it’s strawberry season.

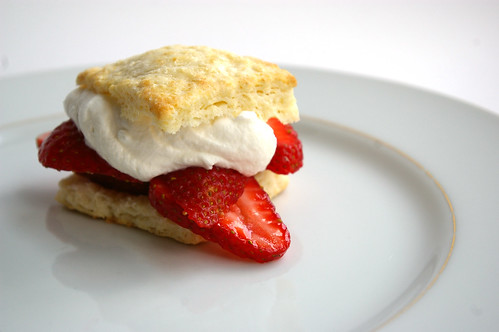
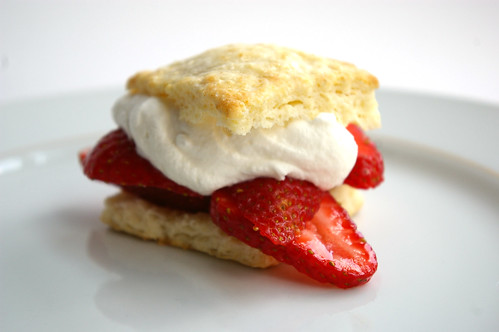
And if those two things aren’t enough to make this girl face down her anxiety with a round of strawberry shortcakes, I’m not sure what would be. After all, the thought of a light, golden scone-like shortcake, topped with slightly sweetened strawberries and a healthy dollop of whipped cream is enough to make me do things much worse than attempt a recipe while bracing for failure.

Within reason, of course.

As hoped for, my anxiety completely melted away when the recipe came together quickly and the shortcakes out of the oven were the requisite golden colour, pulling apart neatly to display all their lovely inner layers.

Strawberry Shortcake II

It may have been thanks to chef Nigella Lawson’s approach to the butter conundrum, which is to grate frozen butter into the dry ingredients. It seems so ridiculously smart, now that I think about it. After all, if the goal is even distribution, what better tool to use than something that will conveniently portion the butter out into tiny pieces? Not to mention the fact that because the butter is frozen, it’s difficult for it to warm up too much before the mixture goes into the oven anyway.

It may also have been that I made absolutely sure to add the leavening.

And it may have been that sometimes anxieties just need to be confronted.

After all, the rewards to be reaped here will carry on and on.

And, in the immediate moment, there are shortcakes to enjoy.

Strawberry Shortcake I

Strawberry Shortcakes

Adapted slightly from chef Nigella Lawson’s How to Be a Domestic Goddess.

For the shortcakes:

  • 1½ cups (325 ml) flour
  • ½ tsp (2 ml) salt
  • 1 tbsp (15 ml) baking powder
  • 5 tbsp (75 ml) sugar, divided
  • 1/2 cup (125 ml) unsalted butter, frozen
  • 1 large egg
  • ½ cup (125 ml) half-and-half cream
  • 2 tbsp (25 ml) whipping cream
  • 2 tbsp (15 ml) sugar, divided
  • 1 cup (250 ml) whipping cream

for the filling:

  • 1 pound (500 g) strawberries, hulled and sliced
  • mix the sliced strawberries with 1 tbsp (15 ml) sugar and set aside in the fridge.

Preheat the oven to 425°f (220°c).

Mix together the flour, salt, baking powder and 3 tbsp (50 ml) of the sugar in a bowl. Grate the frozen butter into the dry ingredients and use your fingertips to lightly toss all together. Whisk the egg into the half-and-half cream and pour into the flour mixture a little at a time, using a fork to mix. (Nigella notes you may not need all the cream; I needed another tablespoon or so.)

Turn the dough out onto a lightly floured surface, then roll gently to about ¾-inch (2 centimetres) thick. Dip a cutter in flour and cut out as many shortcakes as possible. Work the scraps back together, re-roll and cut more. (Nigella suggests using a 3-inch/6½-cm round cutter to make 8; I used a much smaller square one and subsequently got 15 shortcakes.) Place on a baking sheet, brush the tops with the 2 tbsp (25 ml)whipping cream and sprinkle with the remaining sugar.

Bake for 10 to 15 minutes (because mine were significantly smaller than suggested, they only took 8 minutes) until golden. Remove to wire rack to cool.

Whip the whipping cream with the remaining 1 tbsp (15 ml) sugar-and a splash of vanilla extract if desired.

Split the shortcakes through the middle, top with a spoonful of strawberries and dollop of whipped cream and then put the top back on.

These are best served slightly warm.

This story first appeared in the Real Life section in the Calgary Herald. For more delicious recipes, visit CalgaryHerald.com/life.
Continue Reading

Triple Layer Chocolate Cake

It’s my Blogiversary!

Two years ago I decided it was time for me to finally join the blogging world and I started up Patent and the Pantry as a way of celebrating my love of food and photography. But, let’s face it, mostly because of my love of food.

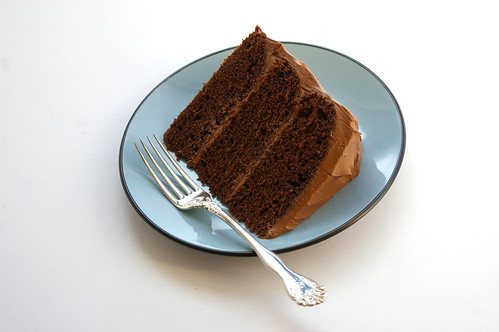
Chocolate Cake slice II

And I got a nice little present just in time for it. I just had my 200,000th page view. I never thought it would grow this much and I am so grateful to all my readers who have bookmarked my blog, forwarded recipes along and faithfully kept up with all my updates even if half of them have involved lemon recipes. Thanks too must go to all my friends and family, which have supported me in this little project.

Any good celebration requires cake. Or at least as far as I’m concerned.

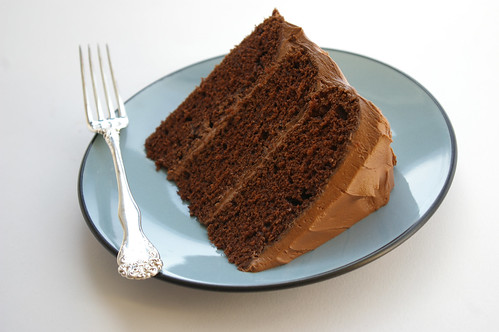
I found this recipe while getting my hair done a few weeks back. Flipping through Bon Appetit, I came across this Chocolate Mayonnaise Cake and immediately wrote it all down with an eye of making it sooner rather than later. Although Red Velvet Cake was fun for the first entry and first anniversary, I wanted to switch things up this time around. And you can never go wrong with chocolate.

I took half over to Andree’s house to share with her. She has been a big supporter of P&P since I launched, offering tips, advice and gently encouraging me to do less baking, more cooking. So, I thought she might like it if she tasted some of the fruits of my baking labours.

The other half went in to work for my “Civilized Sunday” girls who are kind enough to eat all the baking I can’t keep at the house out of fear I will consume it all. Then we all sit around the desk at work eating goodies and reading our horoscopes . . . . And then, yes, we do get down to serious work because otherwise how would we fill the Monday paper?

The cake went over well, but I’m not entirely convinced it was as good as it could be. My main concern here is that the recipe indicates to beat the cake until well blended after each of the four additions of flour. I’ve always been told to go gently when adding flour to a cake and mix (not beat) only until blended because you don’t want to develop the gluten. I wish I had followed my instincts; I’m convinced this cake would have been even more tender. Not that anyone was complaining . . . .

So, if I attempt this again, I’m going to go gentle on the batter. I’m sure it will only improve things.

However, all that said, it was still a good little cake for a special little day.

Prepared pans

Melted chocolate and cocoa

Chocolate Cake Batter

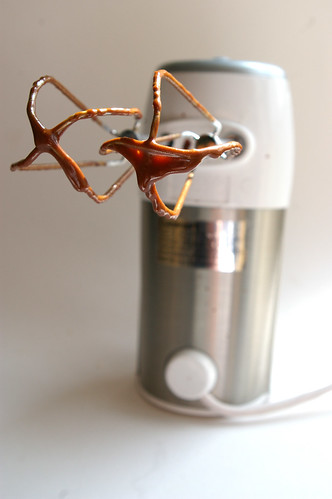
Chocolate beaters

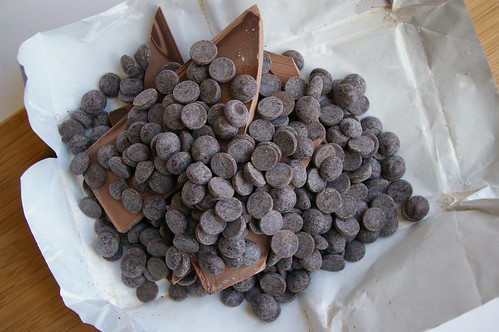
Chips and chunks for chocolate icing

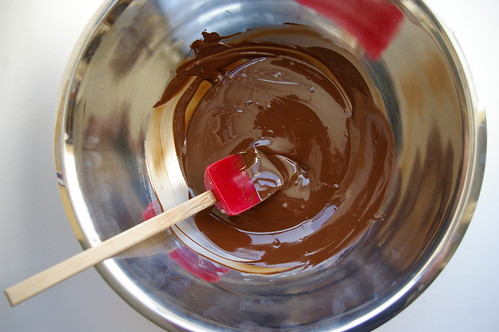
Melted chocolate for the icing

Two layers

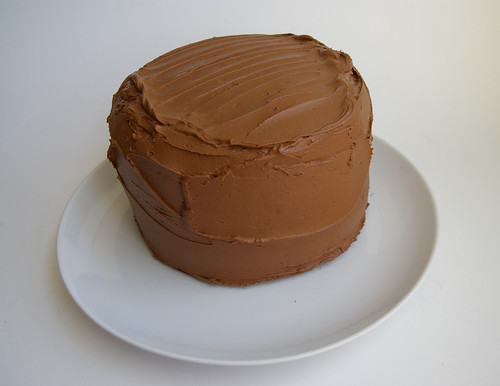
All iced up

Sky high cake

Chocolate Cake slice I

Chocolate Cake

  • 2 ounces bittersweet chocolate (do not exceed 61% cacao), chopped
  • 2/3 cup unsweetened cocoa powder
  • 1 3/4 cups boiling water
  • 2 3/4 cups all purpose flour
  • 1 1/4 teaspoons baking soda
  • 1/4 teaspoon baking powder
  • 1 cup sugar
  • 1 cup (packed) dark brown sugar
  • 1 1/3 cups mayonnaise (do not use reduced-fat or fat-free)
  • 2 large eggs
  • 1 teaspoon vanilla extract

Chocolate Frosting

  • 10 ounces bittersweet chocolate (do not exceed 61% cacao), chopped
  • 1 1/2 cups (3 sticks) unsalted butter, room temperature
  • 3 cups powdered sugar
  • 1 tablespoon vanilla extract
Preheat oven to 350°F.

Butter and flour three 8″ diameter cake pans with 1 and 1/2-inch-high sides. Combine chopped chocolate and cocoa powder in medium metal bowl. (I used a plastic bowl and it appeared to work just as well.) Add 1 and 3/4 cups boiling water and whisk until chocolate is melted and mixture is smooth. Sift flour, baking soda, and baking powder into another medium bowl. Using electric mixer, beat both sugars and mayonnaise in large bowl until well blended, 2 to 3 minutes. Add eggs 1 at a time, beating until well blended after each addition. Beat in vanilla. Add flour mixture in 4 additions alternately with chocolate mixture in 3 additions, beating until blended after each addition and occasionally scraping down sides of bowl. (Again, I’d take it easy here and only mix until just blended instead of beating it.) Divide batter among prepared cake pans (about 2 1/3 cups for each).

Bake cakes until tester inserted into center comes out clean, 30 to 32 minutes. Cool cakes in pans on racks 20 minutes. Run small knife around sides of cakes to loosen. Carefully invert cakes onto racks and let cool completely.

For the frosting, place chopped chocolate in medium metal bowl; set bowl over saucepan of simmering water and stir until chocolate is melted and smooth. Carefully remove bowl from over water; let melted chocolate cool until lukewarm, stirring occasionally.

Using electric mixer, beat butter in large bowl until smooth and creamy. Sift powdered sugar over butter and beat until well blended, about 2 minutes. Beat in vanilla. Add melted chocolate and beat until well blended and smooth, occasionally scraping down sides of bowl.

Place 1 cake layer on platter. Spread 3/4 cup frosting over top of cake layer to edges. Top with second cake layer; spread 3/4 cup frosting over. Top with third cake layer. Spread remaining frosting decoratively over top and sides of cake.

Cut cake into wedges and serve.

Continue Reading

Sautéed Chard over Polenta with Fried Eggs

I came into a plethora of eggs over the weekend.

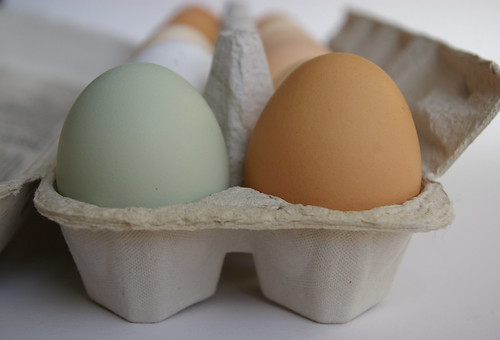
Farm fresh eggs

I was at work on Sunday when a colleague came up to me.

Him: You like X, right?

Me: Oh yes, that’s how I get through the day sometimes. (In my best, most sarcastic and slightly confused voice.)

Him: Uh, OK. Well, I have some and I wondered if you wanted to buy some.

Pause.

Me: Wait, did you say eggs?

Him: What did you think I said?

Me: Um…..

Anyway, he had a few dozen from this totally organic, self-sustaining farm outside of Calgary called Thompson Small Farm. I’ve been searching for really good eggs since I moved here from Vancouver. I’ve found the ones here, even from area farms, to be pretty anemic looking and I’ve craved those with those golden-orange yolks that are so beautiful. So, the thought of finding those was enough to tempt me to buy two dozen. Plus, well, he said one of them was blue-green and that was just a bonus.

So, for the next two days I dreamed up things to make with these pretty eggs in their multicoloured shells. And I realized I wanted to do something that would really showcase the egg itself. Somewhere in my food-related Internet travels, I came across a post where someone had topped polenta with cooked greens and a poached egg. Since I have come to love chard mostly owing to this, I thought it would be cool to do a riff on that idea.

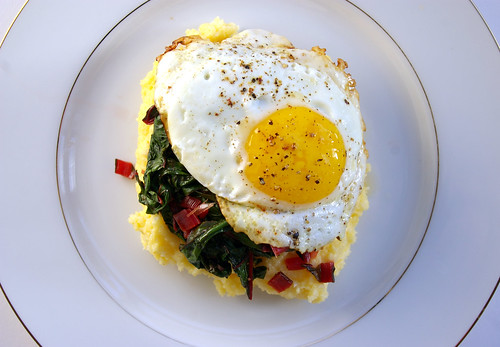
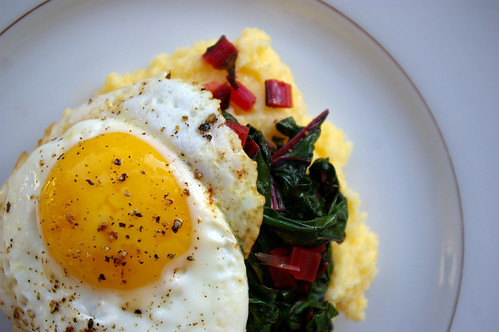
Polenta and chard with egg

For the most part, I made this up as I went along, taking inspiration from the chickpeas and chard entry. But I did a lot of research on poaching eggs (vinegar, no vinegar, swirl, boiling water, stainless steel etc. Who knew there were so many variations?), so that I would be fully prepared when it came time to make them. On the drive home, though, I realized I just wanted to do something fast and, in all honesty, I really didn’t want to dirty another dish. I figured frying the egg in the pan where I had just sautéed the chard would add even more flavour.

I have about three different grinds of cornmeal as I keep thinking I have the wrong one for polenta. In the end, I used the instant stuff. What? It was in my cupboard already and I’m desperately trying to clear space. Plus, that stuff is INSTANT and that makes for a very, very quick dinner. I followed the instructions and then just doctored it up with a bit of cream (er, yes, well, it was already in the fridge . . . .) and some butter and a nice pinch of flaked salt.

This was quick, easy and delicious. I loved the soft polenta, garlicky chard and the ever-so-slightly oozing egg yolk all combined into one. Maybe next time I will try poaching the eggs, but, in a pinch, this was just fine.

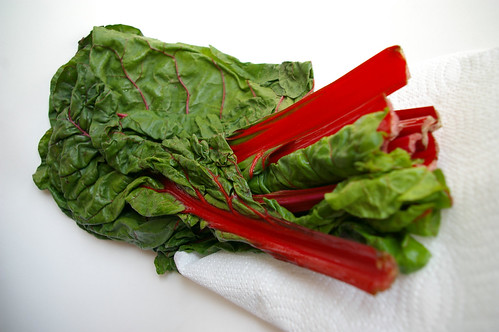
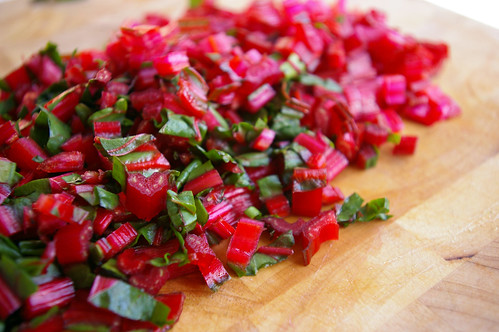
Chard

Egg

Blue eggshell

Chopped chard stems

Polenta and chard with egg II

I’d call these more guidelines than a recipe, so adjust as you see fit.

Sautéed Chard over Polenta with Fried Eggs

  • 1 bunch chard
  • 2 cloves garlic, minced
  • 1 tablespoon olive oil
  • 1/4 cup white wine (or water or chicken stock)
  • 2 eggs
  • butter
  • cooked polenta
  • salt and pepper to taste

Cook polenta according to directions, adding some butter/cream/salt/pepper/cheese or whatever else you desire.

Remove the stems from the chard, then dice finely. Chop leaves into thin strips and set aside. In a large frying pan, heat up olive oil over medium heat. Add stems and a pinch of salt. Saute until they start to soften, about five minutes. Add the garlic and cook for about a minute, until it gets fragrant. Add wine (or water or chicken stock) and then the strips of chard leaves. Stir, then top with a lid and cook for about five minutes until the leaves are wilted. Scrape out pan and add a small knob of butter to melt. When bubbling add eggs and fry to desired doneness.

Dollop polenta onto plate, top with chard and fried egg.

Continue Reading

Lemon Curd Tart

Oh look! It’s something lemon!

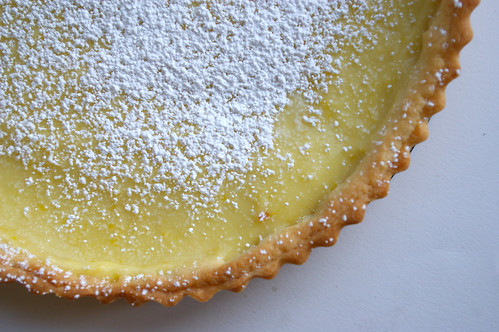
Lemon Curd Tart - top

I know, I know. I have lemon issues. But, please forget about my lemon obsession for a few moments and let’s concentrate on the fact that I attempted pastry! Yes, that thing that everyone else makes and leaves me paralyzed for fear of disaster.

The fact that it’s advertised as “unshrinkable” and mine so very, very shrank like it was Alice in Wonderland after drinking that potion? Yeah, I’m going to ignore that part of it. Because, if I focus on what didn’t quite work, then I’ll never try to make pastry again and with so many pies and tarts to make, I can’t let that get in my way.

"Unshrinkable" tart shell

So, the occasion was perogy night at a friend’s house. Colette’s mom makes killer homemade perogies and Colette paired them up with fried onions and sour cream, the largest kielbasa I’ve ever seen in my life and a huge casserole dish of her mom’s equally delicious cabbage rolls. And salad. But I think Colette and I were the only ones that ate any. And then, of course, lemon tart.

I picked lemon because I figured it would be something light after all that delicious Ukrainian food. And I picked a tart because I really want to get better at making pastry. This Lemon Curd Tart would take care of both those things.

But it wasn’t without it’s challenges.

1) The “unshrinkable” tart shell that shrank. (Watching cooking shows on TV since this, I have learned that you just can’t stretch dough. It will shrink back. Uh-huh. Lesson learned.)

2) I burnt the living daylights out of my hand when whisking the lemon curd just after it came off the heat. But, I was proud of myself for continuing to whisk (the show must go on!) while stretching my way over to the sink and running cold water on the burn. Boiling hot lemon curd – 1. Me – 0.

My tart pan is also a bit bigger than suggested, which is probably why I had more trouble with the dough and felt the curd layer was a bit thin. Next time I’ll double the dough and make some jam tarts with leftovers. And I’ll double the curd, make a nice thick layer and then eat the rest with a spoon. :D

The lemon curd is pretty basic. The tart shell comes from Dorie Greenspan, as adapted by Smitten Kitchen. (I am leaving her instructions completely intact because she explains it very well.)

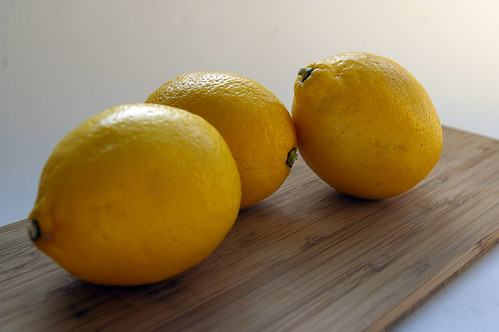
Lemons

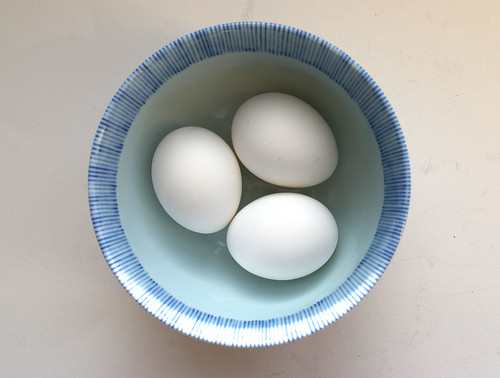
Eggs

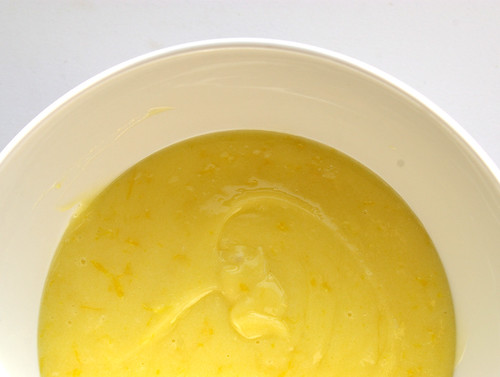
Lemon Curd

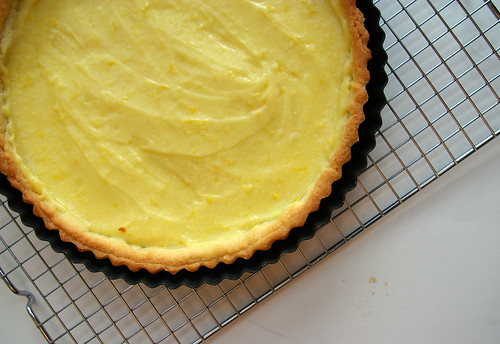
Curd in Tart

Lemon Curd Tart - side

Lemon Curd Tart

  • 3 large eggs
  • 1/3 cup fresh lemon juice (2 -3 lemons)
  • 3/4 cup sugar
  • 4 tablespoons unsalted butter, at room temperature and cut into small pieces
  • 1 tablespoon lemon zest (yeah, I did a lot more than that. Probably double.)

In a stainless steel bowl placed over a pot of simmering water, whisk eggs, lemon juice and sugar. Cook, constantly stirring, until mixture becomes thick. (This took about 10 minutes for me.) Remove bowl from heat and strain to remove lumps. Add small pieces of butter and whisk into lemon mixture until butter has melted. Stir in zest. Let cool. Cover with plastic wrap (I press mine right onto the curd to prevent a skin form forming) and refrigerate.

The Great Unshrinkable Sweet Tart Shell
Makes one 9-inch tart crust

  • 1 1/2 cups all-purpose flour
  • 1/2 cup confectioner’s sugar
  • 1/4 teaspoon salt
  • 1 stick plus 1 tablespoon (9 tablespoons; 4 1/2 ounces) very cold (or frozen) unsalted butter, cut into small pieces
  • 1 large egg

1. Pulse the flour, sugar and salt together in the bowl of a food processor. Scatter the pieces of butter over the dry ingredients and pulse until the butter is coarsely cut in. (You’re looking for some pieces the size of oatmeal flakes and some the size of peas.) Stir the egg, just to break it up, and add it a little at a time, pulsing after each addition. When the egg is in, process in long pulses–about 10 seconds each–until the dough, which will look granular soon after the egg is added, forms clumps and curds. Just before you reach this stage, the sound of the machine working the dough will change–heads up. Turn the dough out onto a work surface and, very lightly and sparingly, knead the dough just to incorporate any dry ingredients that might have escaped mixing. Chill the dough, wrapped in plastic, for about 2 hours before rolling.

2. To roll the dough: Butter a 9-inch fluted tart pan with a removable bottom. Roll out chilled dough on floured sheet of parchment paper to 12-inch round, lifting and turning dough occasionally to free from paper. (Alternately, you can roll this out between two pieces of plastic, though flour the dough a bit anyway.) Using paper as aid, turn dough into 9-inch-diameter tart pan with removable bottom; peel off paper. Seal any cracks in dough. Trim overhang to 1/2 inch. Fold overhang in, making double-thick sides. Pierce crust all over with fork.

Alternately, you can press the dough in as soon as it is processed: Press it evenly across the bottom and up the sides of the tart shell. You want to press hard enough that the pieces cling to one another, but not so hard that it loses its crumbly texture.

3. Freeze the crust for at least 30 minutes, preferably longer, before baking.

4. To fully or partially bake the crust: Center a rack in the oven and preheat the oven to 375 degrees F. Butter the shiny side of a piece of aluminum foil (or use nonstick foil) and fit the foil, buttered side down, tightly against the crust. And here is the very best part: Since you froze the crust, you can bake it without weights. Put the tart pan on a baking sheet and bake the crust for 20 to 25 minutes.

5. Carefully remove the foil. If the crust has puffed, press it down gently with the back of a spoon. Bake the crust about 10 minutes longer to fully bake it, or until it is firm and golden brown, brown being the important word: a pale crust doesn’t have a lot of flavor. (To partially bake it, only an additional 5 minutes is needed.) Transfer the pan to a rack and cool the crust to room temperature, and proceed with the rest of your recipe.

Do ahead: The dough can be wrapped and kept in the refrigerator for up to 5 days or frozen for up to 2 months. While the fully baked crust can be packed airtight and frozen for up to 2 months, the flavor will be fresher bake it directly from the freezer,

Continue Reading

Pasta with Shaved Brussels Sprouts and Pancetta

I eat one brussels sprout a year.

At Christmas.

Under duress.

Brussels Sprouts

It’s a family rule, though it punishes only me — the sole holdout in a family of sprout fanatics. With enough gravy to dunk the sprout in, I can power through the yearly ordeal.

This year, however, no one seemed to notice that my plate remained sprout-free. But it made me think: was there a way I could learn to love my vegetable nemesis? The short answer is yes.

The longer answer is yes, and it involves spaghetti and bacon’s Italian cousin.

Behold, Pasta with Shaved Brussels Sprouts and Pancetta.

Pasta with Brussels Sprouts and Pancetta I

Once I made the decision to try this recipe out, I made a shopping list. Somehow sprouts failed to make it onto the scrap of paper: it seems my subconscious couldn’t believe I really did want them.

At the Italian deli where I bought my pancetta, I wasn’t paying enough attention either. I think the idea was to use a couple of thickish slices of the cured meat that could then be sliced into matchsticks. My slices were thinner than regular bacon, so I just chopped it into small pieces. Considering thinner slices meant better pancetta distribution, I didn’t really see a problem.

Pancetta

I also didn’t notice the clerk was slicing up “hot” pancetta. But I kind of liked the kick of heat to this dish. If you like a little spice and can find hot pancetta, I say go for it. Otherwise, if you still want some heat, you can probably add a pinch or two of red pepper flakes.

The original recipe suggests using the slicing blade of a food processor to thinly slice the sprouts. The photo on the web-site shows lovely green pieces of sprout. I ended up with vegetable confetti. If you’re looking for pretty, I’d suggest trying the mandoline route. Otherwise, the food processor is fine.

While waiting for the spaghetti to finish cooking, I took a test bite of the sprout mix and couldn’t stop myself from eating more. Sure, any vegetable cooked with pancetta, pasta and pine nuts is probably going to be fantastic, but I really did enjoy the flavour of the sprouts.

Sauteed sprouts and pancetta

A quick saute with garlic and shallots, rounded out with just salt and pepper, brought a nice simplicity to the dish. And because the sprouts don’t cook for long, they were tender, not mushy.

Perhaps this is the start of a whole new, sprout-loving me.

Pasta with Brussels Sprouts and Pancetta II

Pasta with Brussels Sprouts and Pancetta IV

Pasta with Shaved Brussels Sprouts and Pancetta

From The Kitchn

  • 1 lb (500 g) brussels sprouts
  • 1 tbsp (15 mL) olive oil
  • 6oz (170g)pancetta, diced or cut into strips
  • 2 shallots, thinly sliced
  • 2 cloves garlic, minced
  • 1/4 cup (50 mL) chicken broth
  • 1/2lb (250g)spaghetti
  • 1/3 cup (75 mL) pine nuts, toasted
  • salt and pepper

Bring a large pot of water to boil. Season generously with salt. Trim the ends off of the brussels sprouts and remove the toughest outer leaves. Shred them in a food processor, using the slicing attachment, or slice them carefully on a mandoline or as thinly as possible with a knife.

Heat a large skillet over medium-high heat and add the olive oil. Add the pancetta and cook for about 5 to 6 minutes, until fairly crispy and cooked through. Clear some space in the middle of the pan and add the shallots. (If you don’t have enough room in your pan to create space, you can remove the pancetta with a slotted spoon and add it back in when you add the sprouts.) Cook for about 5 minutes, until the shallots are soft. Add the garlic and cook until fragrant, about 1 minute or so.

While the shallots are cooking, add the pasta to the boiling water and cook until al dente.

Add the brussels sprouts and the chicken broth to the large skillet, season with salt and pepper, and toss all of the ingredients together. (Go easy on the salt initially because pancetta can be quite salty.) Cook, tossing occasionally, until the brussels sprouts are tender but not too soft, about 5 minutes.

When the pasta is finished cooking, drain and add it to the skillet. You can add a splash of the pasta water (or more broth) if the mixture seems dry. Add pine nuts, toss everything together, season to taste and serve. Serves 3 to 4.

Continue Reading

Lemon Ricotta Pancakes

I’m not a big breakfast eater. Don’t get me wrong, I do eat breakfast. But these days it’s usually a bagel at my desk or a scone picked up on my way to work because, frankly, I’d rather have those extra 10 minutes of sleep than a sit-down morning meal. Unsurprisingly, I’m not much of a morning person.

Brunch, I like. Breakfast-type meals, but after a good sleep-in.

Lemon Ricotta Pancakes I

Growing up, when I was a bit better about waking up in time to eat before leaving the house — partly because it was trickier to eat and walk to school at the same time — I had the strange habit of preferring to eat leftovers for breakfast. Pasta and tomato sauce? Yes, please. Mashed potatoes with gravy? Warm and filling. Cold pizza? Breakfast of champions — after all, it does have several major food groups.

My parents thought it was amusing. Except for the day I wanted to make fish sticks for breakfast; my mom drew the line at that. But sometimes I do want a real breakfast. At home. In my pyjamas.

What I don’t want, though, is a basic pancake.

My Internet travels provided a solution, as I came across a recipe for lemon ricotta pancakes — an intriguing idea. And what a pleasant surprise this recipe turned out to be. Not only did they combine my love of all things lemon, but they were light, like flat baby souffles, with golden edges and a hint of salt from the melted butter they were fried in.

I shamelessly scarfed a bunch down as, ahem, quality control before handing a plate to a friend I had staying with me. In my defence, I had made them quite tiny.

So fluffy and weightless, so bright with their lemon flavour. I couldn’t get enough.

Lemon Ricotta Pancakes II

But this recipe wasn’t without its foibles. Confusingly, the tubs of ricotta are measured in grams and not millilitres or cups. I did some math and the 250-gram tub was a little more than one cup.

I wasn’t going to hang on to a tablespoon or two of ricotta cheese, so I just dumped the whole thing in. Surely, I figured, it wasn’t going to do much harm. And it didn’t. Plus, it’s one of my huge pet peeves to have a recipe that calls for almost an entire can/jar/tub or something, leaving us cooks with random leftover ingredients.

Also, I couldn’t be bothered to zest the lemon onto something just to put it in a measuring spoon and then add it the mixture, so I just zested one lemon straight into the egg yolks. I might be tempted to try the zest of two lemons next time, but only because I love that flavour and feel there’s no such thing as too much lemon.

Lastly, the original recipe I found for this suggested mixing raspberry jam with maple syrup as a topping.

But I wanted something that was going to complement the light lemon flavour of the pancakes, rather than weighing it down. Just before I got started, I diced up about two cups of strawberries, sprinkled on some sugar and let them sit to macerate while I got down to business.

It was the perfect pairing. The slightly sweetened berries added the right touch of fruit, but still let the pancakes shine.

Lemon Ricotta Pancakes III

Lemon Ricotta Pancakes

This recipe is adapted from the Alberta Egg Producers.

  • 4 eggs, separated
  • 1 tub (250 grams) or 1 cup (250 ml) ricotta cheese
  • 3 tbsp (50 ml) sugar
  • ½cup (125 ml) all-purpose flour
  • zest of one lemon
  • 2 tbsp (25 ml) butter
  • 2 cups (500 ml) strawberries, diced
  • sugar to taste

In a large mixing bowl, whisk egg yolks, ricotta cheese, sugar, flour and lemon zest.

In another bowl, whip egg whites with a mixer until glossy peaks form. Stir about one-quarter of the whites into the ricotta mixture, then fold in the remaining whites gently.

Melt butter in pan over medium heat, drop batter on using small ladle or large spoon. I used a ¼-cup (50-ml) measure.) Flatten slightly, then let cook for about two minutes per side until lightly browned. Top with macerated strawberries.

This story first appeared in the Real Life section in the Calgary Herald. For more delicious recipes, visit CalgaryHerald.com/life.
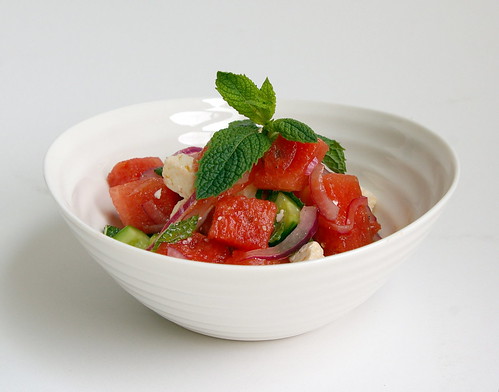
Continue Reading

Applesauce Spice Cupcakes

I felt like making cupcakes. That’s pretty much the reason for the post.

Iced Cupcake

So, I was flipping through my cupcake cookbook (impulse buy, of course. Sigh.) and found this recipe for Applesauce Spice Cupcakes with Brown Sugar Cream Cheese Frosting. (Aren’t you glad I didn’t make all of that the title of the post?) The only reason I paused was because I noticed that it called for unsweetened applesauce and I just happened to have some in my cupboard. Not something I’d normally have hanging around but when I made my Applesauce Cake a few weeks ago, I didn’t look closely at the recipe before going shopping. When looking at the choice between unsweetened and sweetened applesauce, I figured it was only logical that the applesauce cake would call for unsweetened because there was sugar in the recipe.

Duh.

This is why I need to be more explicit with my lists.

I came home to find I bought the wrong kind and had to go back to the grocery store for the right kind of applesauce. I would have returned the unsweetened but was too lazy to go all the way back to the store where I bought it (there are none of that chain close to me; I had picked it up while running other errands). Plus, I guess I figured at some point I would find a way to use it up.

And, lo, I did.

Like every other time I’ve made a Martha Stewart cupcake recipe, I ended up with way more than she predicted. I don’t know if my muffin tin is much smaller than hers or if I’m underfilling the cups, but I ended up with 21 or 22 cupcakes, where she said I would end up with 18. And, people, this was after consuming some batter. (*Hangs head in shame.*)

Spiced batter

But having extras was no big deal, really, because they were good and they all got eaten anyway.

The cupcakes are not overly sweet, which is nice against the cream cheese icing. But I think I actually preferred my mum’s recipe for Applesauce Cake. It just seemed . . . I don’t know. Lighter? Better? And it could be just as easily converted into a cupcake recipe by putting the batter into muffin tins and decreasing the baking time. (Start checking at about 15 minutes. They should probably take about 20.)

One more thing. The recipe calls for 1 1/2 cups of unsweetened applesauce. That’s 375 mL. A can or jar of applesauce here in Canada is 398 mL, so I just dumped the whole thing in. And it was totally fine, so if you’re worried about that last little bit, just chuck it in.

Cooling

Frosting

Cupcake trio

Applesauce Spice Cupcakes

  • 2 cups all-purpose flour
  • 1 teaspoon baking soda
  • 3/4 teaspoon salt
  • 2 teaspoons ground cinnamon
  • 1/2 teaspoon freshly grated nutmeg
  • 1/8 teaspoon ground cloves (I didn’t have any and the recipe was just as tasty)
  • 1/2 cup unsalted butter, room temperature
  • 1 cup granulated sugar
  • 1/2 cup packed brown sugar
  • 4 large eggs, room temperature
  • 1 1/2 cups unsweetened applesauce
  • 1 cup pecans, toasted and chopped (I didn’t put these in because my friend is allergic and I really wanted her to eat one)

Preheat the oven to 350. Line standard muffin tins with paper liners. Whisk together flour, baking soda, salt, cinnamon, nutmeg and cloves.

With an electric mixer on medium-high speed, cream butter and both sugars until pale and fluffy. Add eggs, one at a time, beating until each is incorporated, scraping down sides of bowl as needed. Reduce speed to low. Add applesauce and then flour mixture, beating until just combined after each. Stir in pecans by hand.

Divide batter evenly among lined cups, filling each three-quarters full. Bake, rotating tins halfway through, until a cake tester inserted in centers comes out clean, about 20 minutes. Transfer tins to wire racks to cool completely before removing cupcakes. Cupcakes can be stored overnight at room temperature, or frozen up to two months, in airtight containers.

To finish, use a small offset spatula to spread cupcakes with frosting. Frosted cupcakes can be refrigerated up to three days in airtight containers; bring to room temperature before serving.

Brown-Sugar Cream-Cheese Frosting

  • 1/2 cup unsalted butter, room temperature
  • 8 ounces cream cheese, room temperature
  • 1 cup packed brown sugar

With an elecrtic mixer on medium-high speed, beat butter, cream cheese and brown sugar until smooth. Use immediately, or refrigerate up to three days in an airtight container. Before using, bring to room temperature, and beat on low speed until smooth.

Continue Reading

Glazed Lemon Cakes

While winter seems to beg for rich, warm or comforting desserts — sticky toffee pudding, brownies and apple pie — I crave lemon.

Of course, I’ve always been a go-against-the-grain kind of girl.

I like all those desserts, too; they have their place. But lemon tang on a dark, wintry day takes me away from the snow and cold. It can brighten a dreary afternoon, send me a shot of virtual sunshine.

Glazed Lemon Cakes II

Sure, we’ve been enjoying a lengthy bout of relatively warm weather, but I’m not easily fooled. Real spring is still weeks away and if I can trick myself into feeling like winter has already snapped and the fresh green and blossoms are quickly nearing, then I have to take advantage of that.

But which lemon dessert?

Conservatively, I have about 40 lemon-based tarts, bars, cupcakes and other concoctions saved on the online bookmarking site, Delicious. (All right, I checked. There are 41. But probably not for much longer.) All of these things have caught my eye at one time or another and I’ve saved them for just such wintry occasions when I need a taste of bright and tart.

The lemon bars had their appeal. The pull-apart lemon loaf looked tempting, but a bit time-consuming for me in this fit of citrus craving. But glazed lemon cakes? Oh yes, those I could handle.

The hardest part of this recipe was remembering to pull the butter out of the fridge so it could come to room temperature. Almost all of the ingredients are standard in most fridges, except, perhaps, the plain low-fat yogurt or buttermilk. In this case I went with the yogurt because it seemed like something I could more easily use up. Buttermilk is great for baking, but it’s not something I tend to go through quickly.

These little cakes were light, tender and full of tang. With the addition of the thick glaze that dripped down the edges, they reached lemon perfection. Not puckeringly tart, but deliciously citrus: a little injection of sunshine on an overcast day.

I can’t lie. I ate two before I even mixed the glaze.

And if that isn’t enough motivation to whip up a batch, I’m not sure what is.

One last note, the original recipe calls for a “6-cup jumbo muffin tin.” Since I try to avoid buying new bakeware for just one recipe, I decided to make do with what I had lying around.

My advice? Bake them in a regular muffin tin for 15 minutes (though consider starting to check them at the 10-minute mark, just in case) and eat two!

Lemon Cakes

Glazed Lemon Cakes I

Glazed Lemon Cakes III

This recipe is from Everyday Food.

Glazed Lemon Cakes

  • 1/2 cup (125 mL) unsalted butter, room temperature, plus more for muffin tin
  • 1½ cups (375 mL) all-purpose flour, plus more for muffin tin
  • 2 tsp (10 mL) baking powder
  • 1/2 tsp (2 mL) salt
  • 1/2 cup (125 mL) low-fat buttermilk, or plain low-fat yogurt
  • 1 tsp (5 mL) vanilla extract Zest of 1 lemon, finely grated, plus juice, plus 2 tbsp (25 mL) more lemon juice for the glaze
  • 1 cup (250 mL) granulated sugar
  • 2 large eggs
  • 1½ cups (375 mL) confectioners’ sugar

Preheat oven to 350°F (EDIT, this should be 180°C). Butter and flour a 6-cup jumbo muffin tin or 12-cup regular muffin tin. In a medium bowl, whisk the flour with the baking powder and salt. In a small bowl, whisk together the buttermilk, vanilla and lemon zest and juice of 1 lemon. Set aside.

With an electric mixer, cream butter and granulated sugar until light. Add eggs one at a time, beating well after each addition. With mixer on low speed, add flour mixture in three batches, alternating with two additions of buttermilk mixture.

Divide evenly among muffin cups. Bake until a toothpick inserted in centre of a cake comes out clean, 20 to 25 minutes. (Or about 15 minutes for a 12-cup muffin tin. Start checking at the 10-minute mark.) Cool 10 minutes in tin, then cool completely on a rack.

Set rack over wax or parchment paper. In a small bowl, stir confectioners’ sugar with remaining lemon juice until smooth. Pour over cakes, spreading to edges with a small knife. Let set 30 minutes.

This story first appeared in the Real Life section in the Calgary Herald. For more delicious recipes, visit CalgaryHerald.com/life.
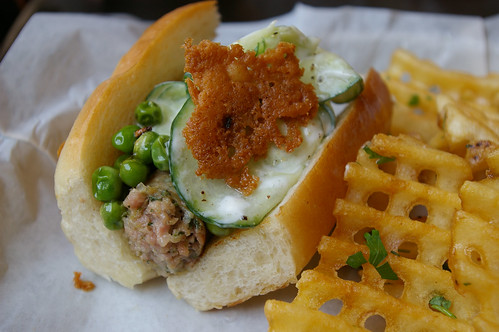
Continue Reading

Pasta Carbonara

I have had great need of comfort food lately.

And for me that often means cheese and cream and pasta. Emphasis on cream. Sure, throw bacon in there too. So, no, this is not going to be low-fat or healthy or in any way, shape or form good for you, unless you have a severe bacon deficiency. (And wouldn’t that be wonderful?)

This is a totally bastardized version of Pasta Carbonara. Yes, I sometimes make the real stuff. No, this isn’t it. Yes, it’s still good.

Pasta Carbonara

I’ve loved pasta carbonara since I was a kid when my grandfather would make it for me.
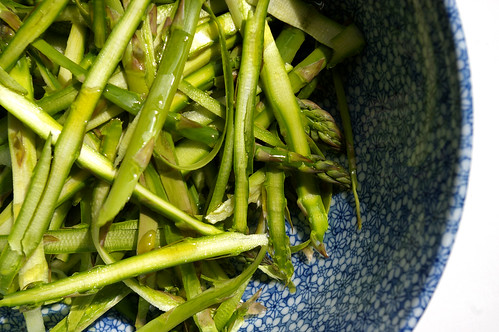
I like the contrast of the salty bacon and the slightly sweet onions and the smooth creaminess bundled with the slight chew of a wide, flat pasta. (Why do I always delay so long in writing blog posts. I’m killing myself right now, having eaten the last of this for lunch.)
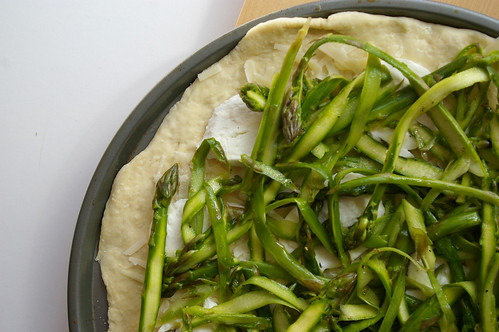
You may notice that I put a pound of bacon in the ingredient list. I cook up a pound but can guarantee nothing near that actually makes it into the dish. A lot of bacon snacking goes on. I consider it part of the cooking process.

Oh, and I cook it in the oven. This may seem like a weird extra step, but it means I’m not standing around watching it cook in the pan (read: I can go mess around on the computer) and it makes relatively quick work when doing an entire package of the stuff.

Since I make enough for a family of six, I typically have a lot of leftovers. Let me offer you one tip when it comes to reheating: add a bit of milk or cream to the bowl/tupperware container. It will help steam and revitalize the noodles and sauce instead of frying it.

So, now that I’m drooling, I’m not going to keep waxing poetic on how good this is. Trust me. Make it. And don’t feel guilty about it. Sometimes life needs a bit of cream and bacon and pasta.
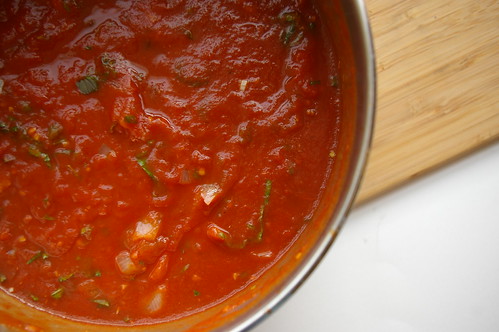
Diced onion

Bacon

Cream and Onions

In the pan

Pasta Carbonara

  • 500 gram package of pasta (linguine, spaghetti, fettucine)
  • 1 pound bacon
  • 1 tablespoon olive oil
  • 1 yellow onion, diced
  • 1 cup whipping cream
  • 1/4 cup Parmesan cheese (plus more for sprinkling)
  • salt
  • pepper

Feel free to cook the bacon as you prefer. Though, seriously, give this method a try.

Preheat oven to 400. Place bacon on cookie sheet/on rack over cookie sheet/on broiler pan (heck, I’ve even used a casserole dish; it just takes extra draining after). Cook bacon for 15 to 20 minutes or until crisp. (Err on the side of crisp because it will soften in the cream sauce later. Limp bacon will get limper. *Shudder*) Set on paper towels to drain, then set aside to cool. When cool enough to handle, cut into smaller pieces. I usually do them a centimetre or two wide.

Heat olive oil in a pan over medium heat, add onion and a pinch of salt. Saute onion until transluscent, but not brown. Add whipping cream and cook until it has reduced by about a third. It should be super thick and rich. (I usually have a little extra cream or half-and-half around just in case it reduces too much.)

While the cream is reducing, cook pasta according to the packages directions. Drain.

Mix together the cream sauce and the pasta, adding in the Parmesan cheese and tossing until mixed. Add bacon and toss again. Season to taste. (Wait until the end to season because the bacon and cheese are salty and you don’t want to oversalt it.) Serve with fresh cracked pepper and more Parmesan, if desired.

Continue Reading